RxFire in Svelte 3 using Firebase Firestore and Authentication
Introduction to Svelte3, Firebase, and RxFire. RxFire provides a set of observable creation methods. You simply call a function with some parameters to receive an RxJS observable. With that observable in hand you can use any operators provided by RxJS to transform the stream as you like.

I’m the founder of CodingCatDev, where we create “Purrfect Web Tutorials” to teach the world how to turn their development dreams into reality. I am a professional full stack developer, and I am passionate about mentoring new developers and helping the community that has allowed me to live my development dreams. I firmly believe that anyone can learn to be a developer. The CodingCatDev team is here to help!
Original: https://codingcat.dev/tutorial/rxfire-in-svelte-3-using-firebase-firestore-and-authentication
RxFire was created by David East, who is a Firebase Developer Advocate. Although Firebase Blog introduced RxFire in September, 2018. I thought it would be a good point of reference for beginners starting out with both Svelte 3 and Firebase.For those coming from an Angular background you might be familiar with RxJS and the Angularfire2 package. I know from my experience you MUST learn RxJS if you are going to use Angular on any size application. It can be one of the hardest parts to learn but there are several fantastic tutorials and sites dedicated to how RxJS works.Some of my favorites
New to Svelte 3, Please checkout
Example
In the example below it shows a quick preview osf how the final React application will work. As you can see there are essentiall 4 steps that will occur.
Sign In
Add Cat Fact
Show Added Cat Fact in List
Sign Out
Setup
You will need NPM which comes bundled with nodejs. Also npx is the easiest using the template provided on git.
npx degit sveltejs/template rxfire-svelte cd rxfire/svelte
You will also need to create your own Firebase project and initialize a Firestore database, please create this using strict mode. Example rules;
Final App Structure


Install dependencies
You will need rxfire, firebase, and rxjs
npm i rxfire firebase rxjs
Create Firebase.js
Firebase.js will be our main Firebase file and will include the tools for our firebase application, including the instantiation of firebase. This file includes rxfire for both the auth and firestore helper functions.Firebase.js
```plain text import "firebase/auth"; import "firebase/firestore"; import firebase from "firebase/app"; import { authState } from "rxfire/auth"; import { collectionData } from "rxfire/firestore"; import { filter } from "rxjs/operators"; const app = firebase.initializeApp({ /* Place your configuration here */ }); const firestore = firebase.firestore(app); // Initialize firestore const auth = firebase.auth(app); // Initialize firebase auth const loggedIn$ = authState(auth).pipe(filter(user => !!user)); // Observable only return when user is logged in. export { app, auth, firestore, collectionData, loggedIn$ }; export default firebase;
>

    You can skip the Instructions part of the lesson if you are already familiar with Svelte 3.

## Simple Initial Component

### Remove App.svelte and replace it with the following

You can basically think of a .svelte file equal to an html file. There are a few things to note here, any styles are scoped to the current component by default, in order to get styles outside of this you can place them within something like `:global(div.flex-row)`. However (maybe best practice), I found it easier to move these from App.svelte over to `/public/global.css`;App.svelte

```plain text
<script>
    import Instructions from './components/Instructions.svelte';
    import SignIn from './components/Signin.svelte';
    import AddCat from './components/AddCat.svelte';
    import ListCatFacts from './components/ListCatFacts.svelte';
    import { loggedIn$ } from './Firebase.js'
    /\* Make something more observable \*/
    const user = loggedIn$;
</script>
<style>
    /\* :global(div.flex-row){ display: flex; justify-content: center; flex-flow: row wrap; } :global(div.flex-column){ display: flex; justify-content: center; flex-flow: column; } .max-800{ max-width: 800px; } \*/
</style>
<div class="flex-row">
    <div class="flex-column">
        <Instructions />
    </div>
</div>
Create Instructions.svelte
This is a very simple Svelte Component that takes no props, it just returns straight html.components/Instructions.svelte
```plain text

In this example we will use RxFire to Observe the Cat Facts that we add to our Firestore Database.
https://github.com/AJONPLLC/rxfire-react-cats- Sign In
- Uses Google Auth for Firebase
- Found in App.svelte
- Add Cat Fact
- This will use an API and Insert the facts into Firestore
- Found in components/AddCat.svelte
- Firestore collection
- Observing catfacts for changes, heart eyes are your facts
- Found in components/ListCatFacts.svelte
- Sign Out
- Observe that user is removed
## Update collection catfacts

### Create AddCat.svelte

The first button that we are going to add is simple enough it calls an API and pushes the data returned into a firestore collection as a new document. I always like to work from top down, so first lets import AddCat.svelte into our App.svelte.

### Update App.svelte

App.svelte

```plain text
... import AddCat from './components/AddCat'; ... <SignIn user={user} /> ...
We will now pass our first prop to AddCat, this is done simple by declaring a variable and passing it, in our case we will use const user = loggedIn$. Is this necessary, probably not but I wanted to show passing a prop, we could ideally just grab this from Firebase.js.Take note on the child we can then access this prop by defining export let user;.The addCatFact function calls an API that returns a single random cat fact from https://cat-fact.herokuapp.com. Because of CORS we have to pass it through a proxy, but you will see that we get a value back. We then use the javascript destructuring assignment to create a new object by adding our catFactDate to the object. This allows us to later sort the facts in our list in descending order.We add a random cat fact to firestore and by adding our catFactDate to the object. This allows us to later sort the facts in our list in descending order.Things we need to pay special note to here are
#if - If blocks just a standard if that you would expect
$user - Subscriptions if you come from angular this is like the async pipe.
on:click={addCatFact - Component Events this is similar to the events normally found on html componens but here we are passing the function
addCatFactby just surrounding with curlys.
```plain text
Now if you try this right now it should fail with this alert
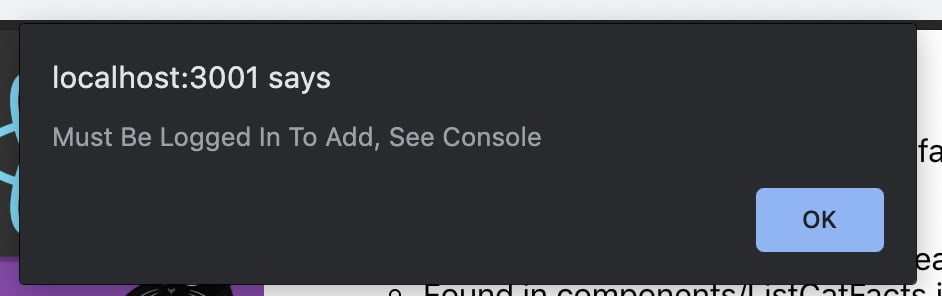
This is expected as our firestore.rules are set to strict mode, we will add those after we get through our authentication section next.You may also notice in the console (and on the screen fact jumps in and out) that firebase actually adds to our array, until failing on the backend. This is done on purpose as it gives us the fast UI that we expect while still maintaining the data integrity.
## Add Firebase Authentication
### Update App.svelte
In the `SignIn` component we will again use props, we will pass the user state.App.svelte
`<script> ... import SignIn from './components/Signin.svelte'; ... </script> ... <SignIn user={user} /> ...`
```plain text
<script>
import firebase, { app } from '../Firebase'; /\* this is like props \*/ export let user; const signIn = () => { const authProvider = new firebase.auth.GoogleAuthProvider(); app.auth().signInWithPopup(authProvider); }; const signOut = async () => { await firebase.auth().signOut(); };
</script>
<div class="flex-column">
{#if $user}
<h1>
Welcome {$user.email}
<button className="myButton" on:click="{signOut}">4. Sign Out</button>
</h1>
{:else}
<button className="myButton" on:click="{signIn}">1. Sign In</button> {/if}
</div>
Update AddCat to include user uid
Pass user to AddCat
Update our main app to pass the user prop.App.svelte
<AddCat user={user} />
Now we can use this to include with our data going to firestore. AddCat.svelte
As well as whether or not to show the Add Cat Fact button, we check to see if the user exists. This button should only show when a user is signed in.
```plain text
## Update firestore.rules

```plain text
service cloud.firestore {
    match /databases/{database}/documents {
        // LockDown All
        match /{document=\*\*} {
            allow read: if false; allow write: if false;
        }
        // User
        match /users/{userId} {
            allow read: if false;
            allow write: if request.resource.id == request.auth.uid;
        }
        // CatFacts
        match /catfacts/{catFactId} {
            allow read: if true;
            allow write: if request.auth.uid != null && request.resource.data.uid == request.auth.uid;
        }
    }
}
Create List of Cat Facts
Create ListCatFacts
This is probably the most important part of RxFire it will return an Observable that you can subscribe to for all changes to a collection by using the function collectionData which takes the collection as paramater as well as an option id to create, in our case we pass catFactsRef.orderBy('catFactDate', 'desc') and 'catFactId'.Now we can just use a map to iterate on each catFact, whenever the Observable updates the current catFact state the array is updated and we can show the full list update using {#each $catFacts as catFact} then if you are the owner of the fact you get catheart eyes using a if block.
```plain text
```


