Angular CLI Deploying
Demonstrating how to quickly deploy using Angular CLI to 6 places. Then how to setup CI/CD in Azure, AWS, and Google Cloud Platform.
I’m the founder of CodingCatDev, where we create “Purrfect Web Tutorials” to teach the world how to turn their development dreams into reality. I am a professional full stack developer, and I am passionate about mentoring new developers and helping the community that has allowed me to live my development dreams. I firmly believe that anyone can learn to be a developer. The CodingCatDev team is here to help!
Original: https://codingcat.dev/tutorial/angular-cli-deploying
Deploying Fast
So you have a conference or perhaps a JAMStackGR meeting that you created an Angular app for and need to show it to the world. How do you deploy this out to a CDN (Content Delivery Network) so that the world can access your new app? There are many ways that you can deploy your site, but one of note is the Angular CLI, it allows you to deploy to 6 different platforms.
First lets make sure you have already covered a couple of things.
Create app command
ng newServe command
ng serveTest full build using
ng build --prodcommand locally and lite-server and try out on local browser
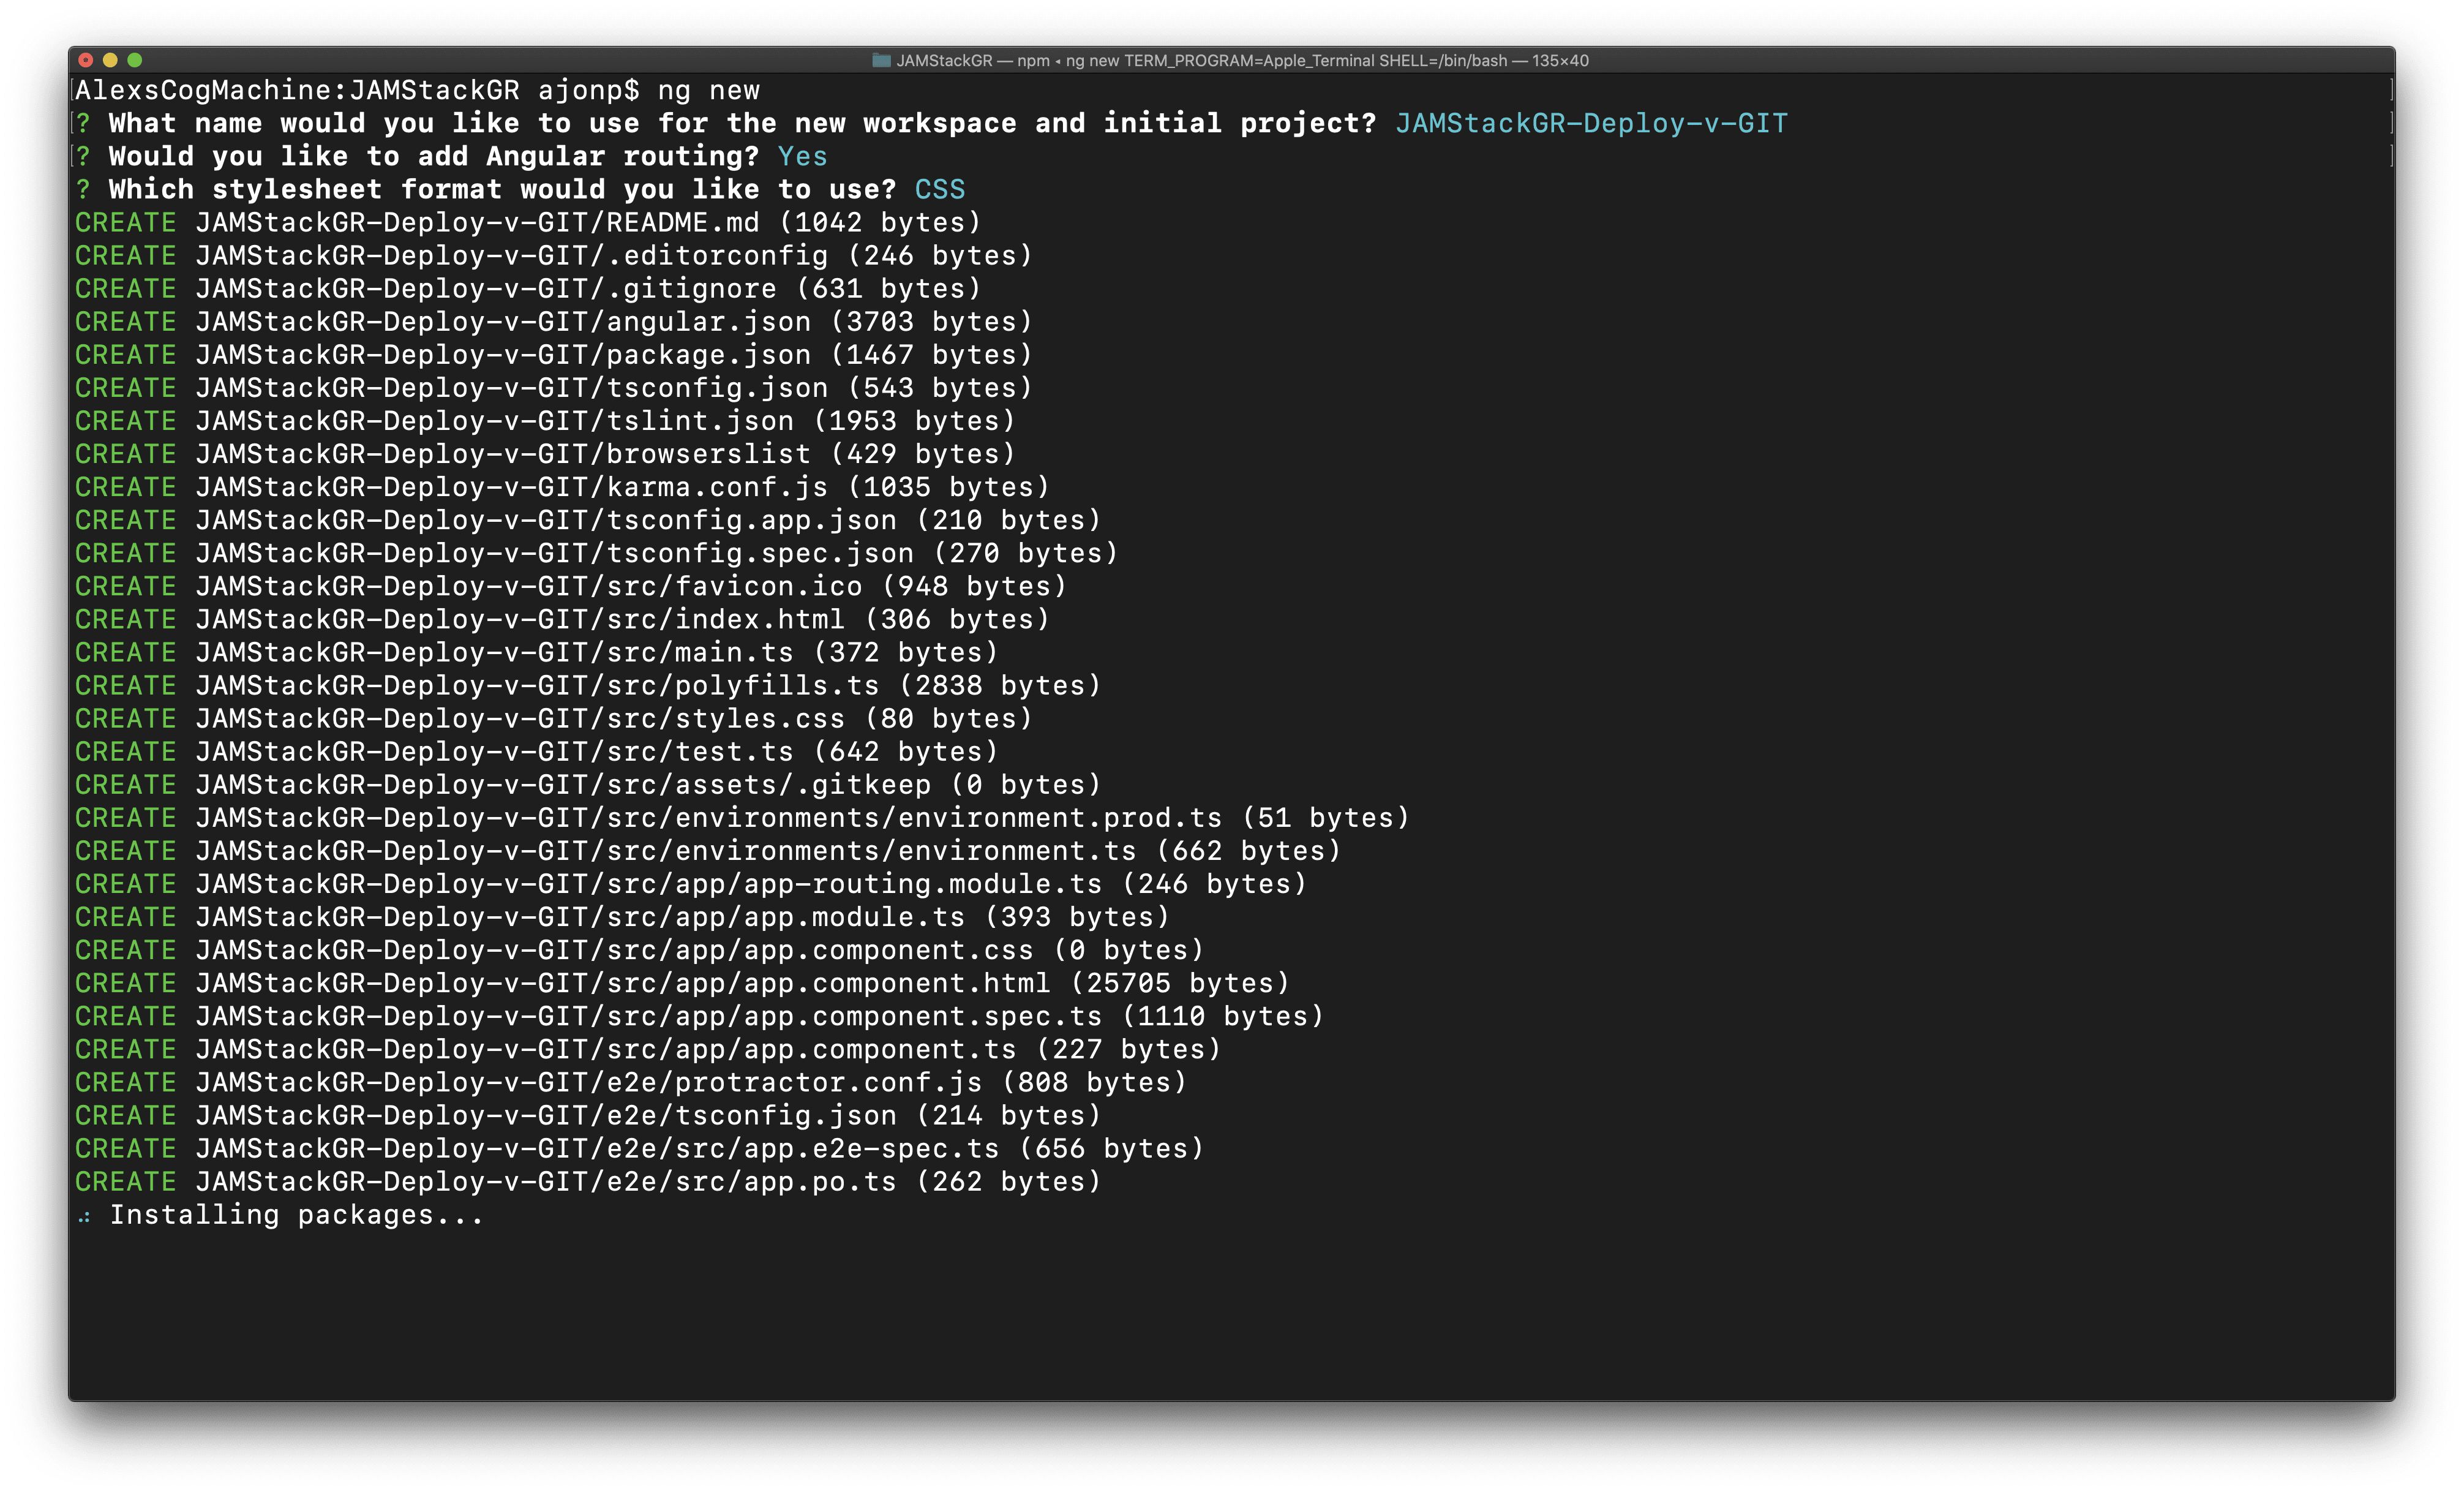
Create Your App
We are keeping this one simple and running the default Angular New command, pick a name and then answer yes to everything
Serve Locally
We are going to make one simple change and use a different default image on our app. To do this we are going to open VSCode (Visual Studio Code).
Now that VSCode is open add your favorite image to the src/assets/ so that we can access it within our app.
You can do this in your favorite terminal or within VSCode ctrl+~ will open the terminal within VSCode
First try out the default application by running the below command.
ng serve
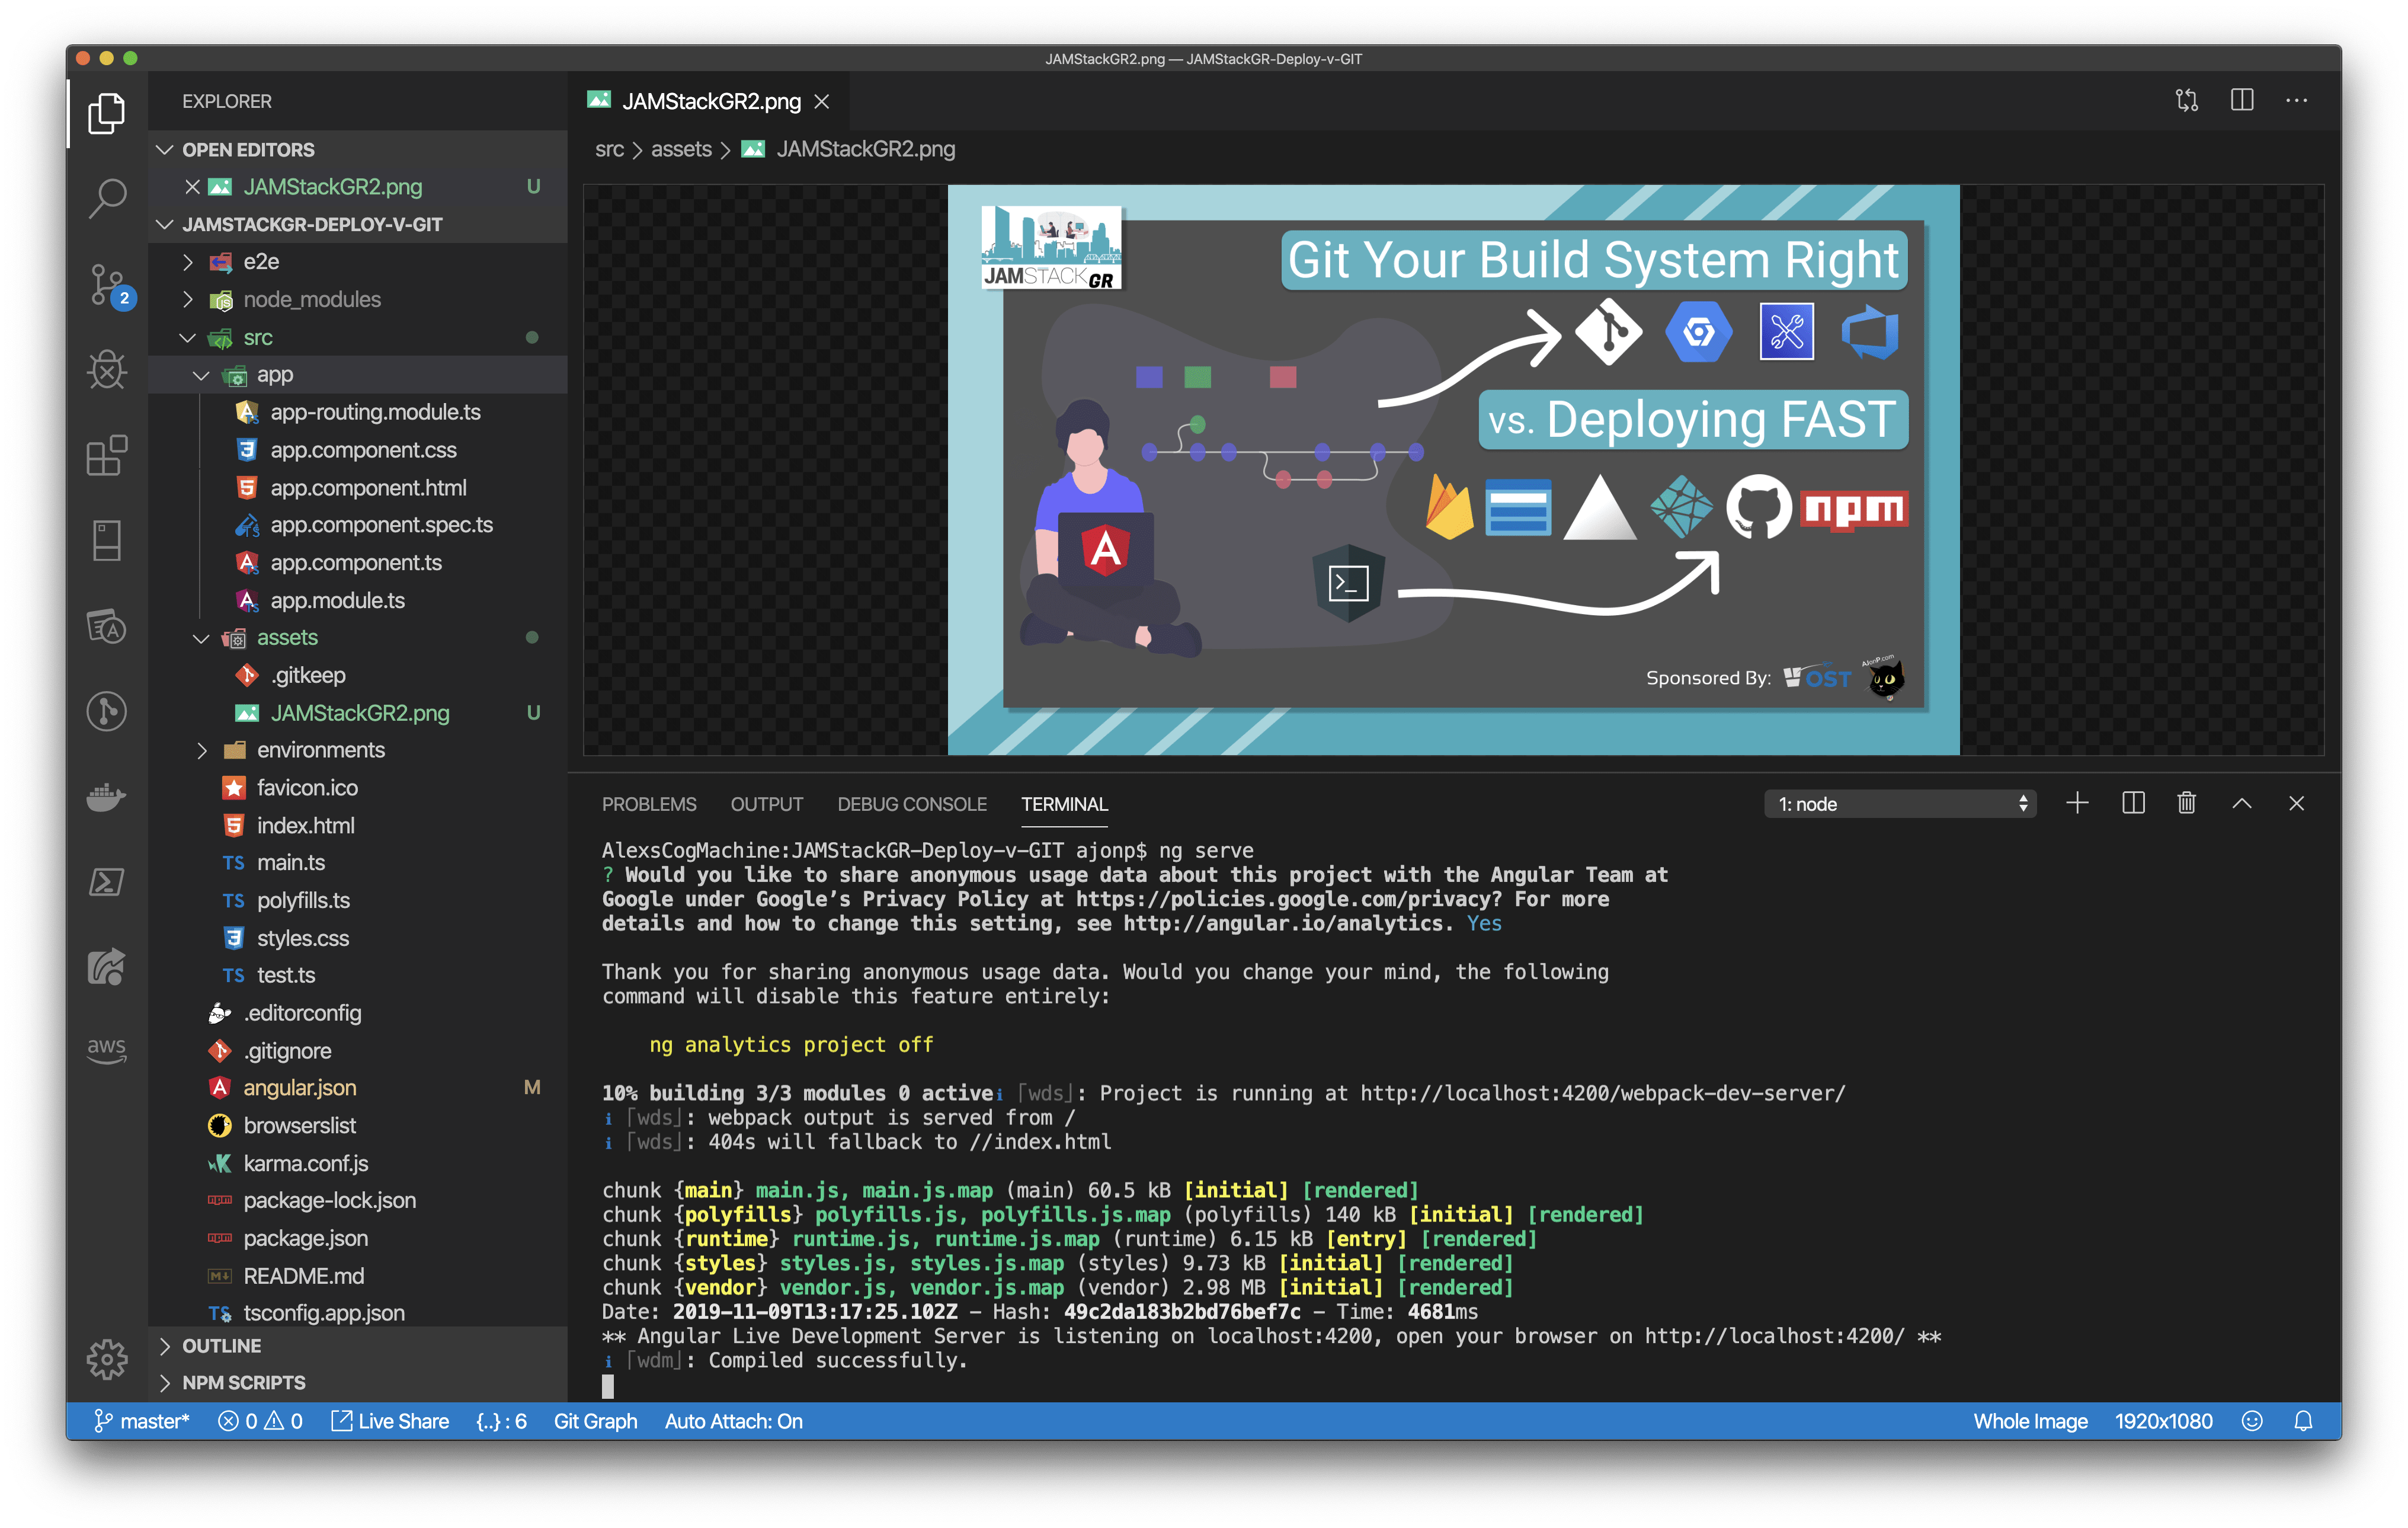
Open the browser to see the default Angular Application
Now we will remove all of this and just put our picture on the page. There should be a bunch of html in between the two comments below. You can remove all of this!
app.component.html
```plain text
When angular serves the asset folder you can find the above added picture in the directory `/assets/`. We will wrap our picture in a simple flex layout and add leave the `<router-outlet></router-outlet>` in case this app gets modules added later.

```html
<div style="display: flex; justify-content: center; width: '100%';">
  <img src="assets/JAMStackGR2.png" alt="JAMStackGR 2 Logo" style="width: 100%;" />
</div>
<router-outlet></router-outlet>
Production Build
Once your picture is showing in the browser this means that we are ready to make a production version of our application. To do this we are going to execute the below command.
Once this completes it will have compiled the complete app and you will find it in a new folder within the dist/ directory. This is the full application and at this point we can serve this locally with a server. A simple one that I like to use is lite-server which is also recommended in the Angular deploy documentation, I like to install this globally.
An example to serve from our base directory is the command below
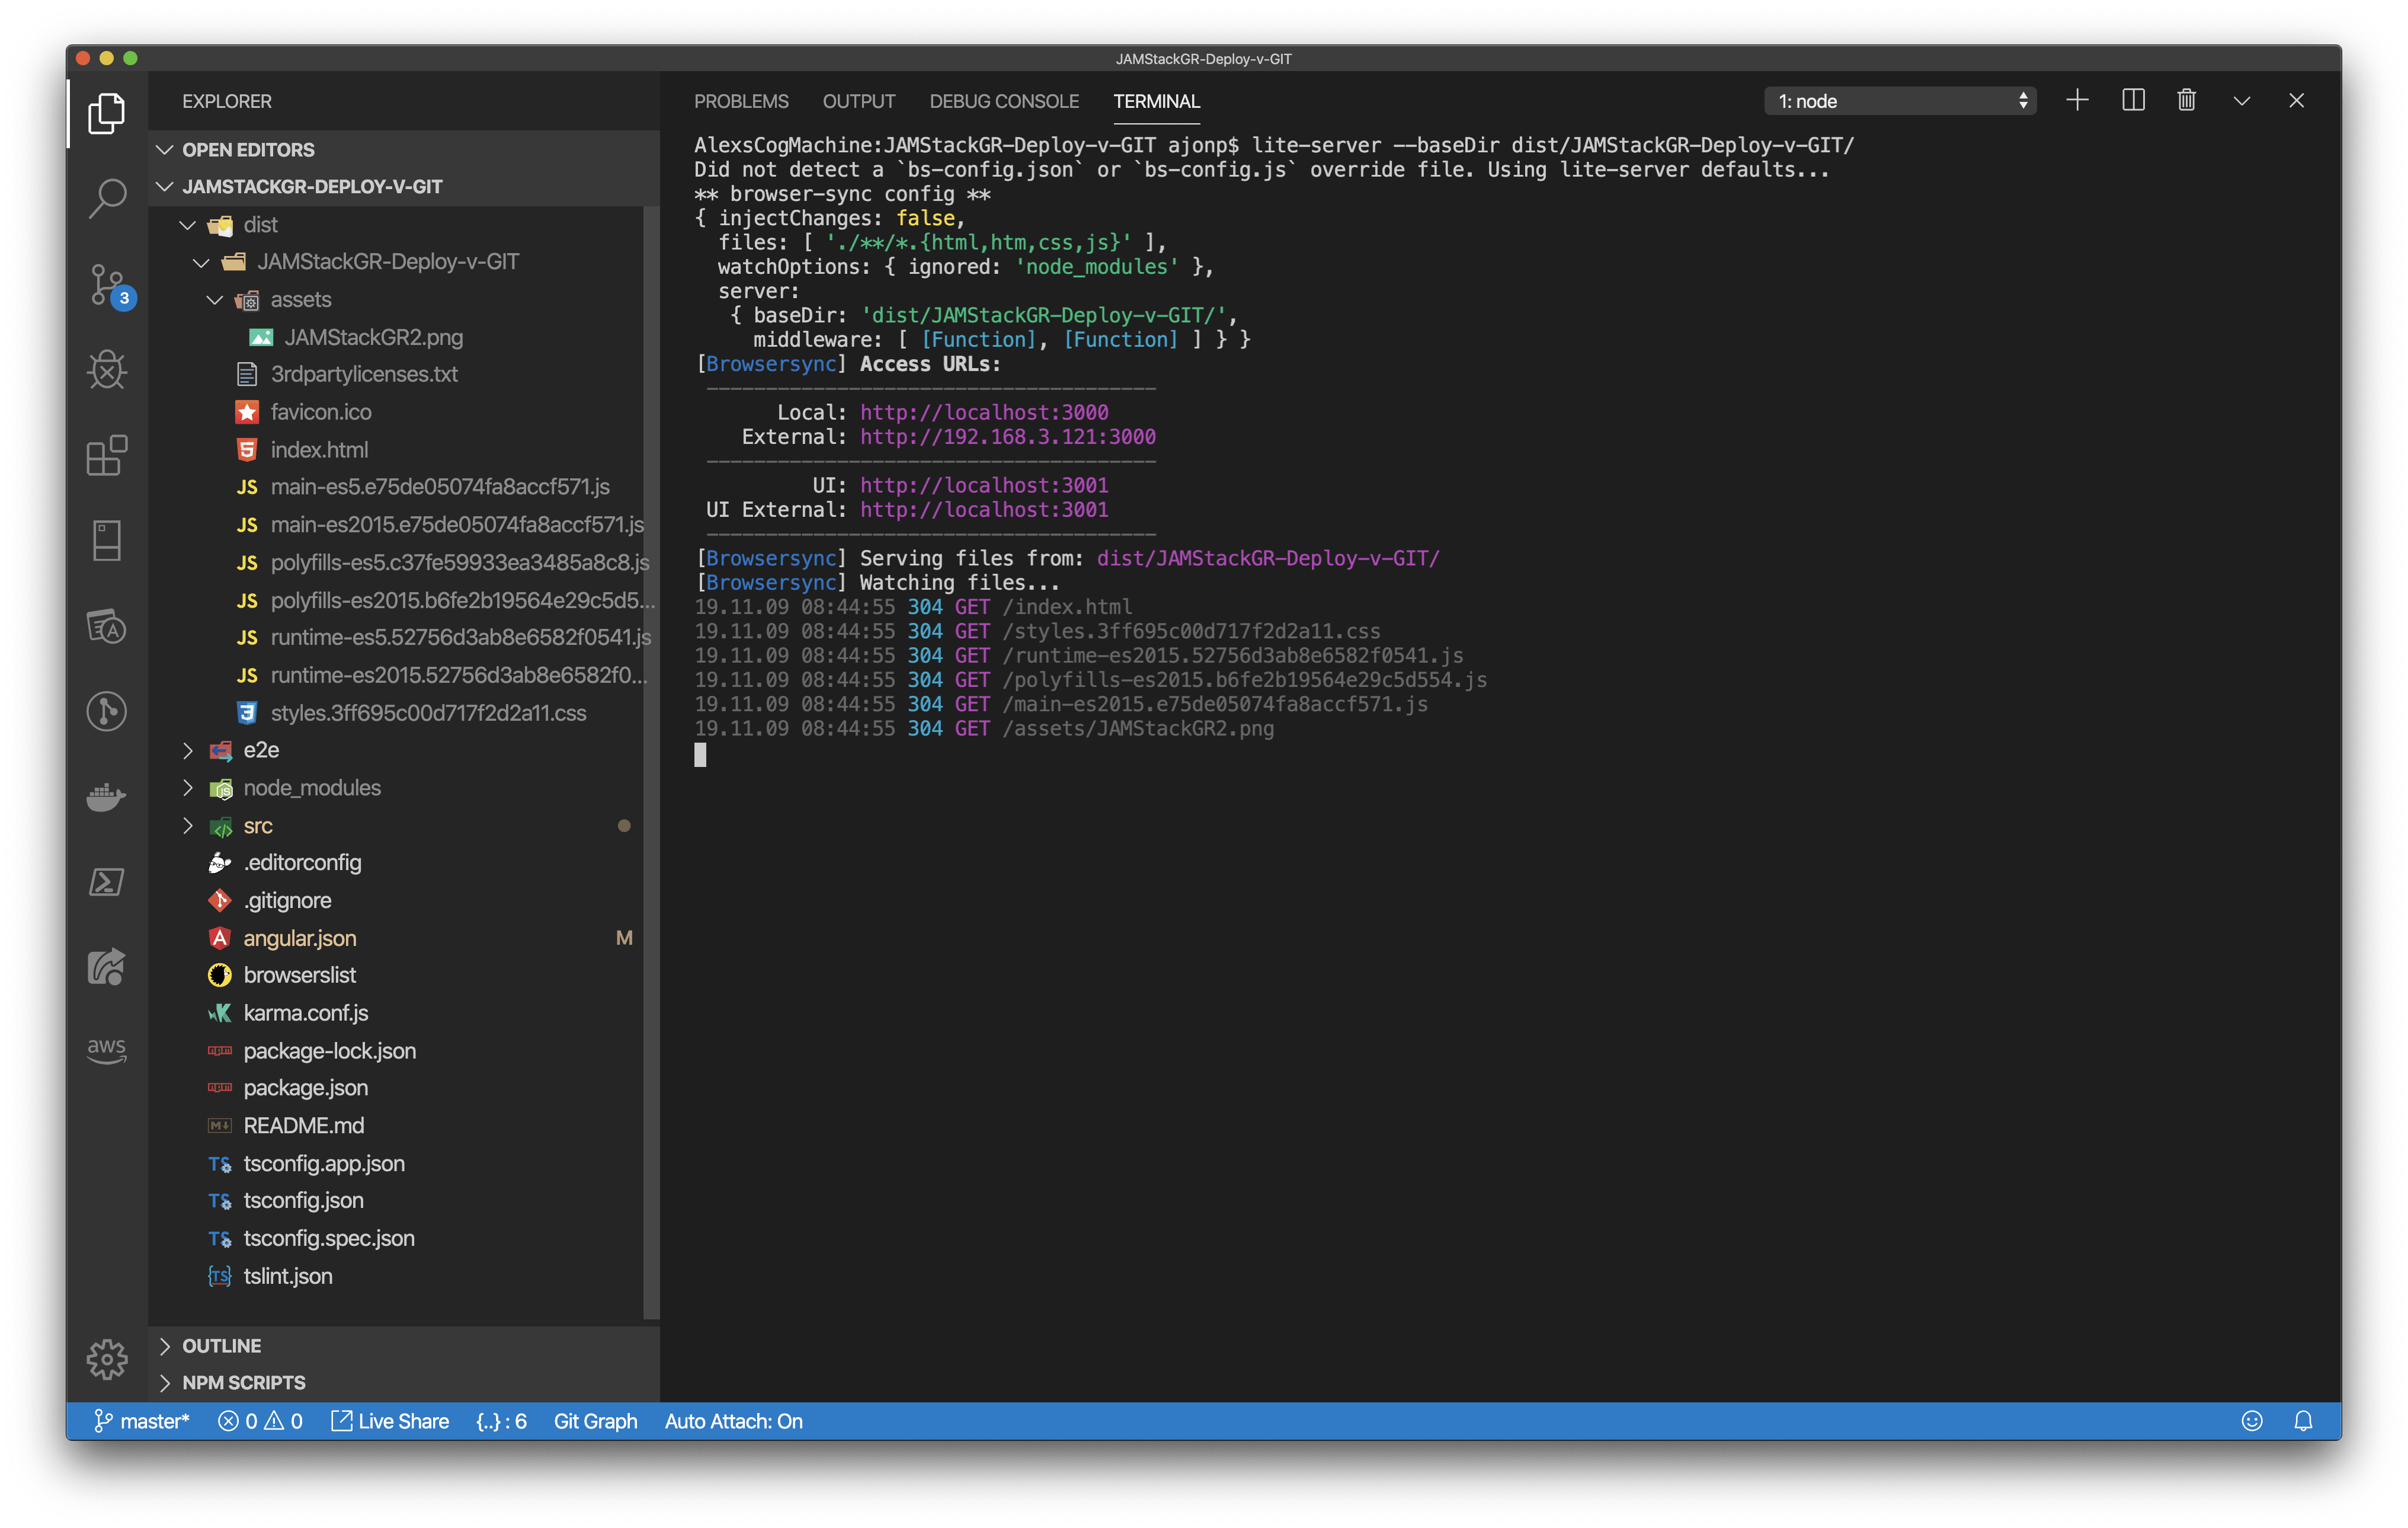
You can see the production site on
This might seem the same as using ng serve, but this is running the production code!
Angular Deploy Platforms
The Angular CLI command
ng deploy(introduced in version 8.3.0) executes thedeployCLI builder associated with your project. A number of third-party builders implement deployment capabilities to different platforms. You can add any of them to your project by runningng add [package name]. ~ Angular GuidePlease also note that I am in now way suggesting you should use the quick deploy methods with public repos (as there are keys all over) or that they are ready for true production use. This method is best used as demos.
If you see any 404 issues you need to update the base html element, similar to
<basehref="/JAMStackGR-Deploy-v-GIT/">
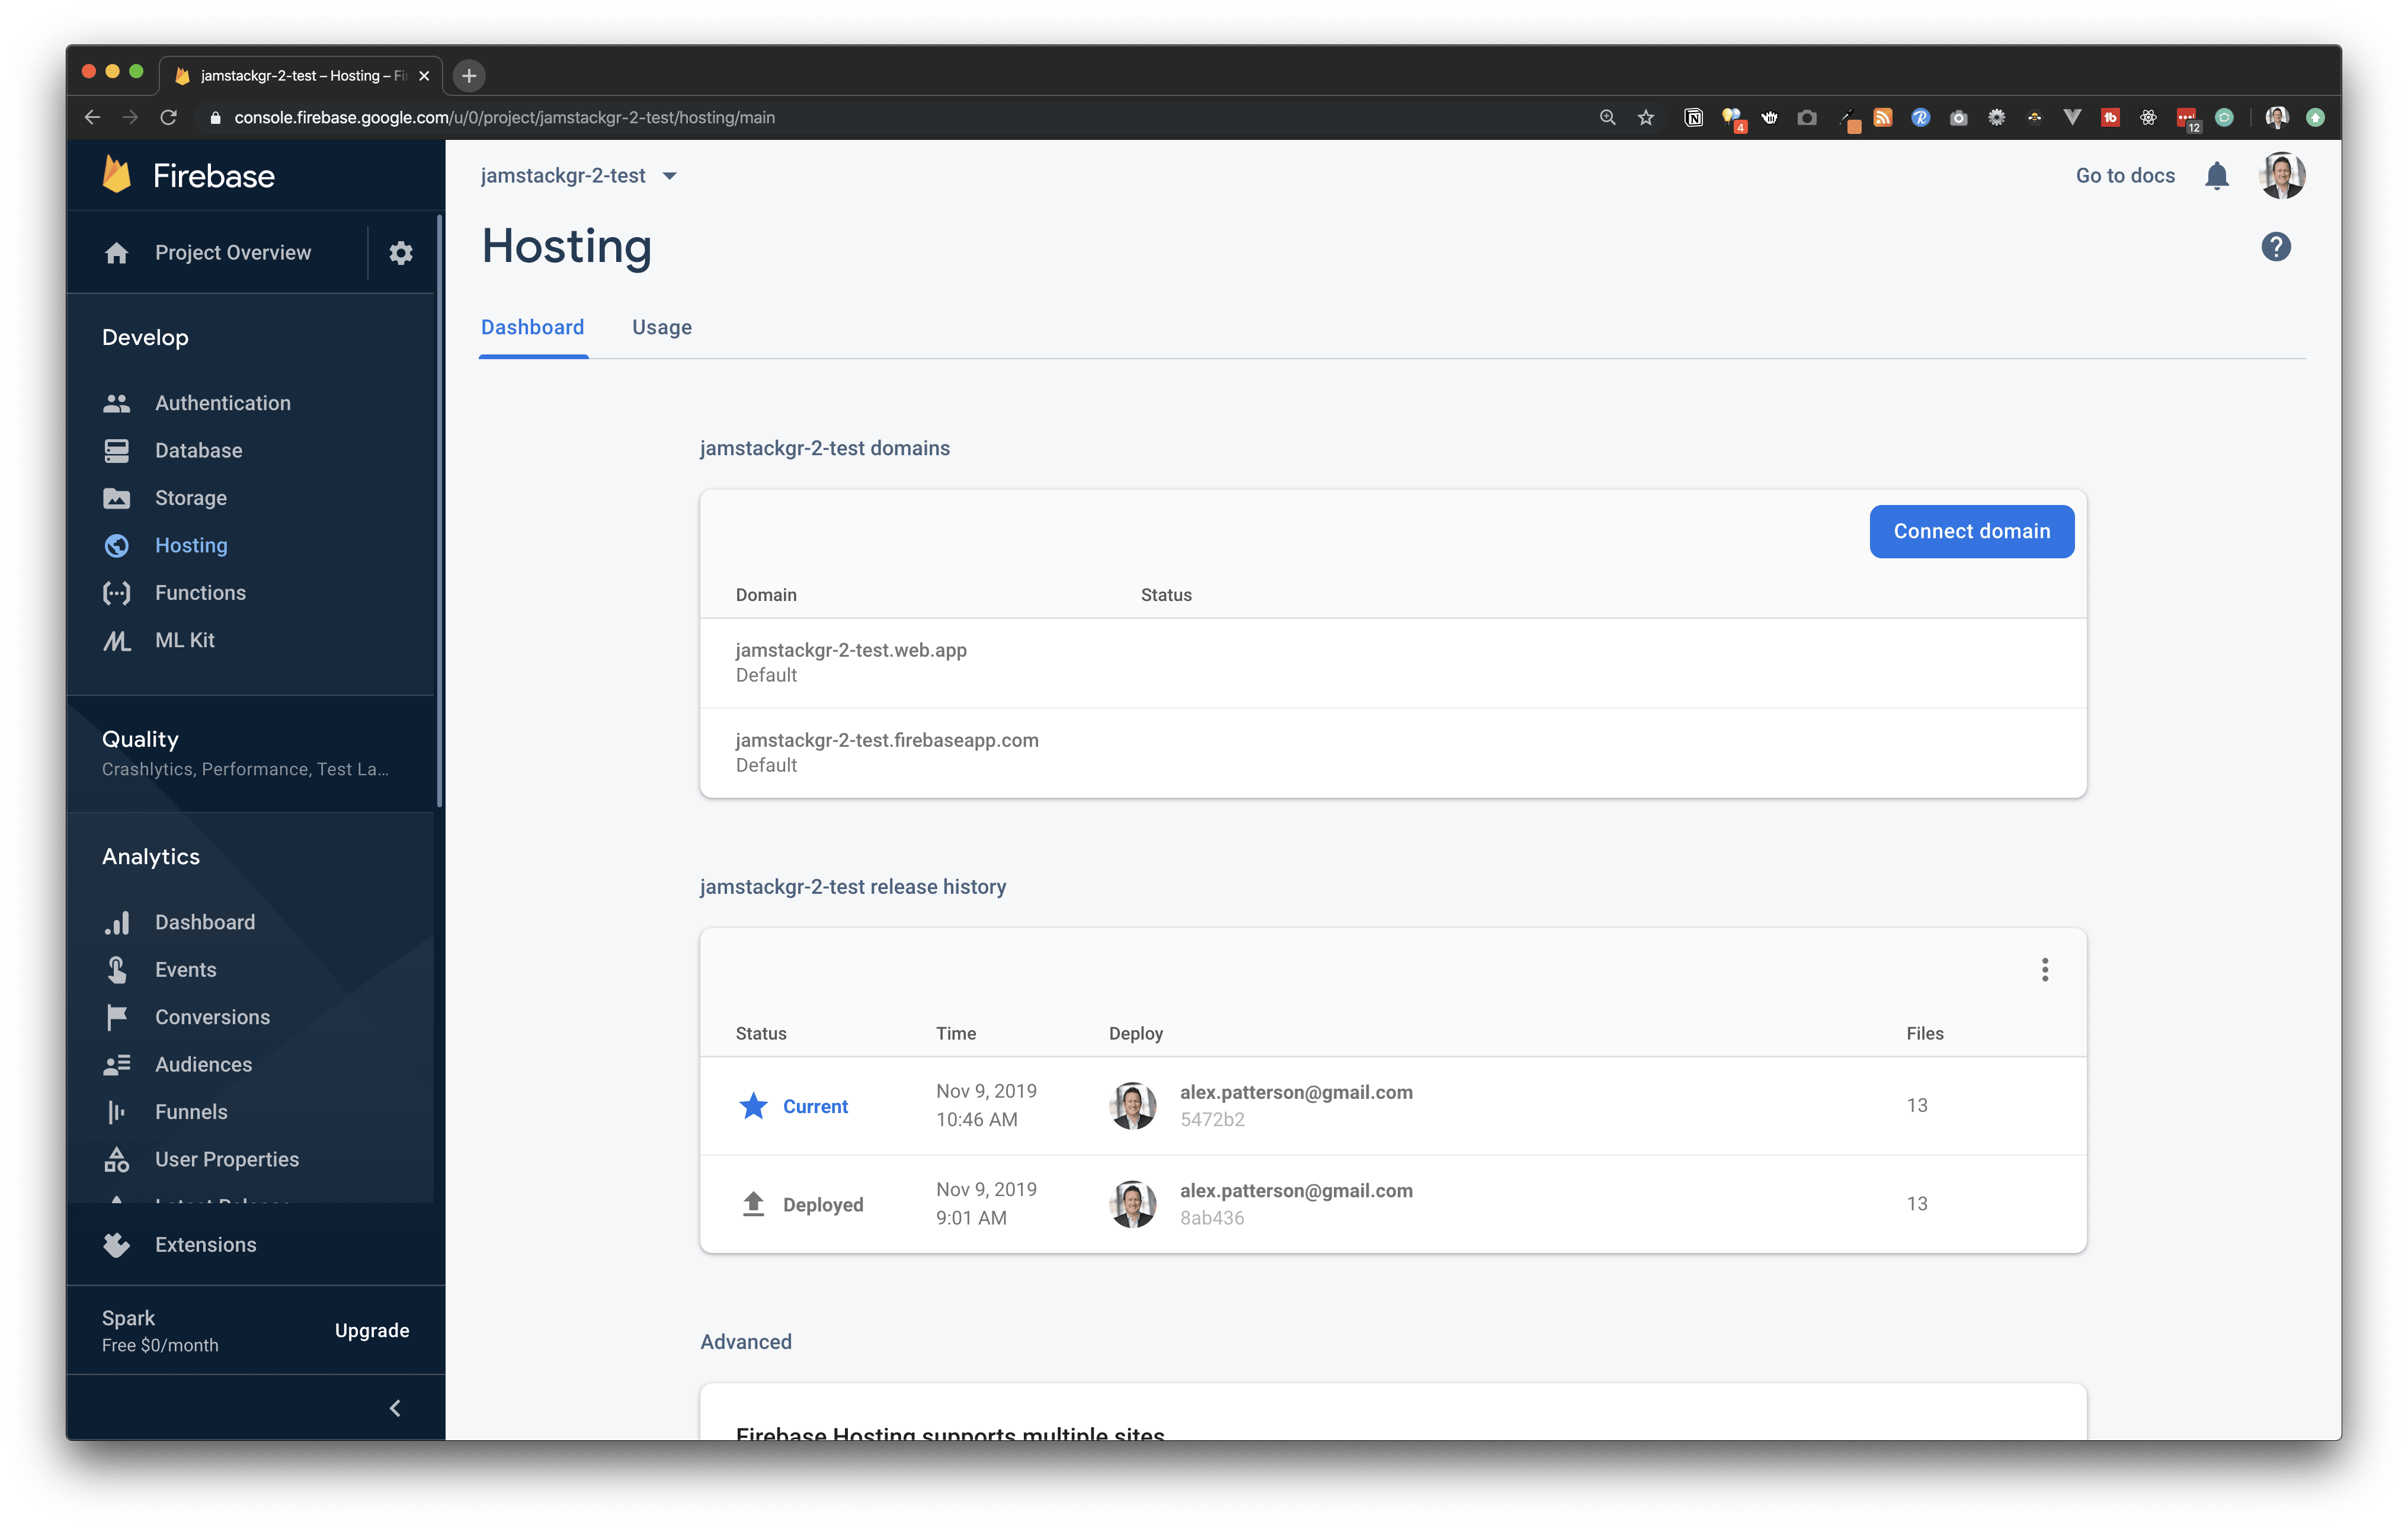
Firebase Hosting
Firebase Hosting is hosting on CDN edge servers around the world. There are several products in the Firebase suite including Firestore which offers a Backend as a Service. You will need a firebase account (google user account) in order to use this service, and a firebase project created.
Creating a Firebase project https://console.firebase.google.com/ login and select Add Project, give it a unique name.
Deploy command
This command has added the correct npm packages
Login using the CLI, this will direct you to login so that the CLI can be granted to act on your behalf.

You will then need to copy the login token so that you can paste it back in the CLI.
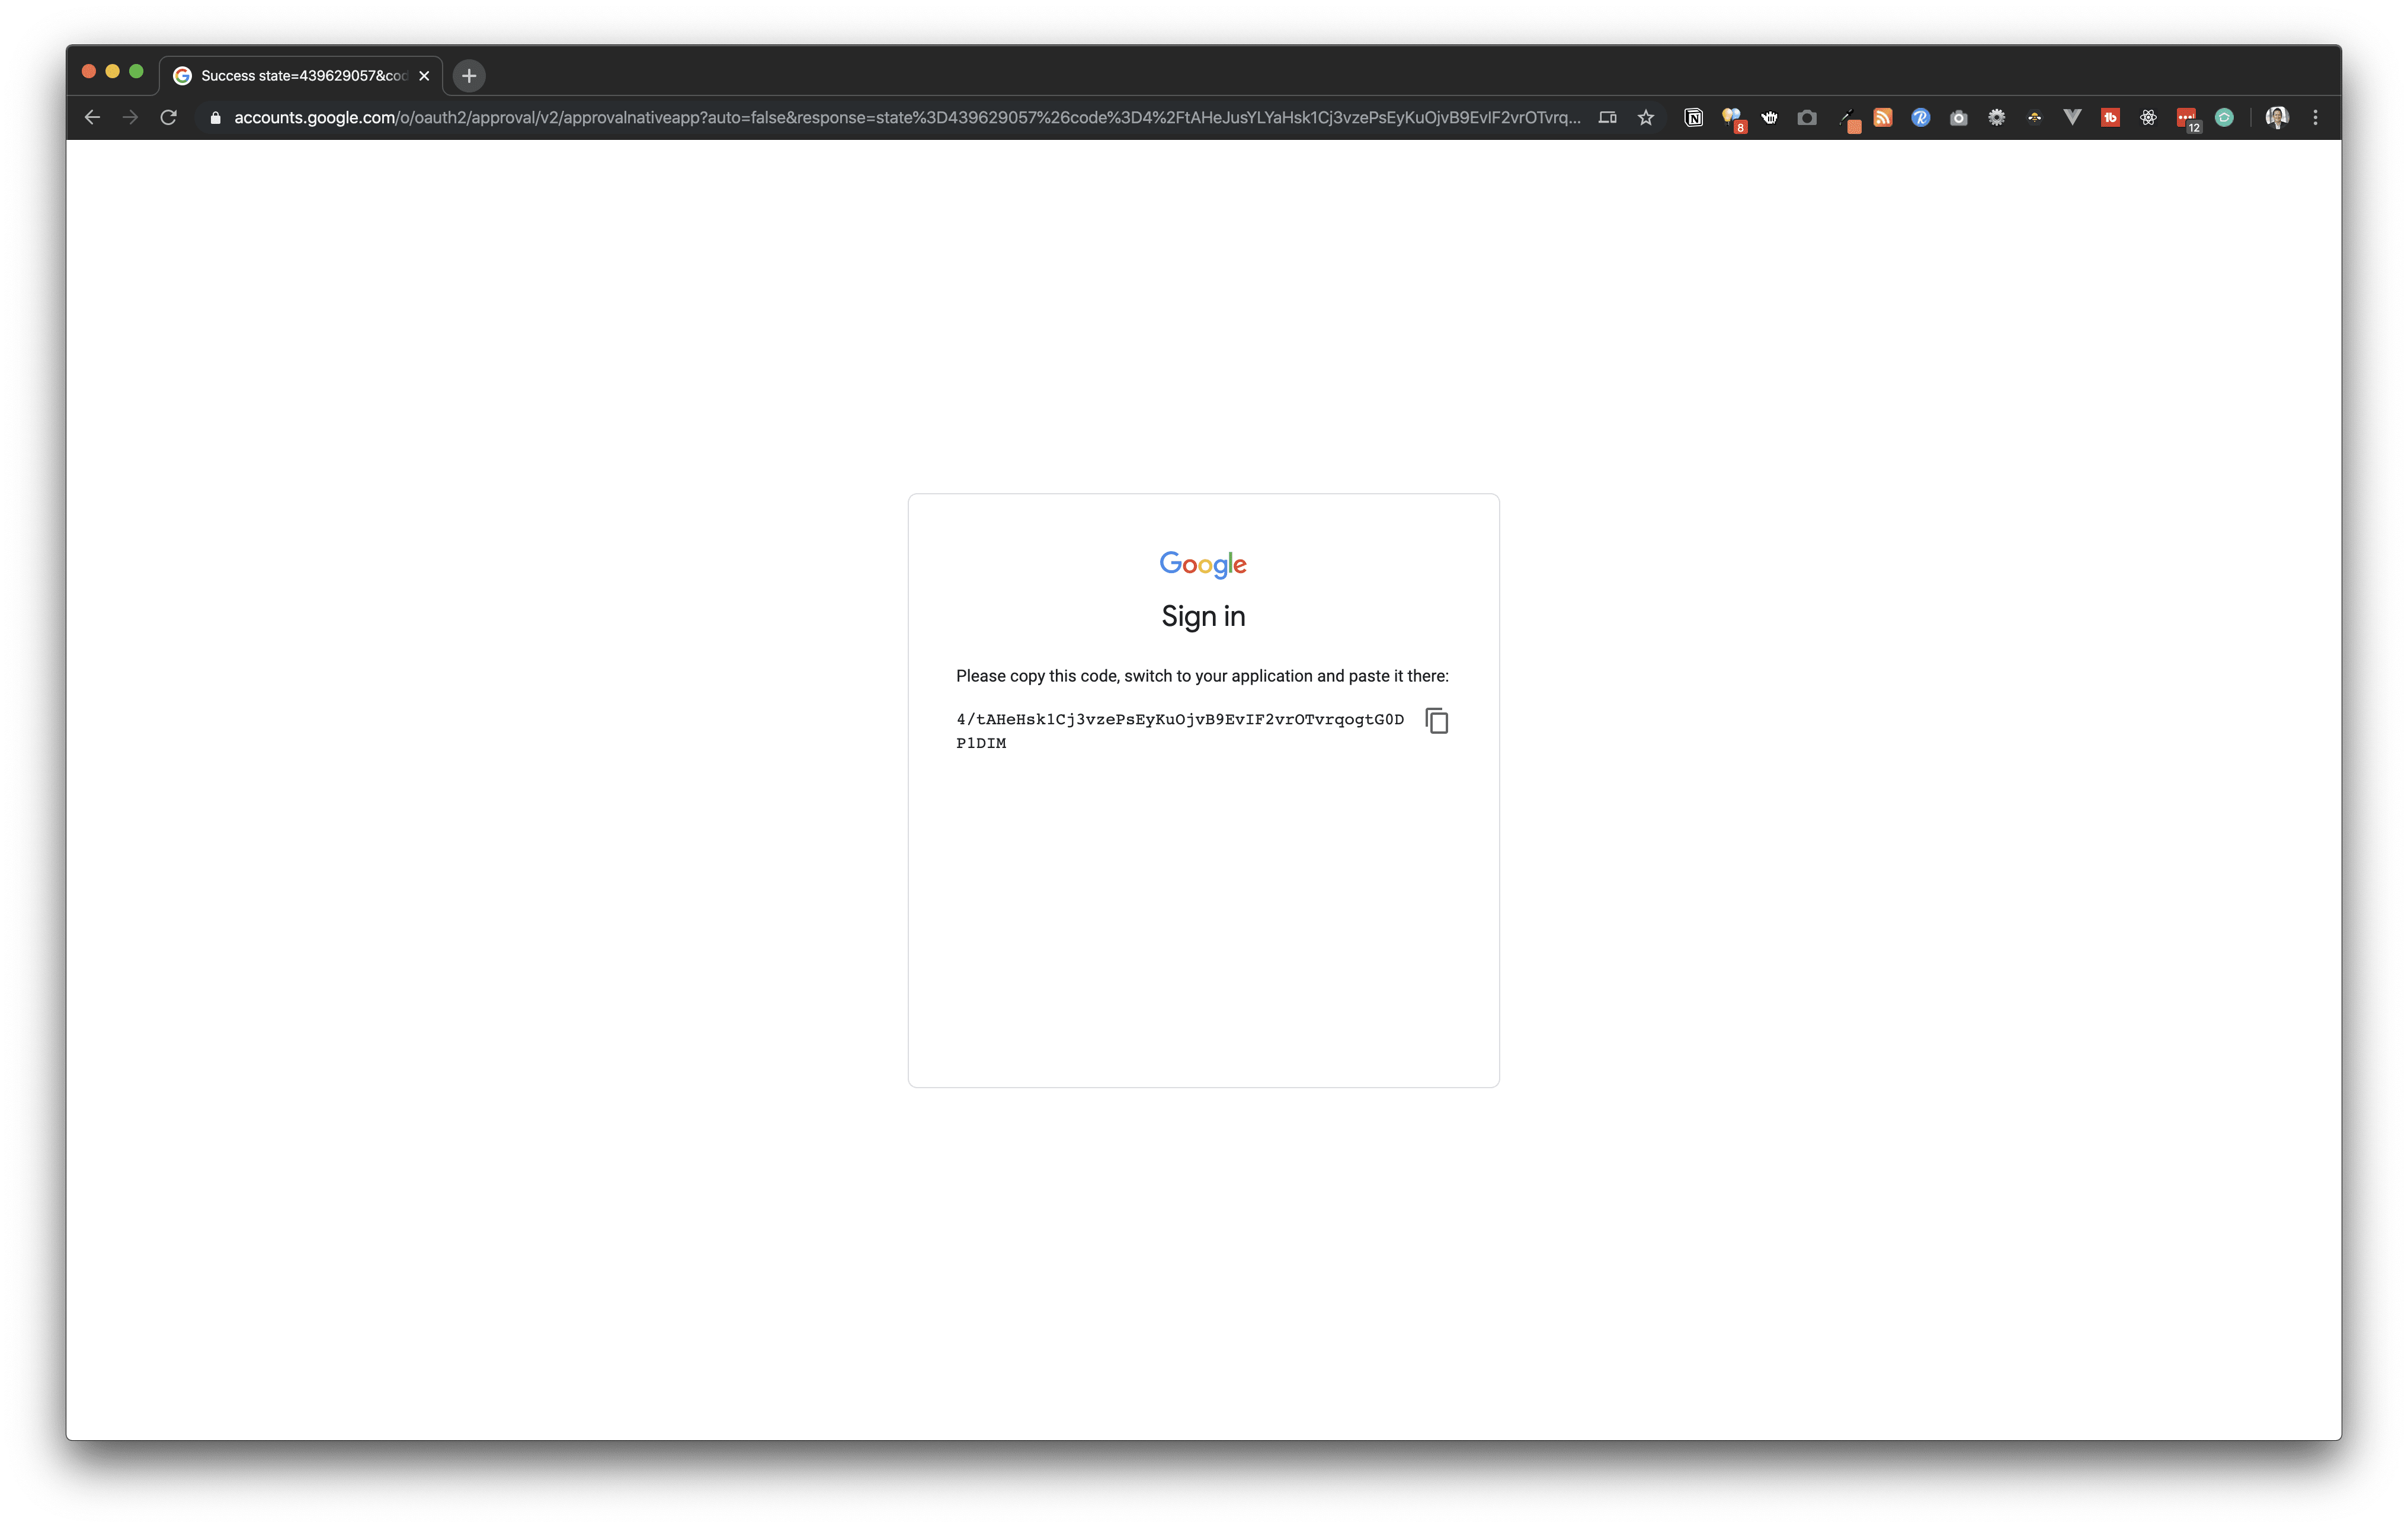
Paste the code like below

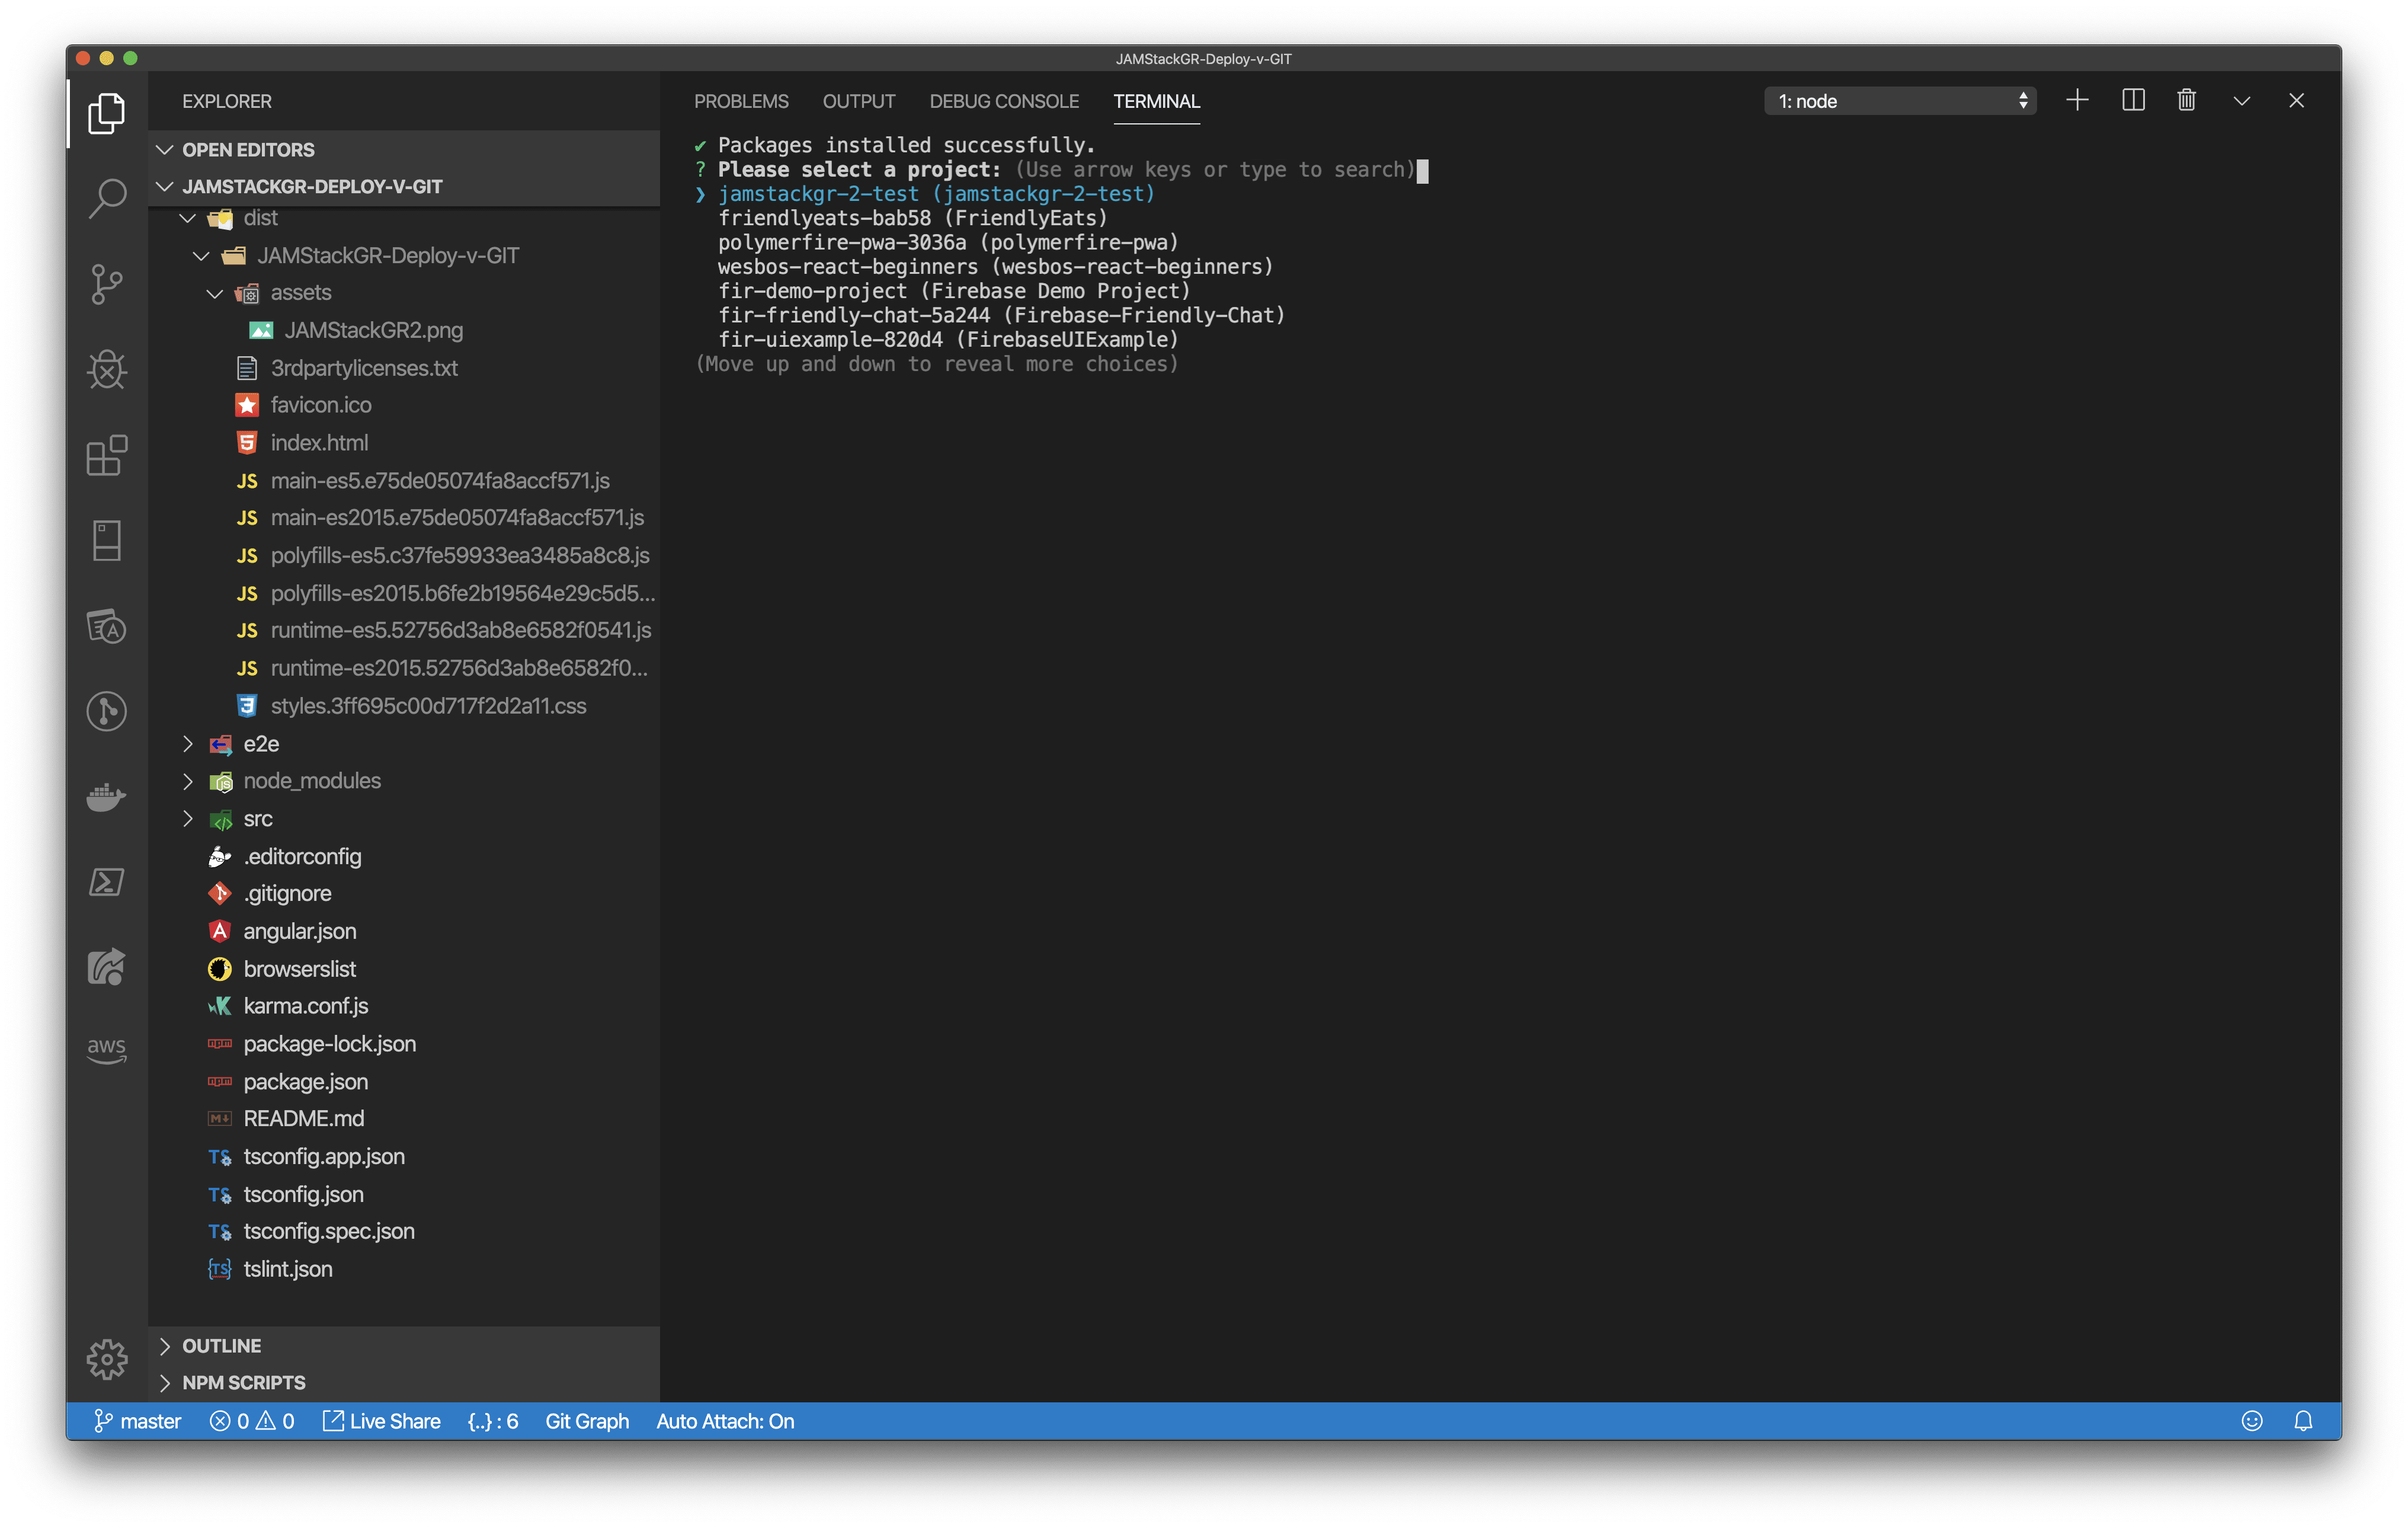
Now that the CLI can access your projects it will have them in a list. Select your Firebase project that you have created.
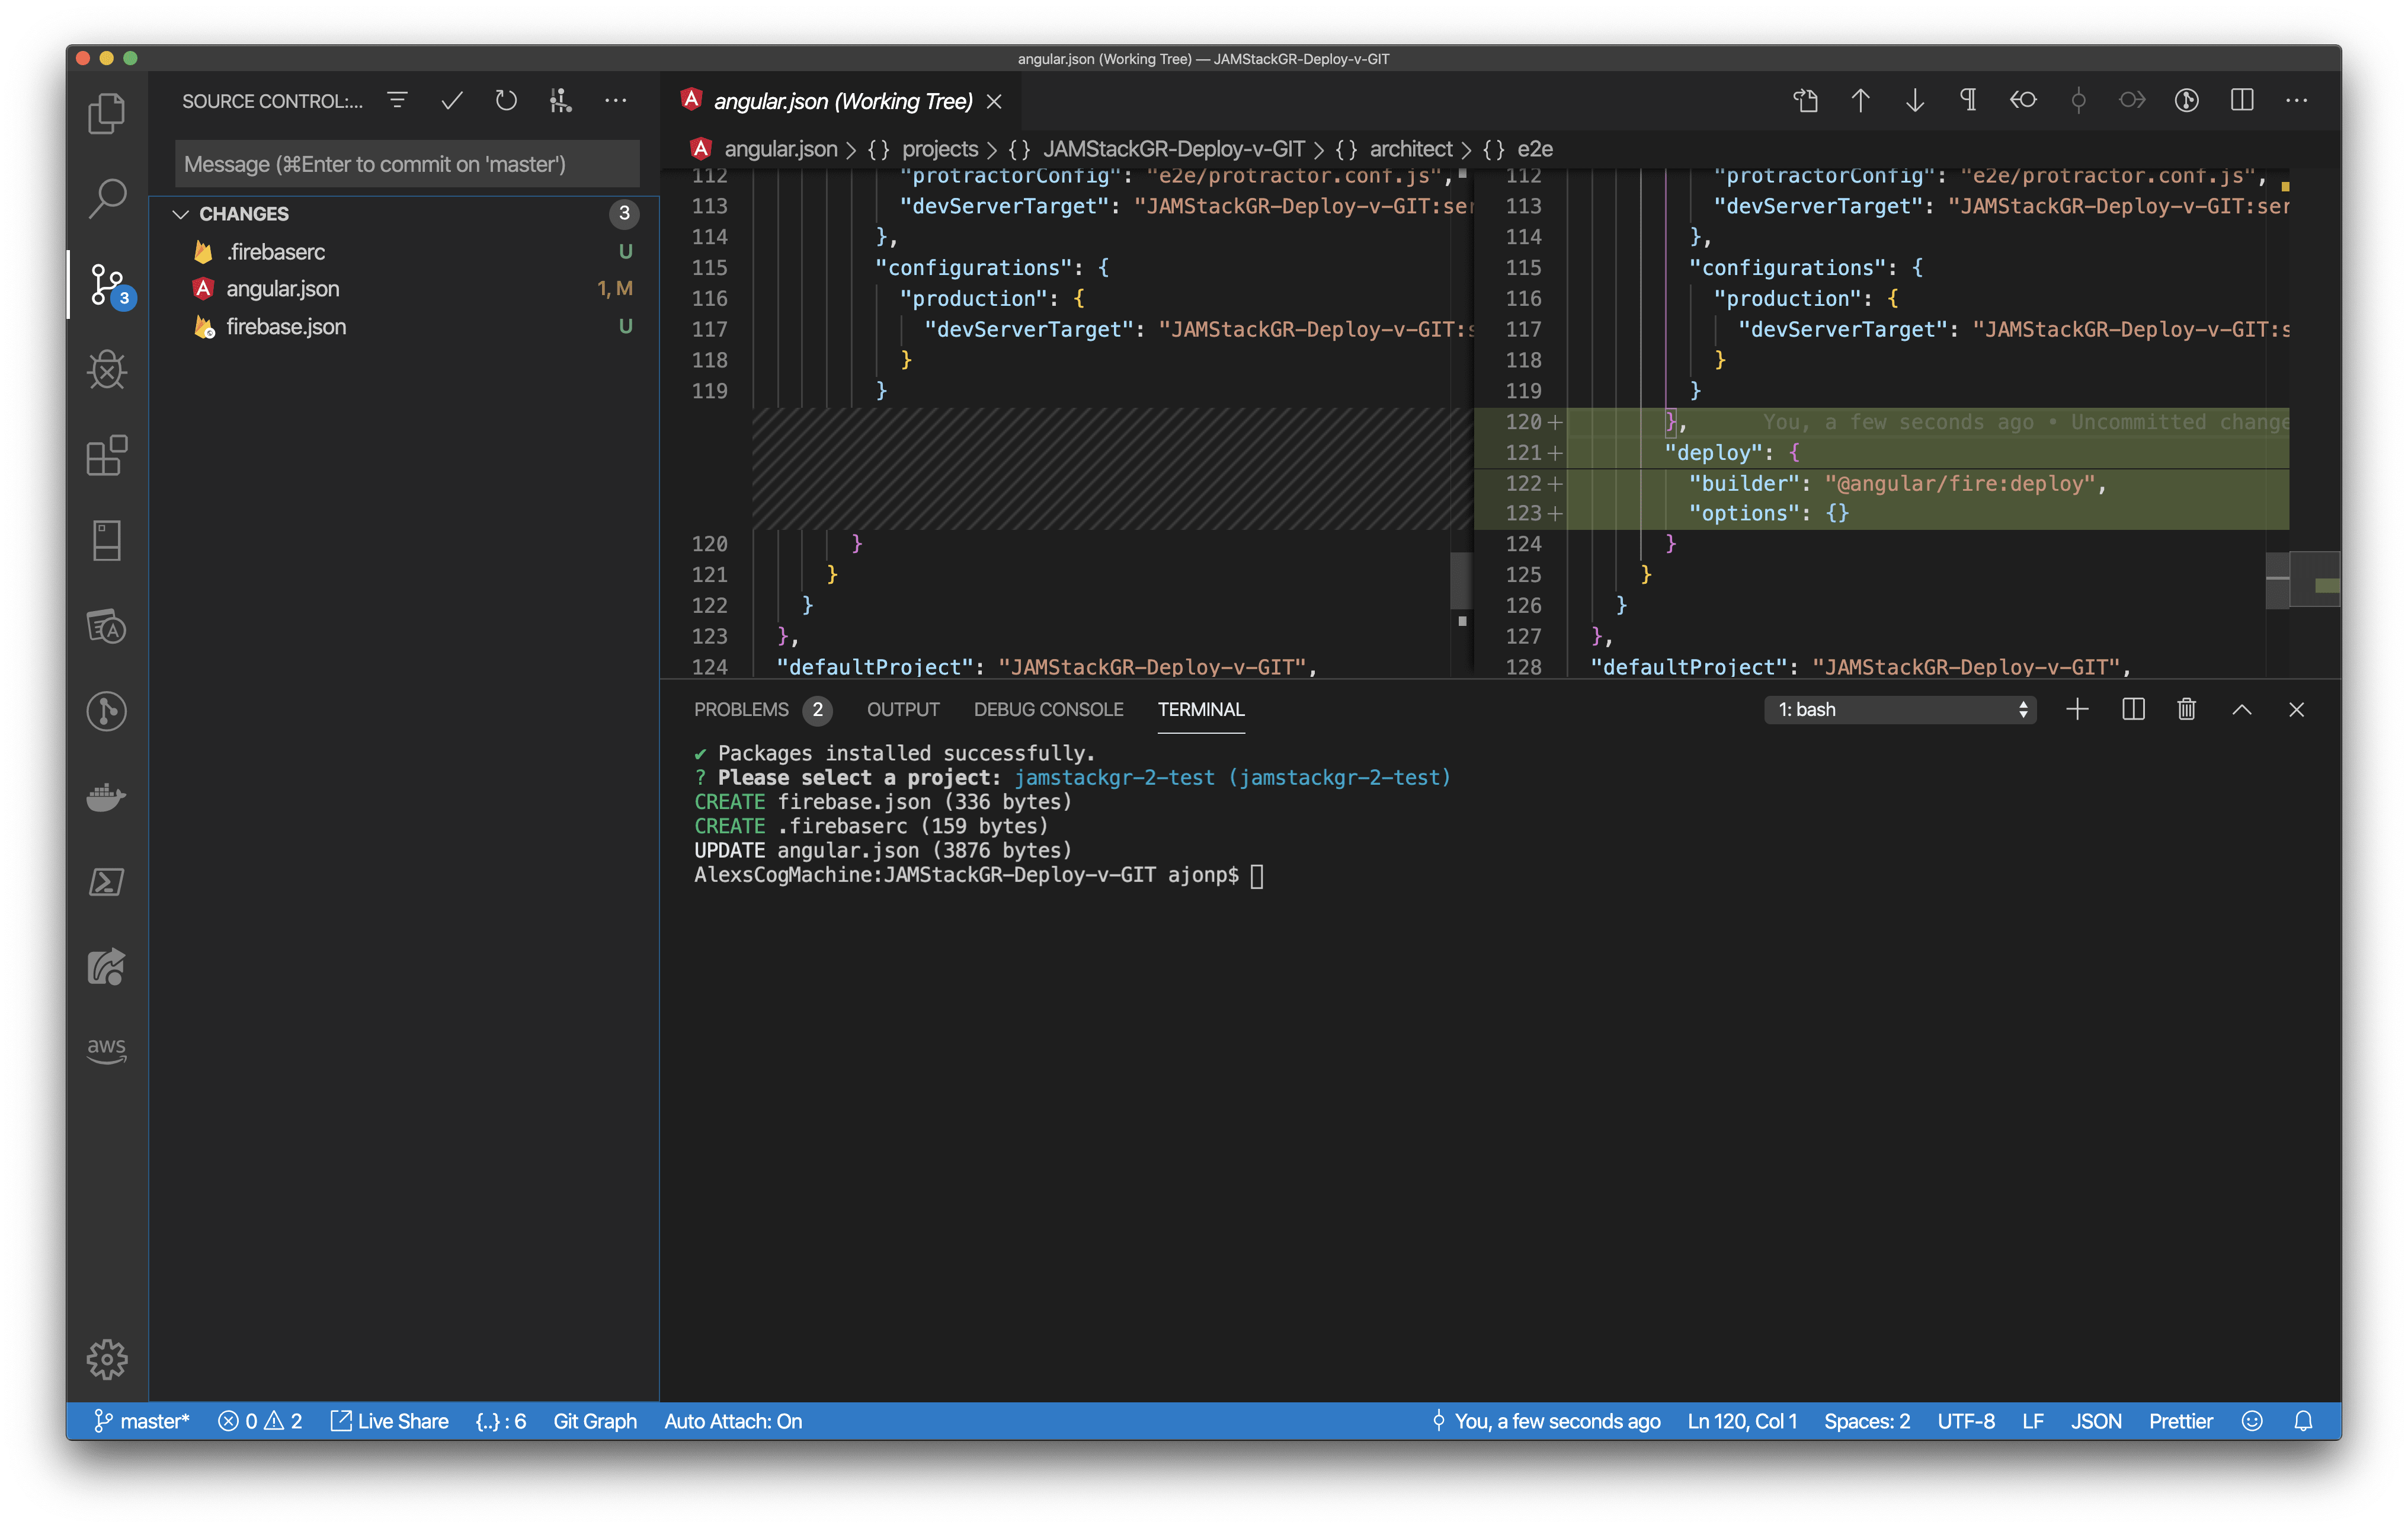
If you take a look at angular.json you will now see that there is an entry for this deploy option listed
"deploy": {
  "builder": "@angular/fire:deploy",
  "options": {}
}
The CLI also created some default firebase files in your project .firebaserc and firebase.json. See below.
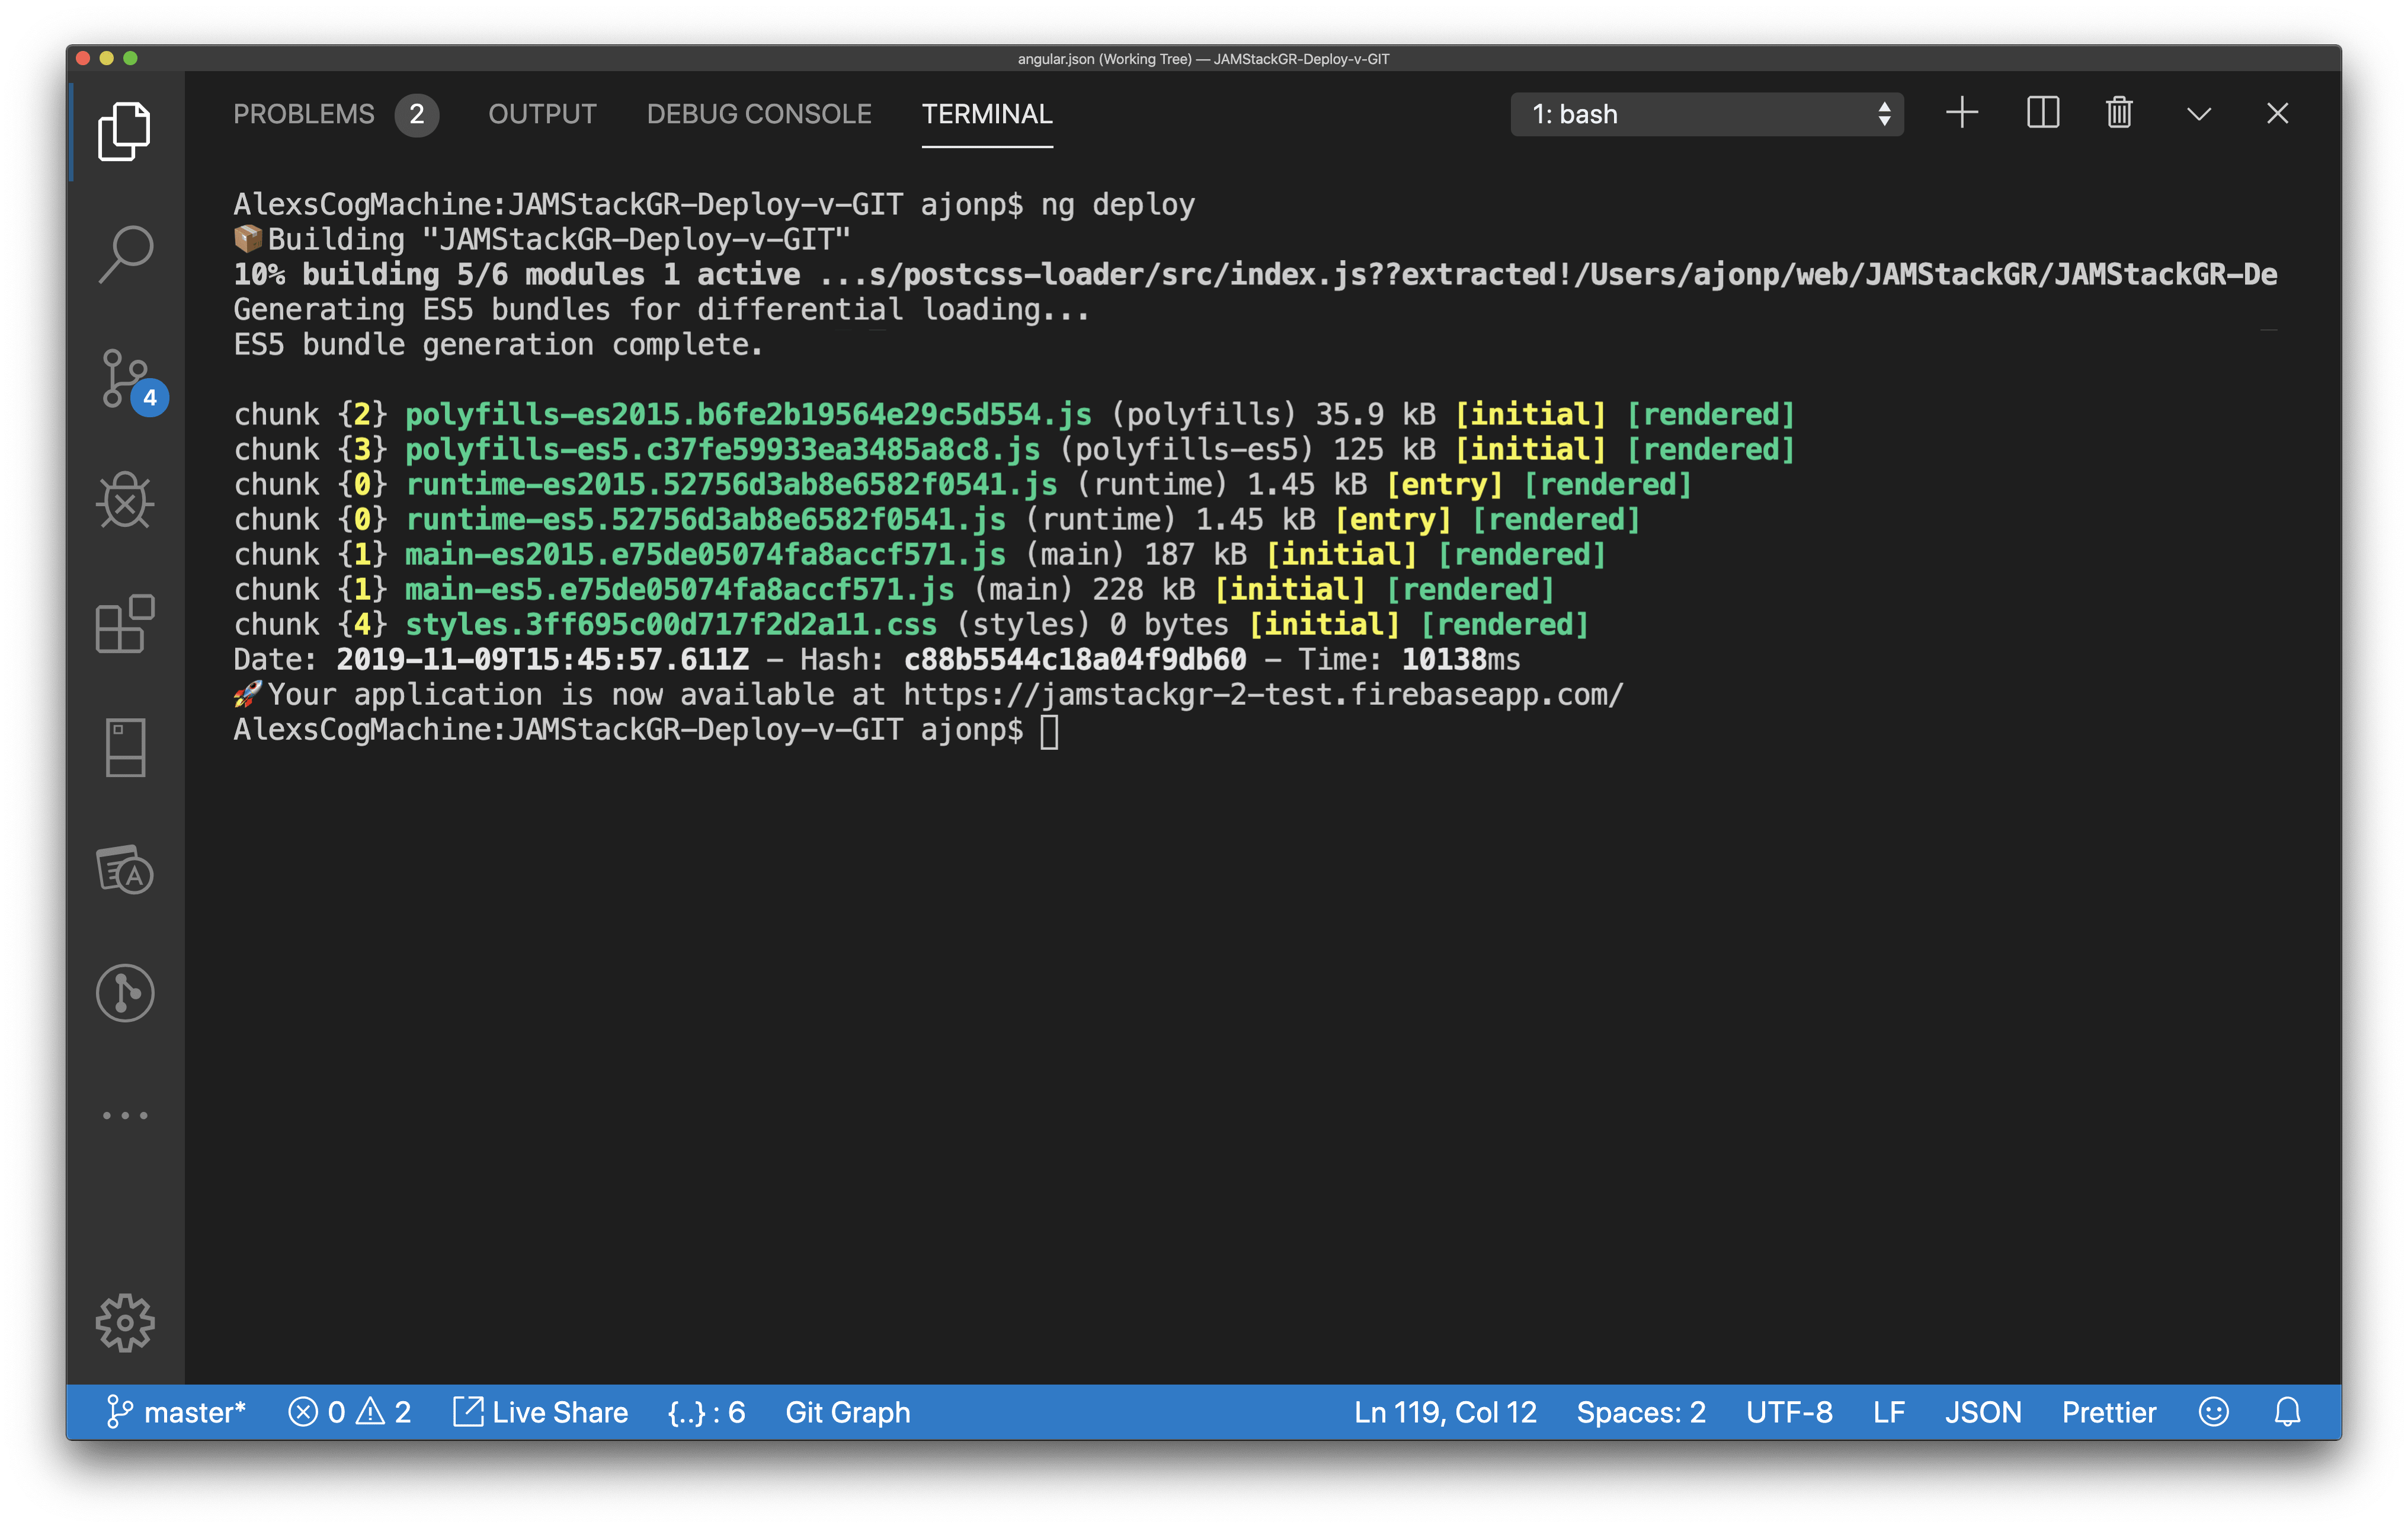
Now that everything is setup you can run the deploy command below
```plain text ng deploy
This will build your project and deploy it to Firebase Hosting
> You will need a free [Microsoft or GithHub login](https://azure.microsoft.com/en-us/services/devops/) and Azure Dev Ops account to use this deploy method.
Run the below command
```bash
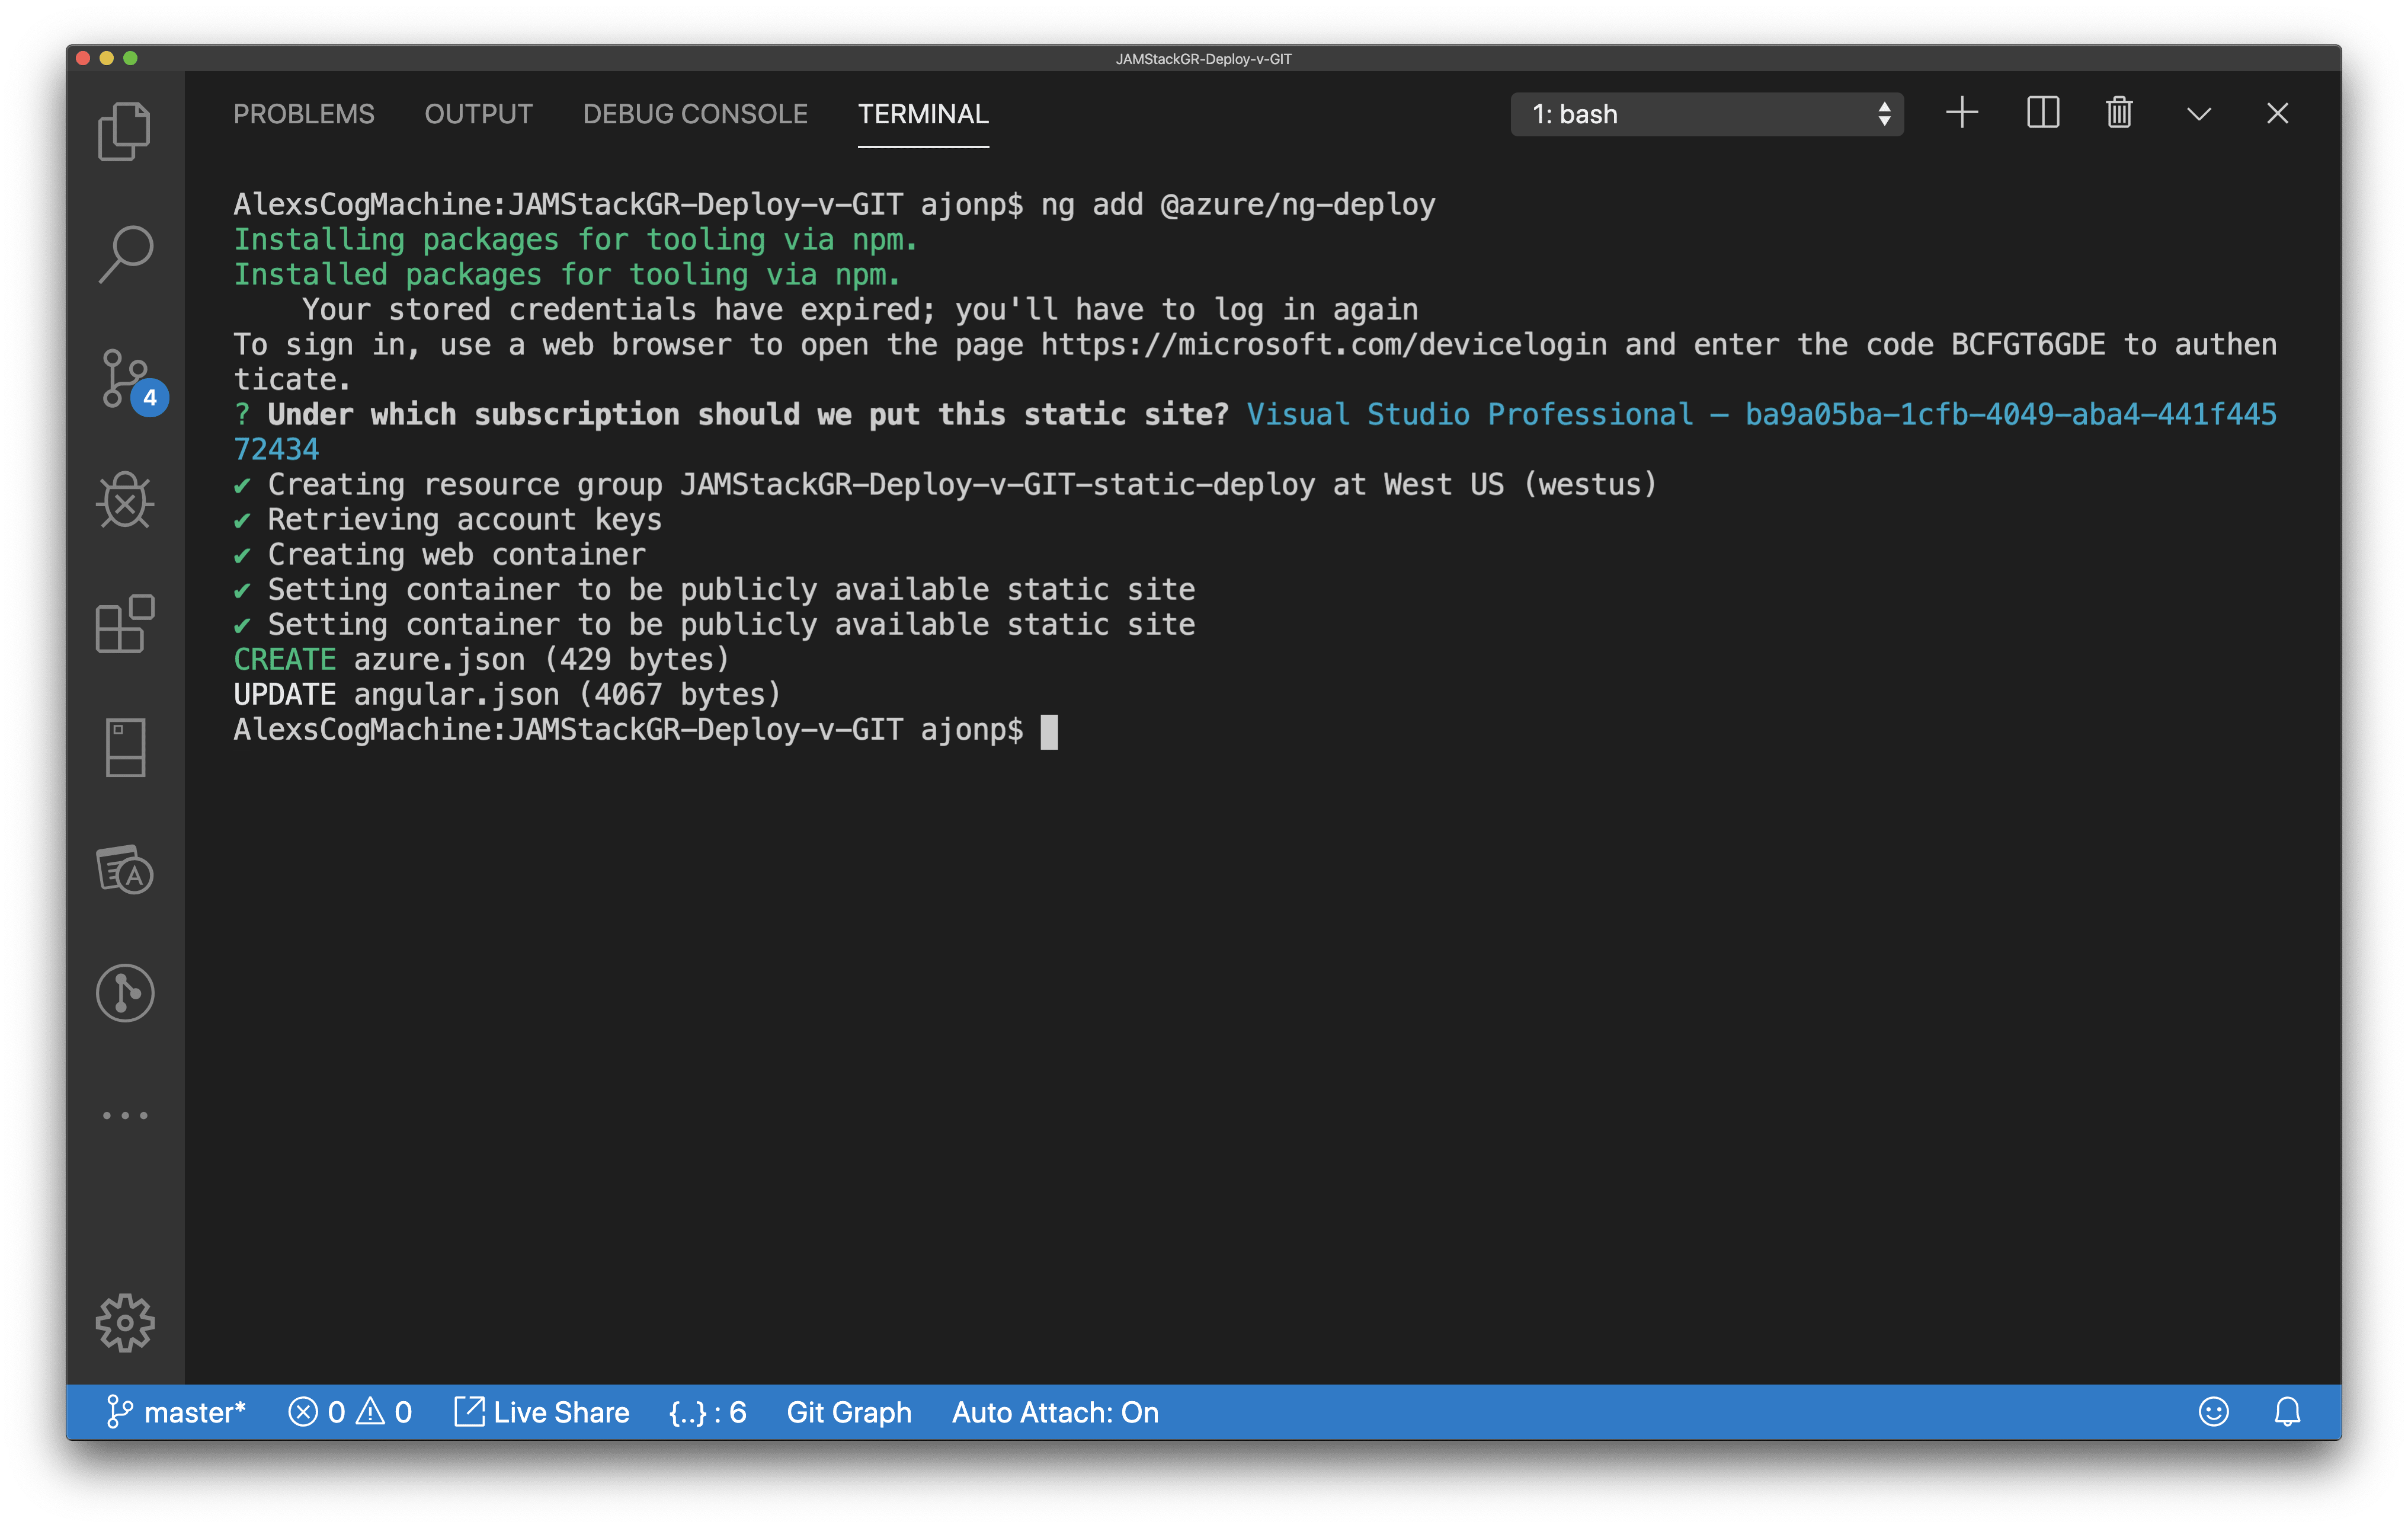
ng add @azure/ng-deploy
This has added the Azure package to npm dependencies "@azure/ng-deploy": "^0.2.3",
This will initiate the login flow. You will need to follow the link in the console.
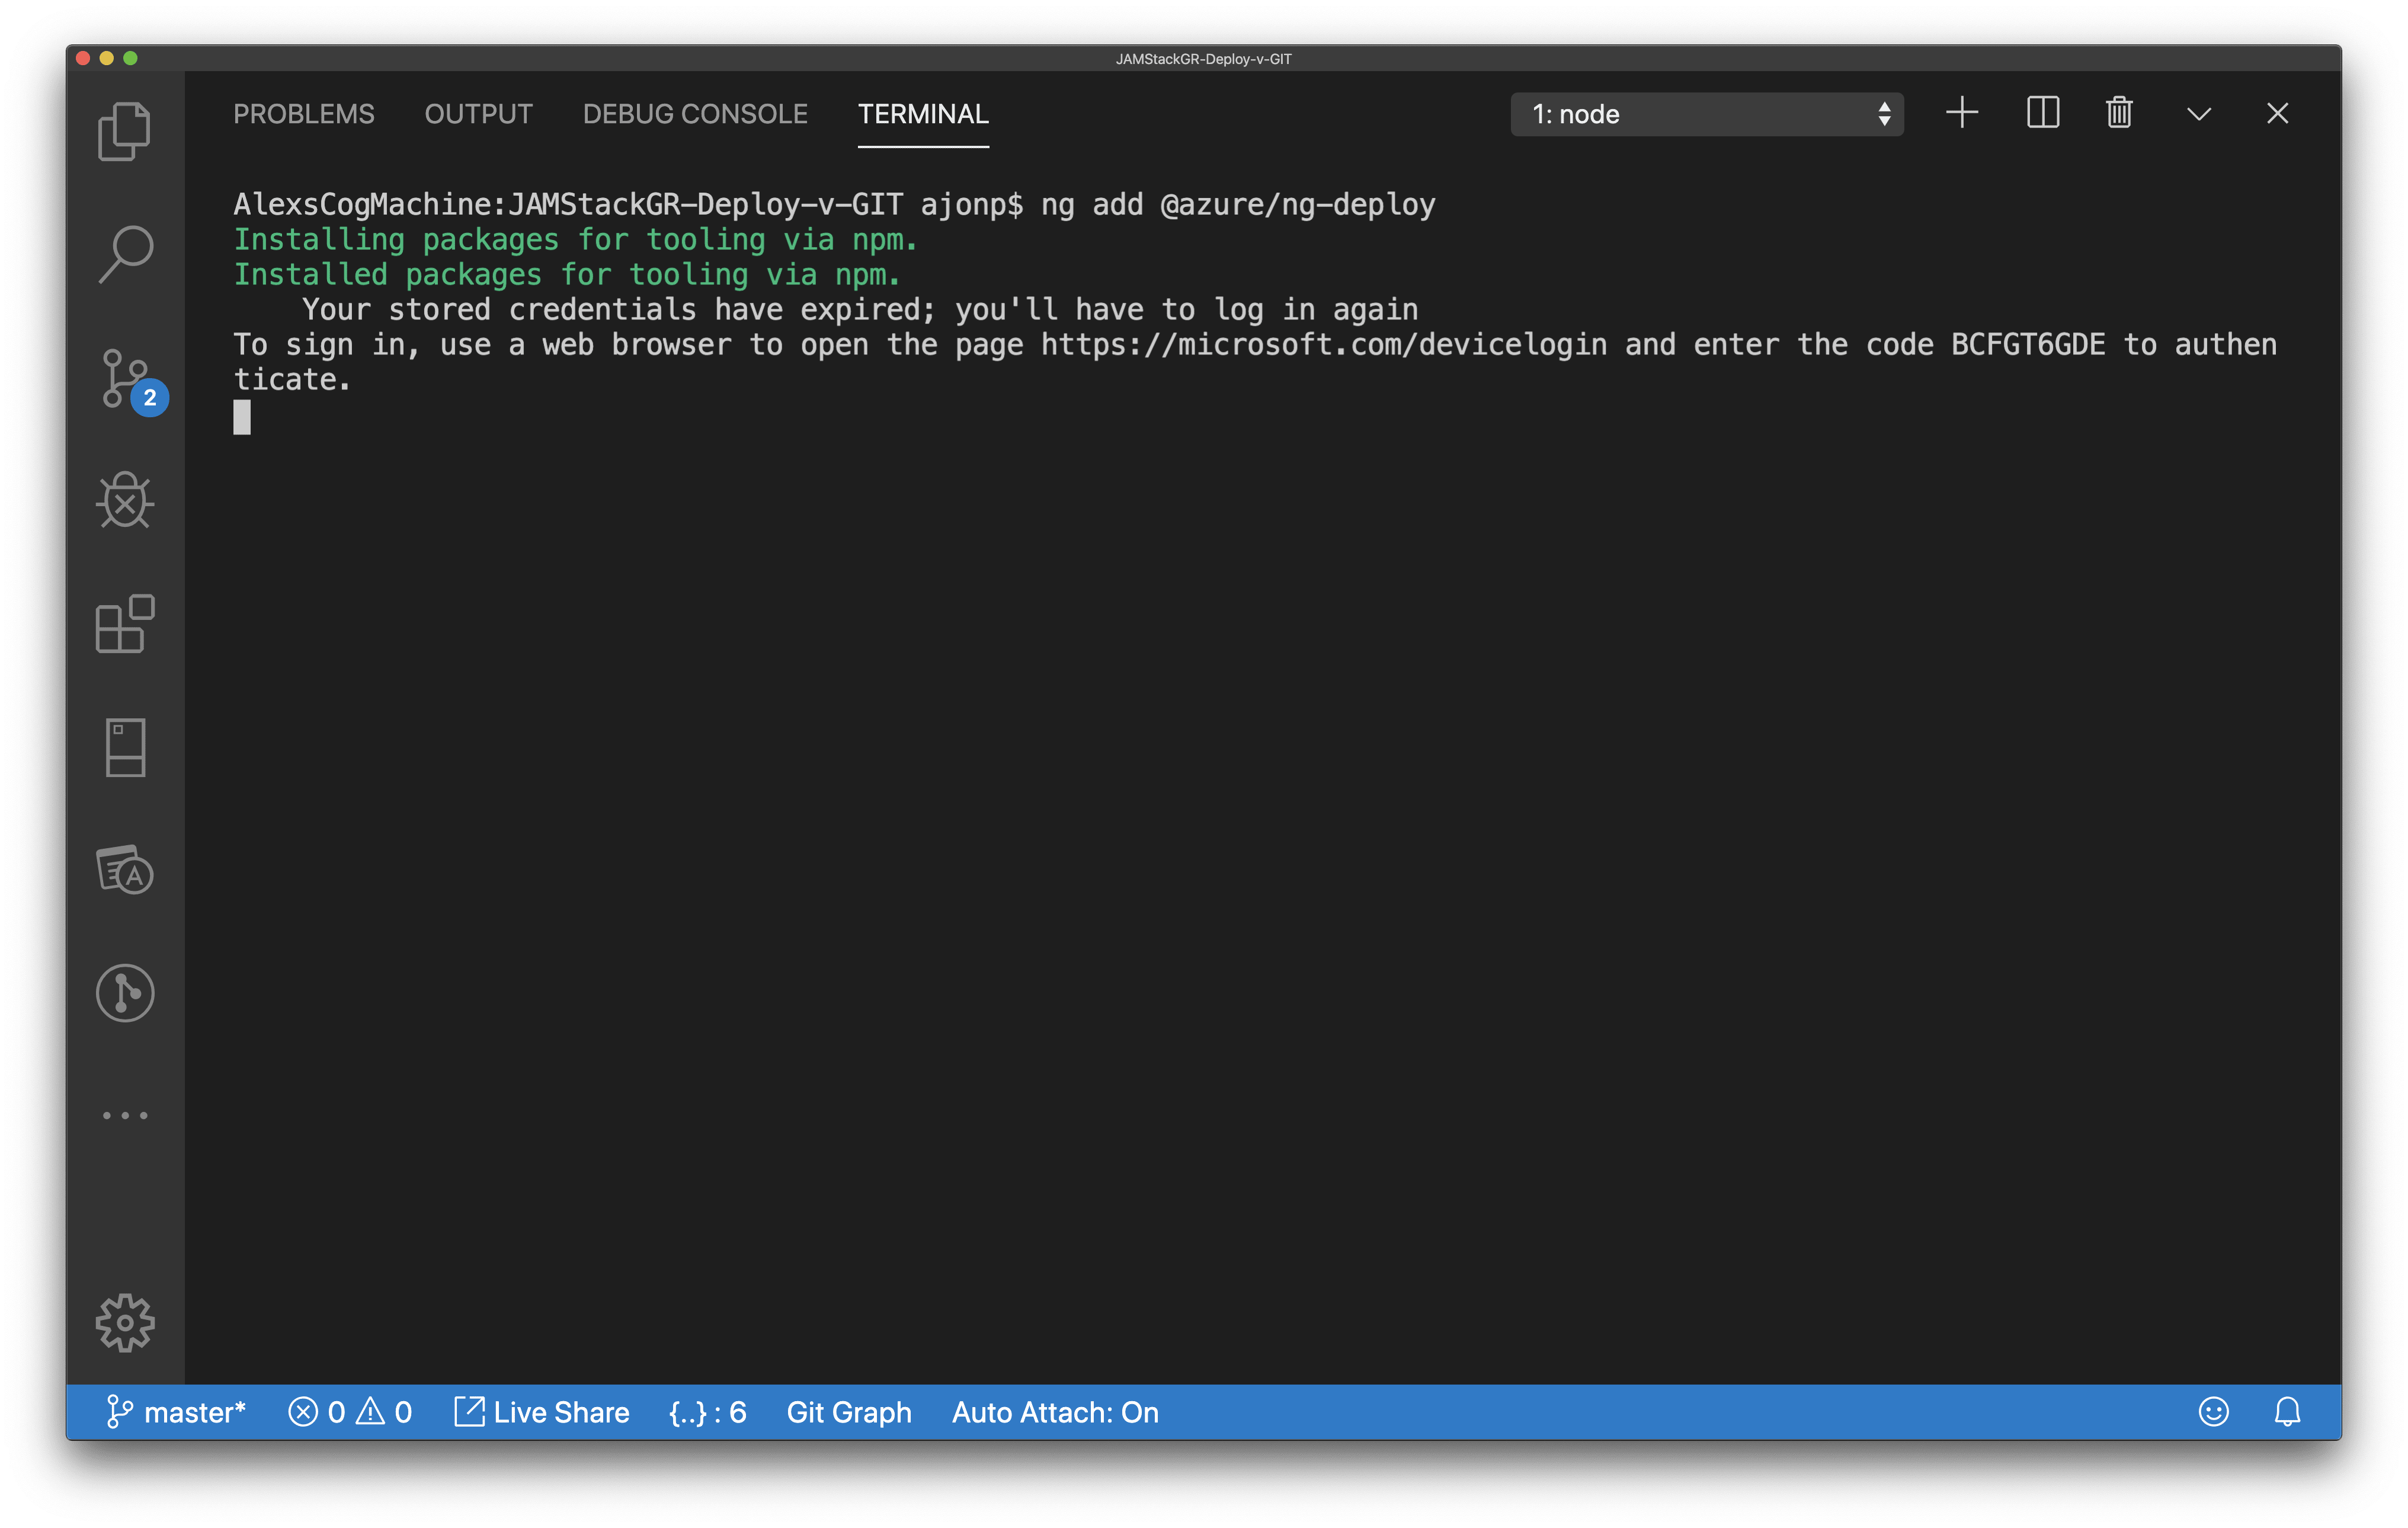
Copy the code and paste into the browser.
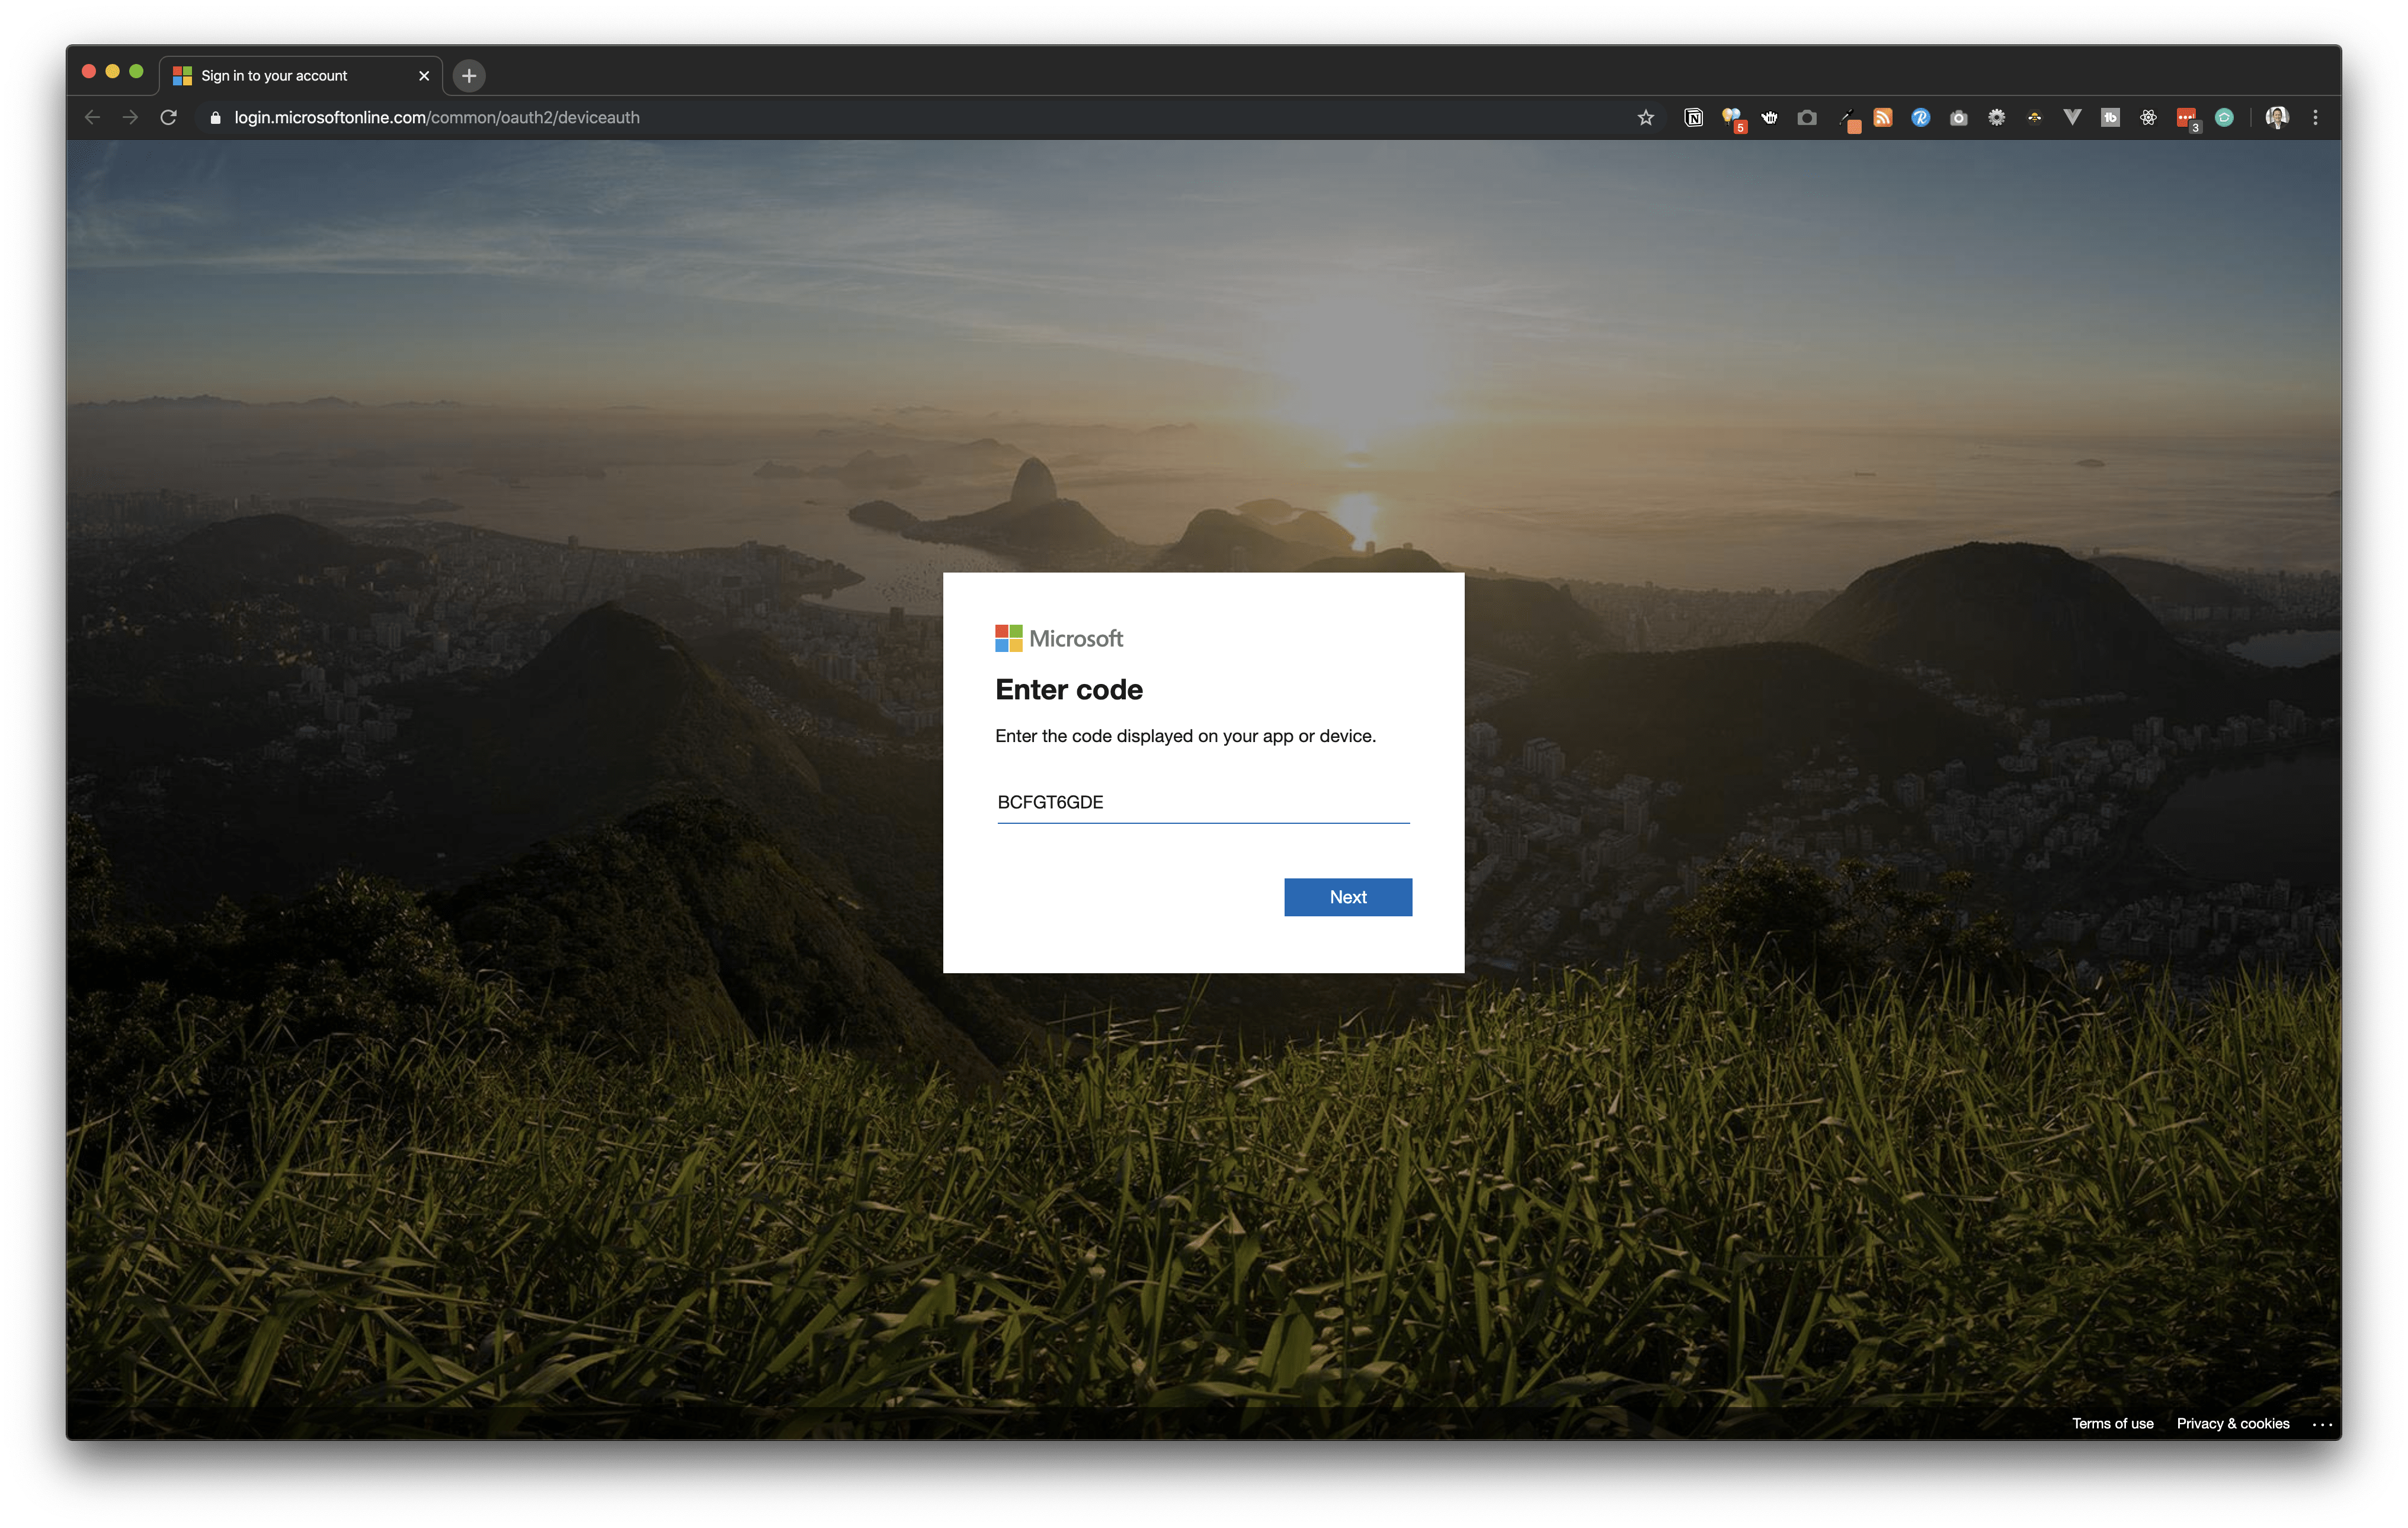
You will then login to your Microsoft account. And you will receive a message about Microsoft Cross Platfrom CLI Interface.

You should now have a list in the CLI asking "Under which subscription should we put this static site?". Pick the one you would like to use (maybe you only have one). This will once again build out the site and get it ready for deploying.
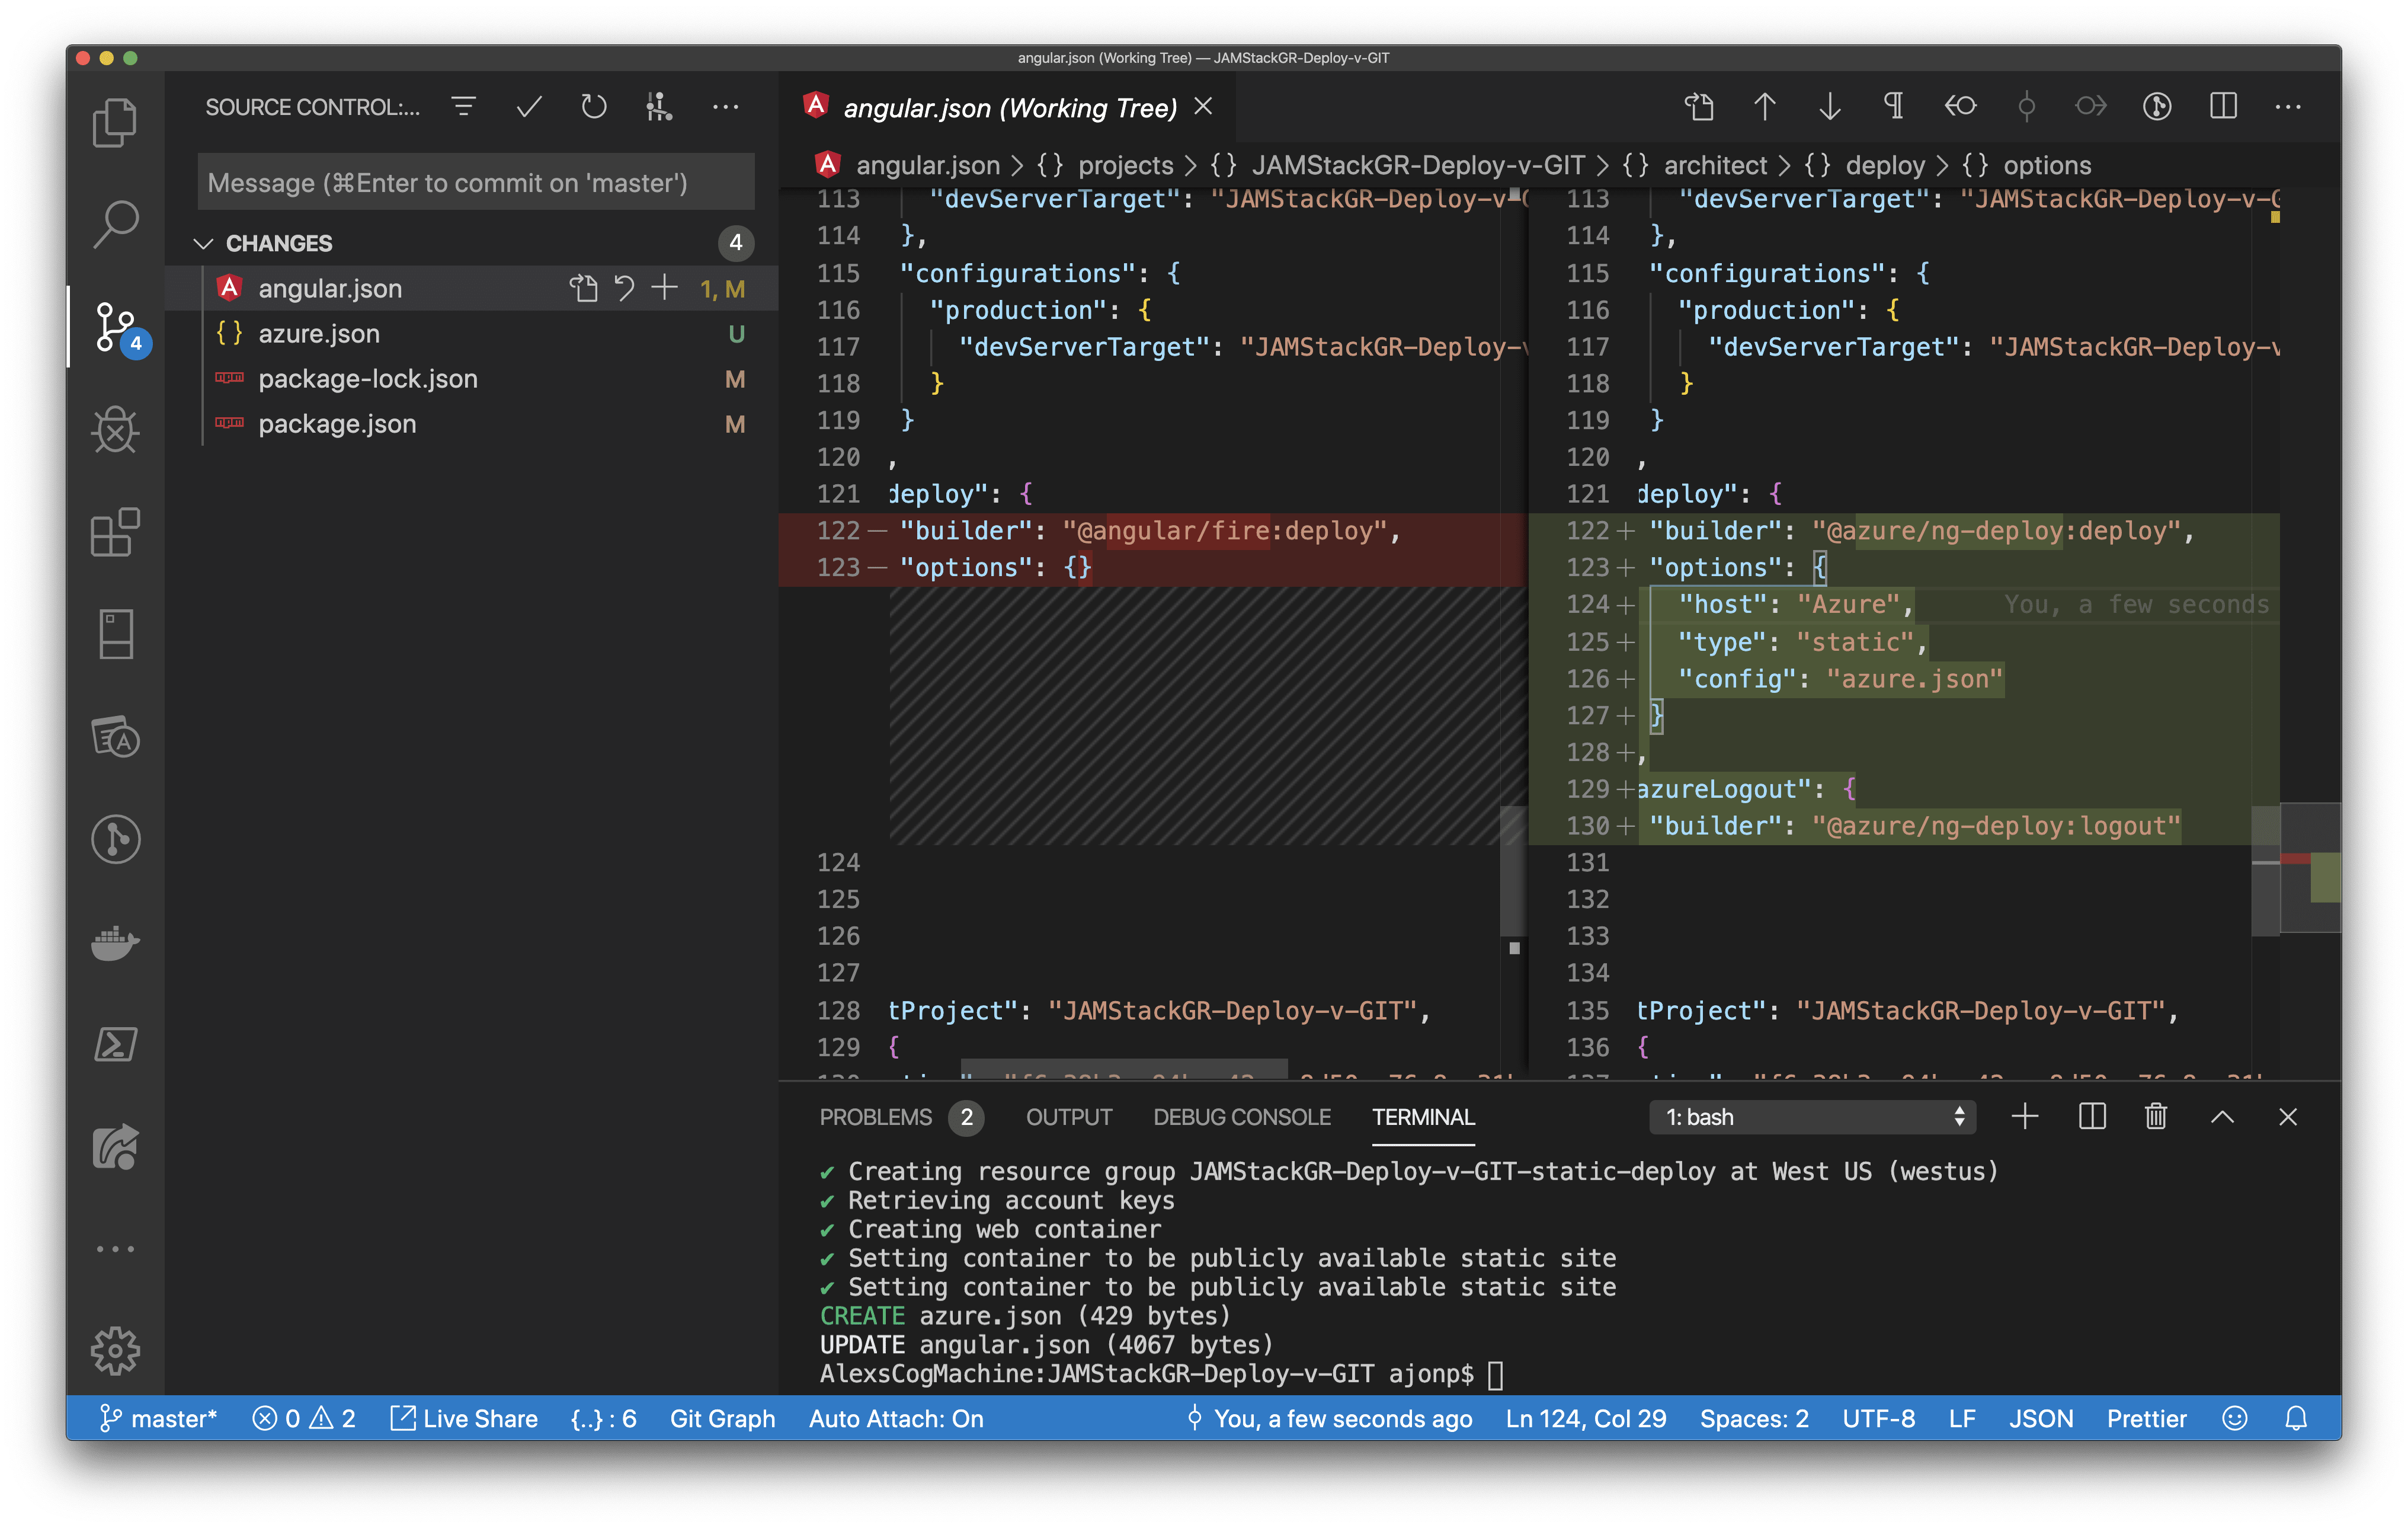
Something interesting that I found during this process is that Angular overwrites the deploy builder command with Azure. This also adds azure.json file.
azure.json
{
  "hosting": [
    {
      "app": {
        "project": "JAMStackGR-Deploy-v-GIT",
        "target": "build",
        "configuration": "production",
        "path": "dist/JAMStackGR-Deploy-v-GIT"
      },
      "azureHosting": {
        "subscription": "ba9a05ba-1cfb-4049-aba4-441f44572434",
        "resourceGroupName": "JAMStackGR-Deploy-v-GIT-static-deploy",
        "account": "jamstackgrdeployvgstatic"
      }
    }
  ]
}
angular.json
"deploy": {
  "builder": "@azure/ng-deploy:deploy",
  "options": {
    "host": "Azure",
    "type": "static",
    "config": "azure.json"
  }
},
"azureLogout": {
  "builder": "@azure/ng-deploy:logout"
}
Run the deploy command for Azure
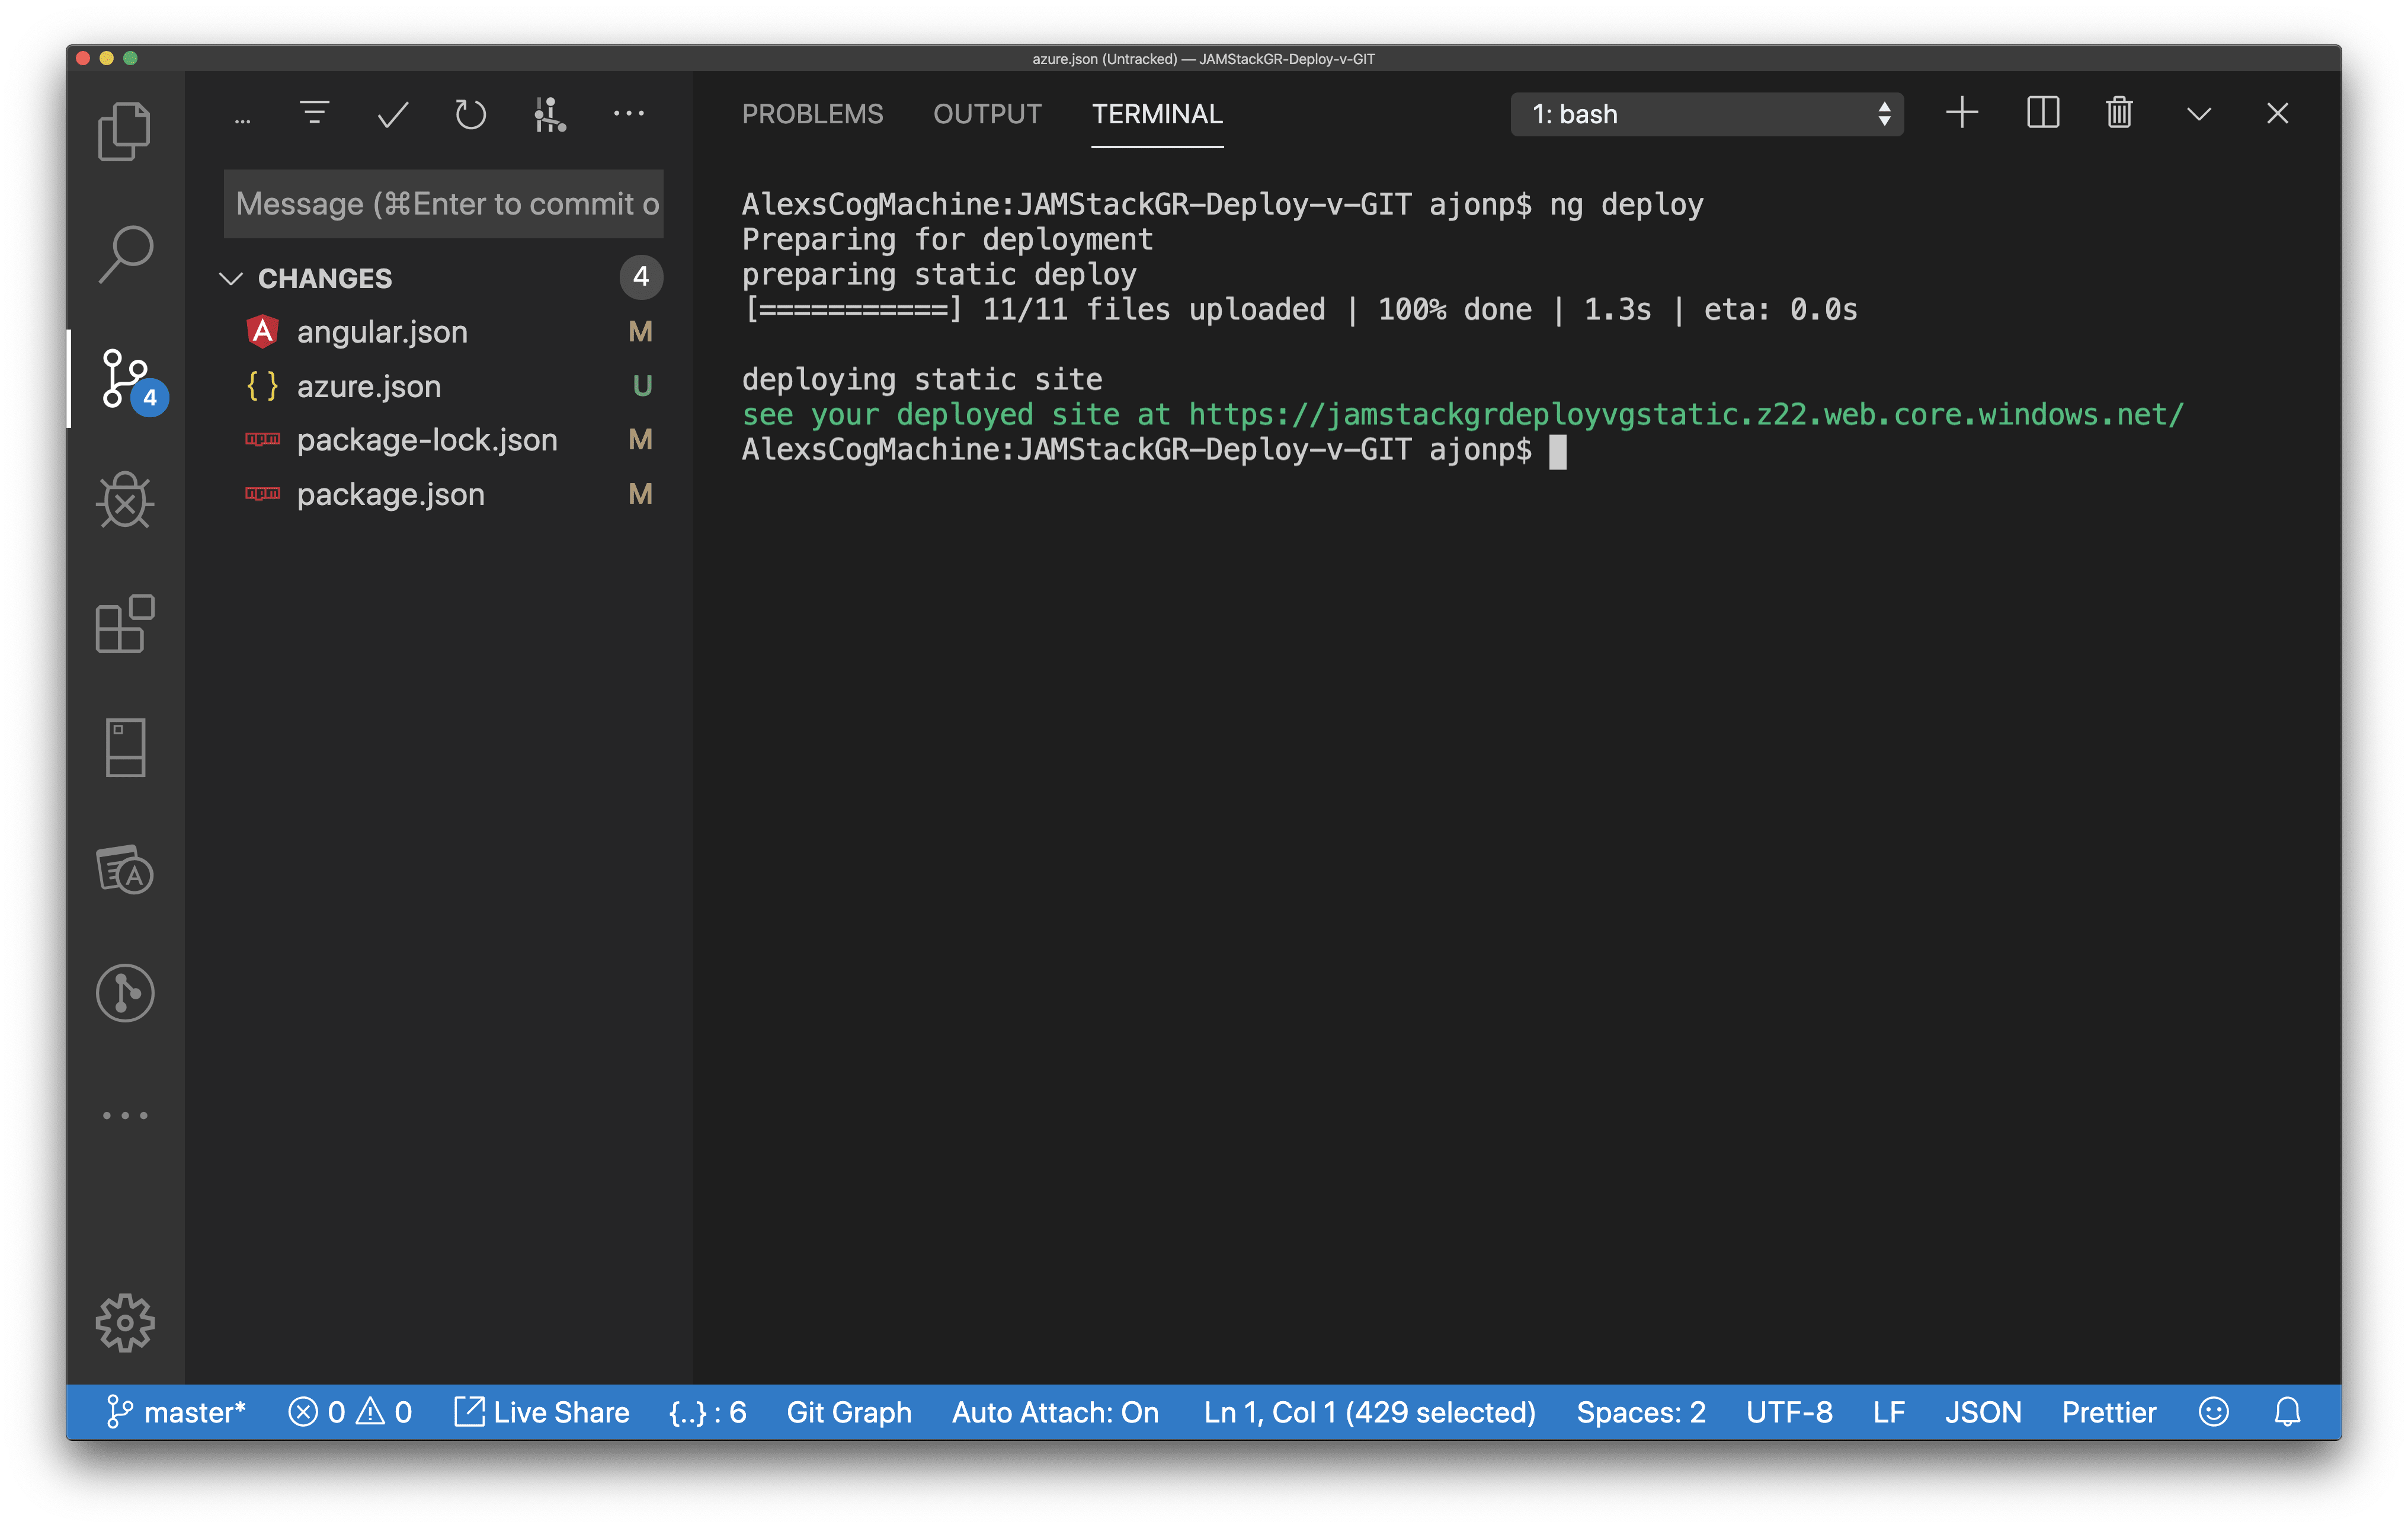
ng deploy
Angular CLI creates a Storage Account and Resource Group Automatically as you can see from the above azure.json.
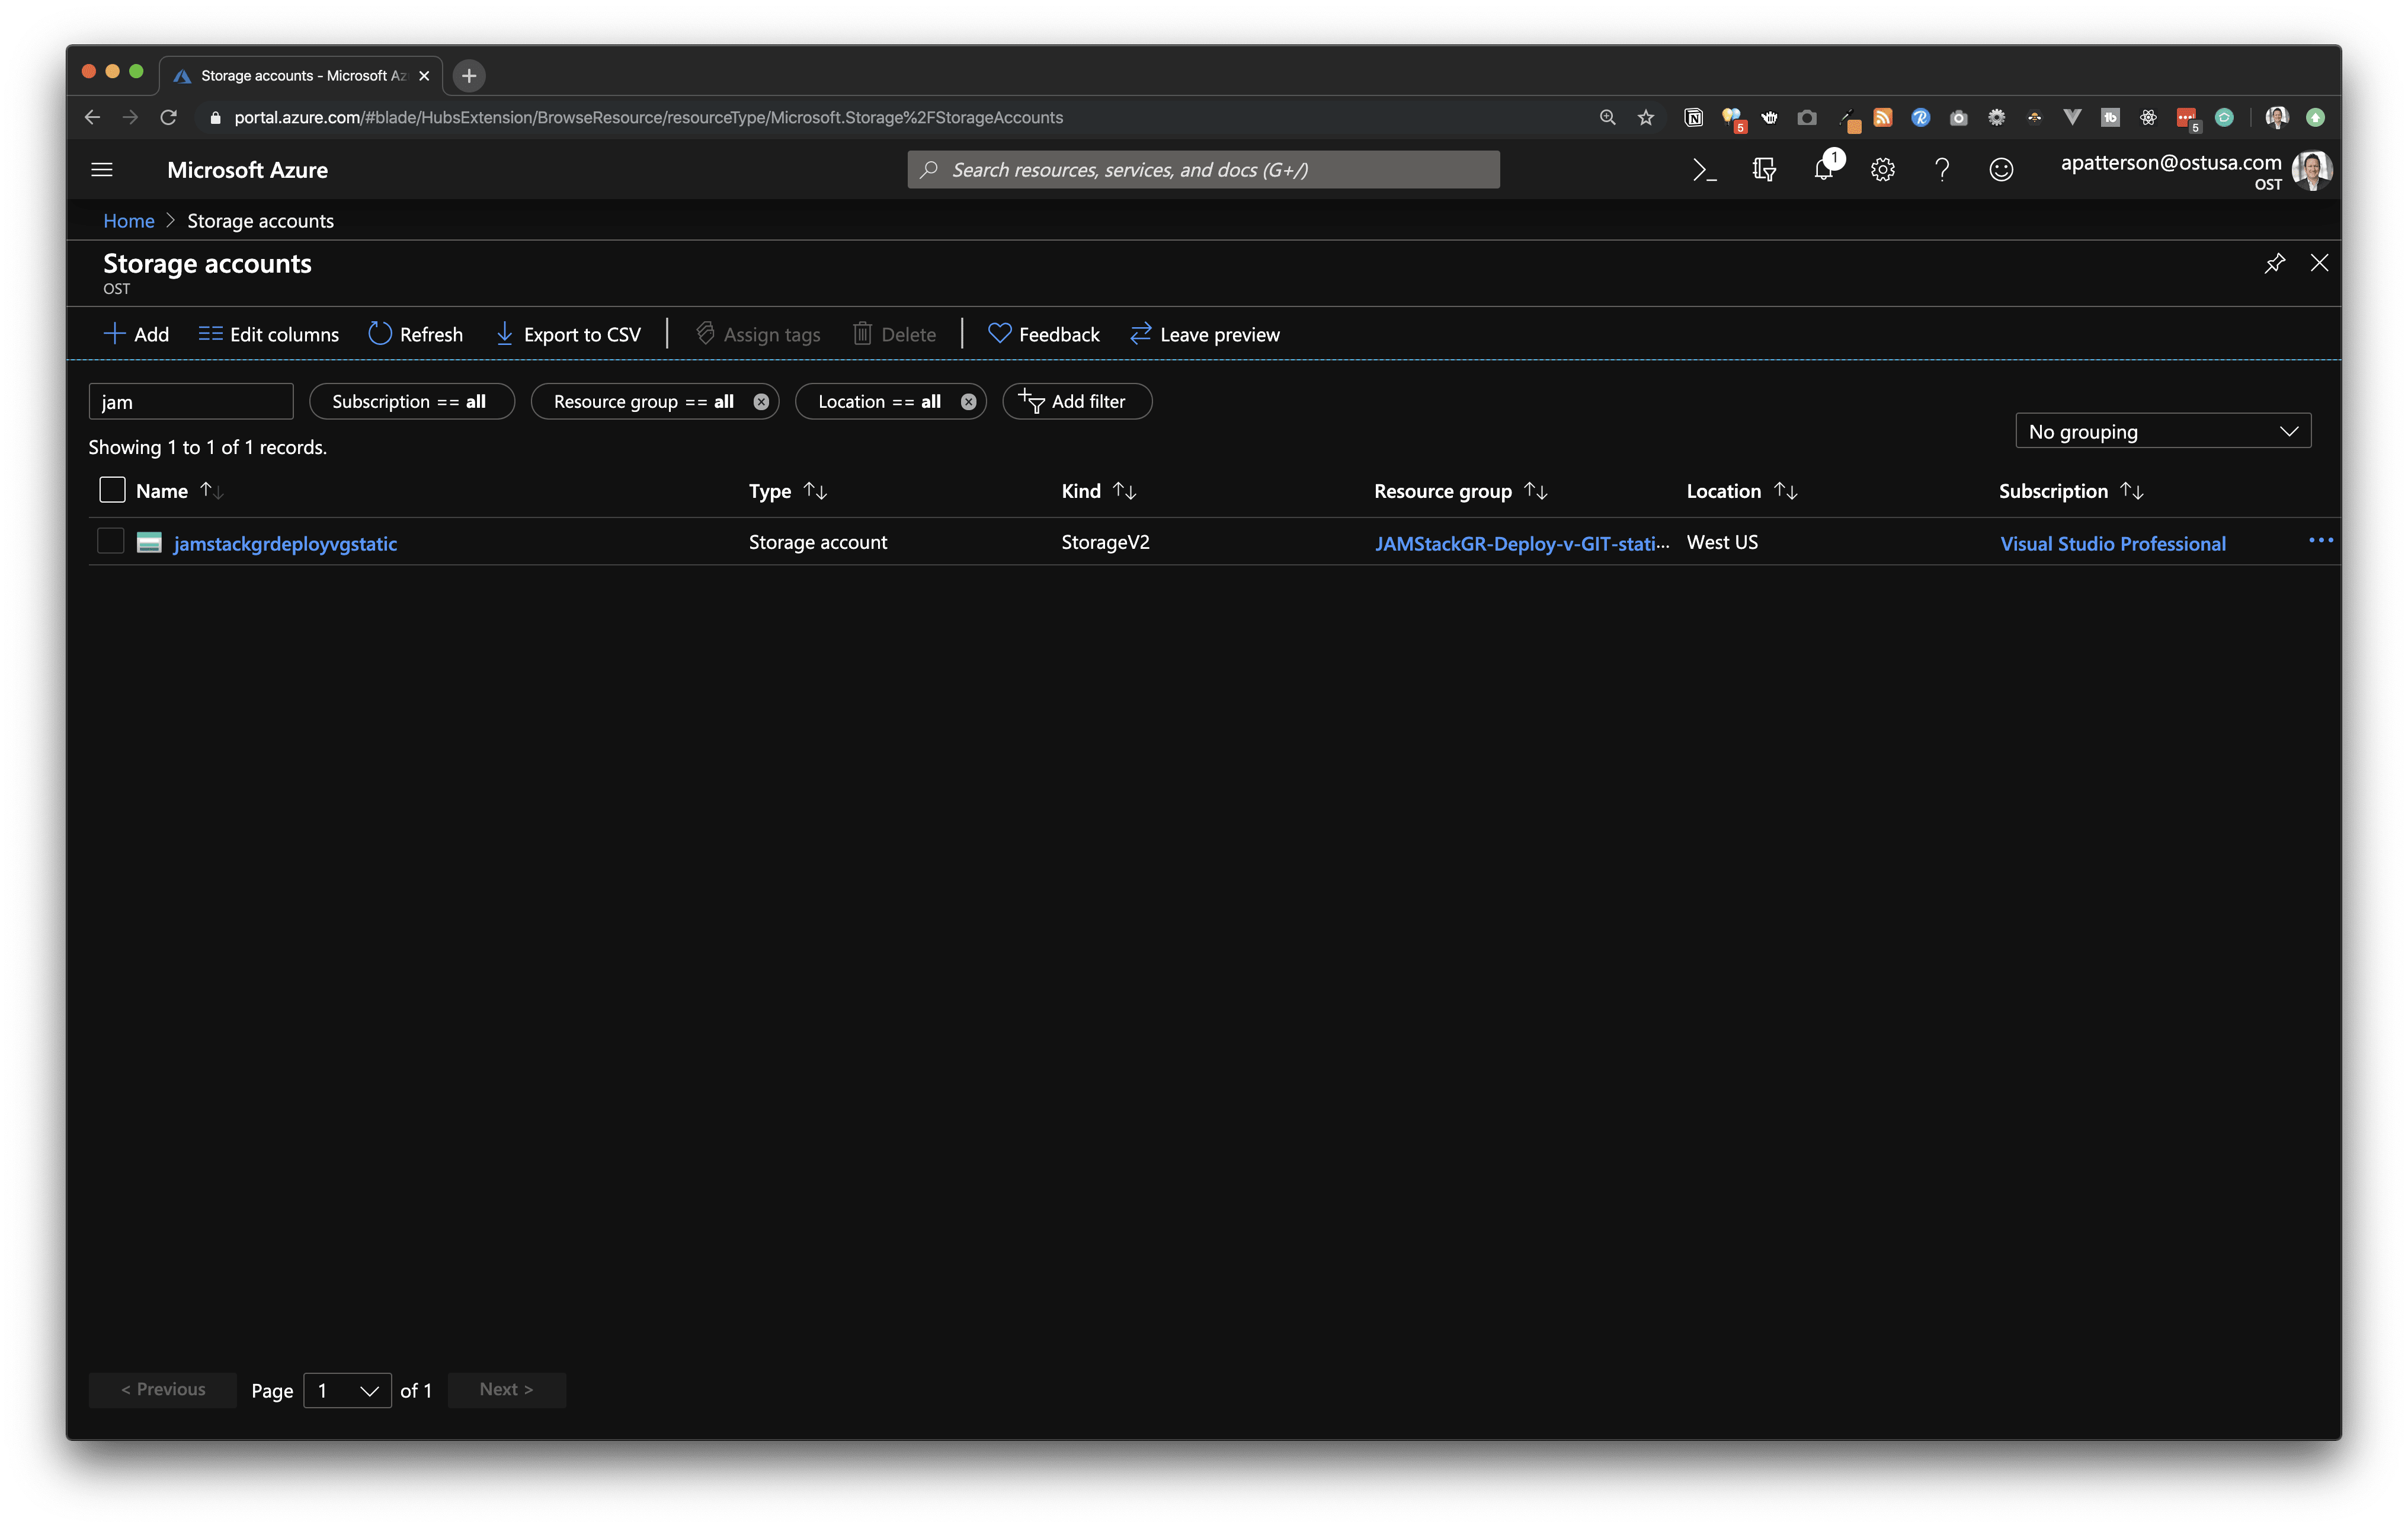
If your unfamiliar with Azure Storage accounts you can think of them as a container to put just about anything you need to store. Items like blobs, file shares, tables, and queues. For this deploy a Blob Container is used.
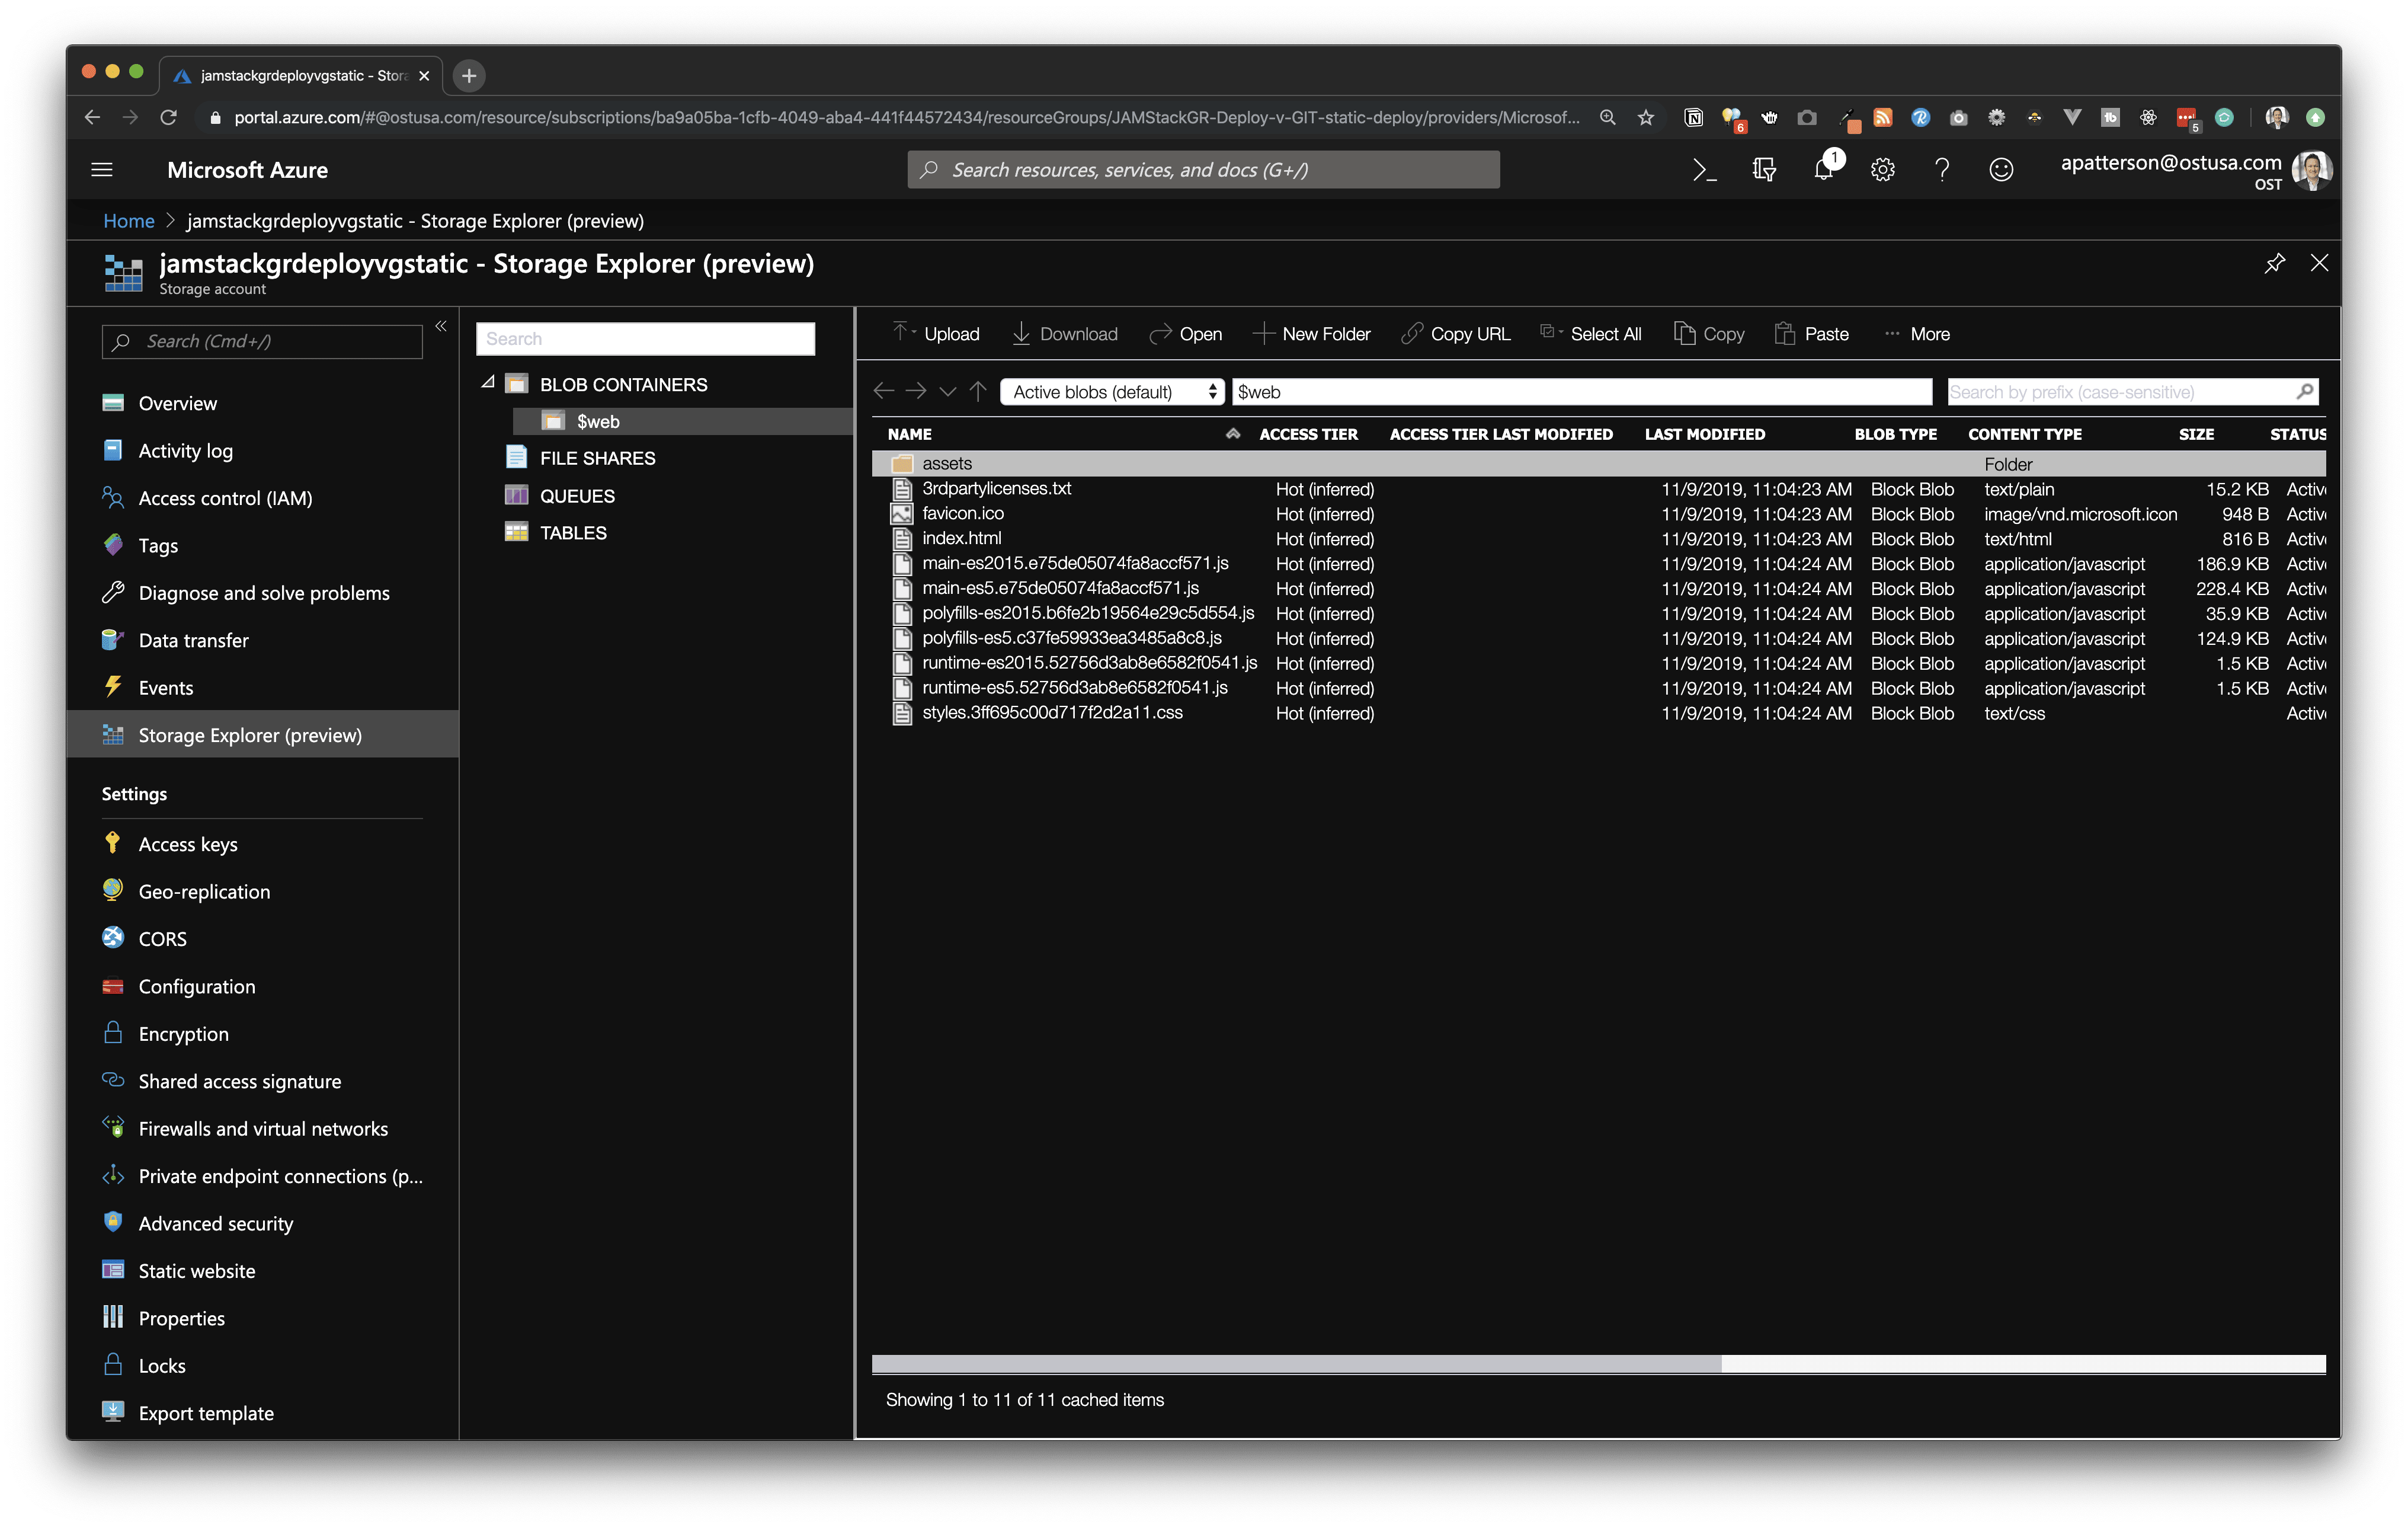
Now in order to access that container a static site is also created. This can be though of as the equivalent to running lite-server locally. It is pointed at index.html.
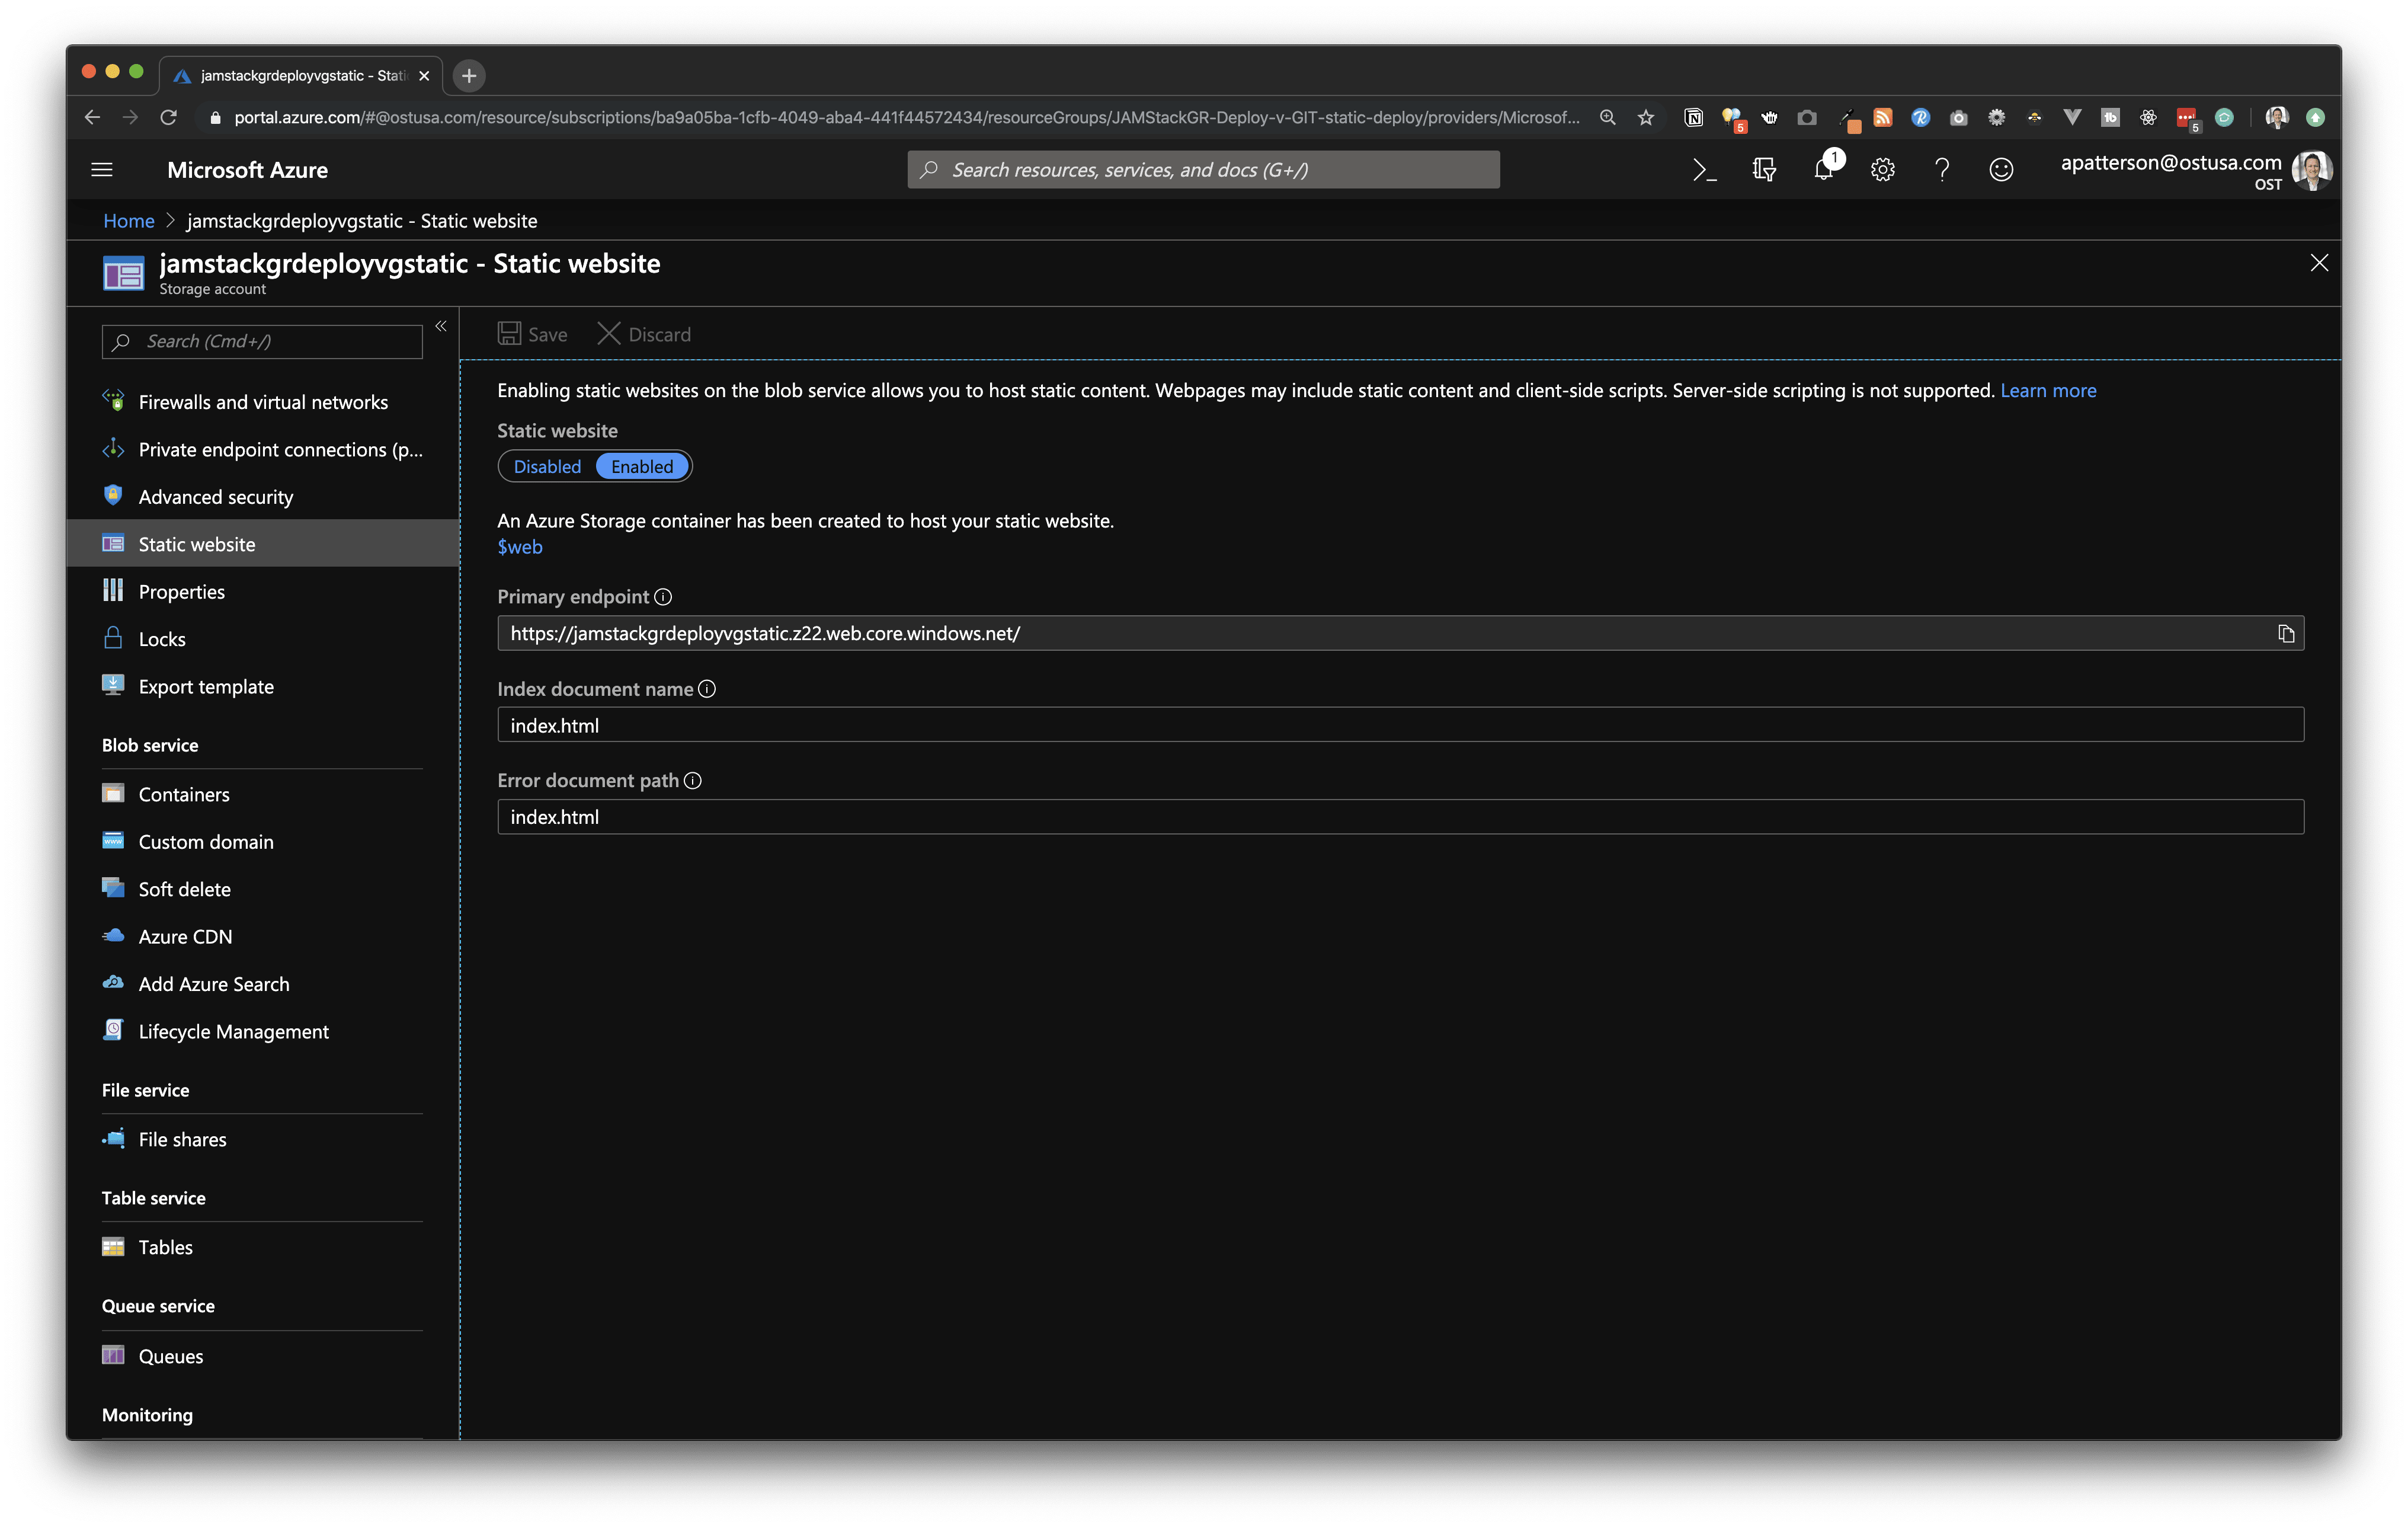
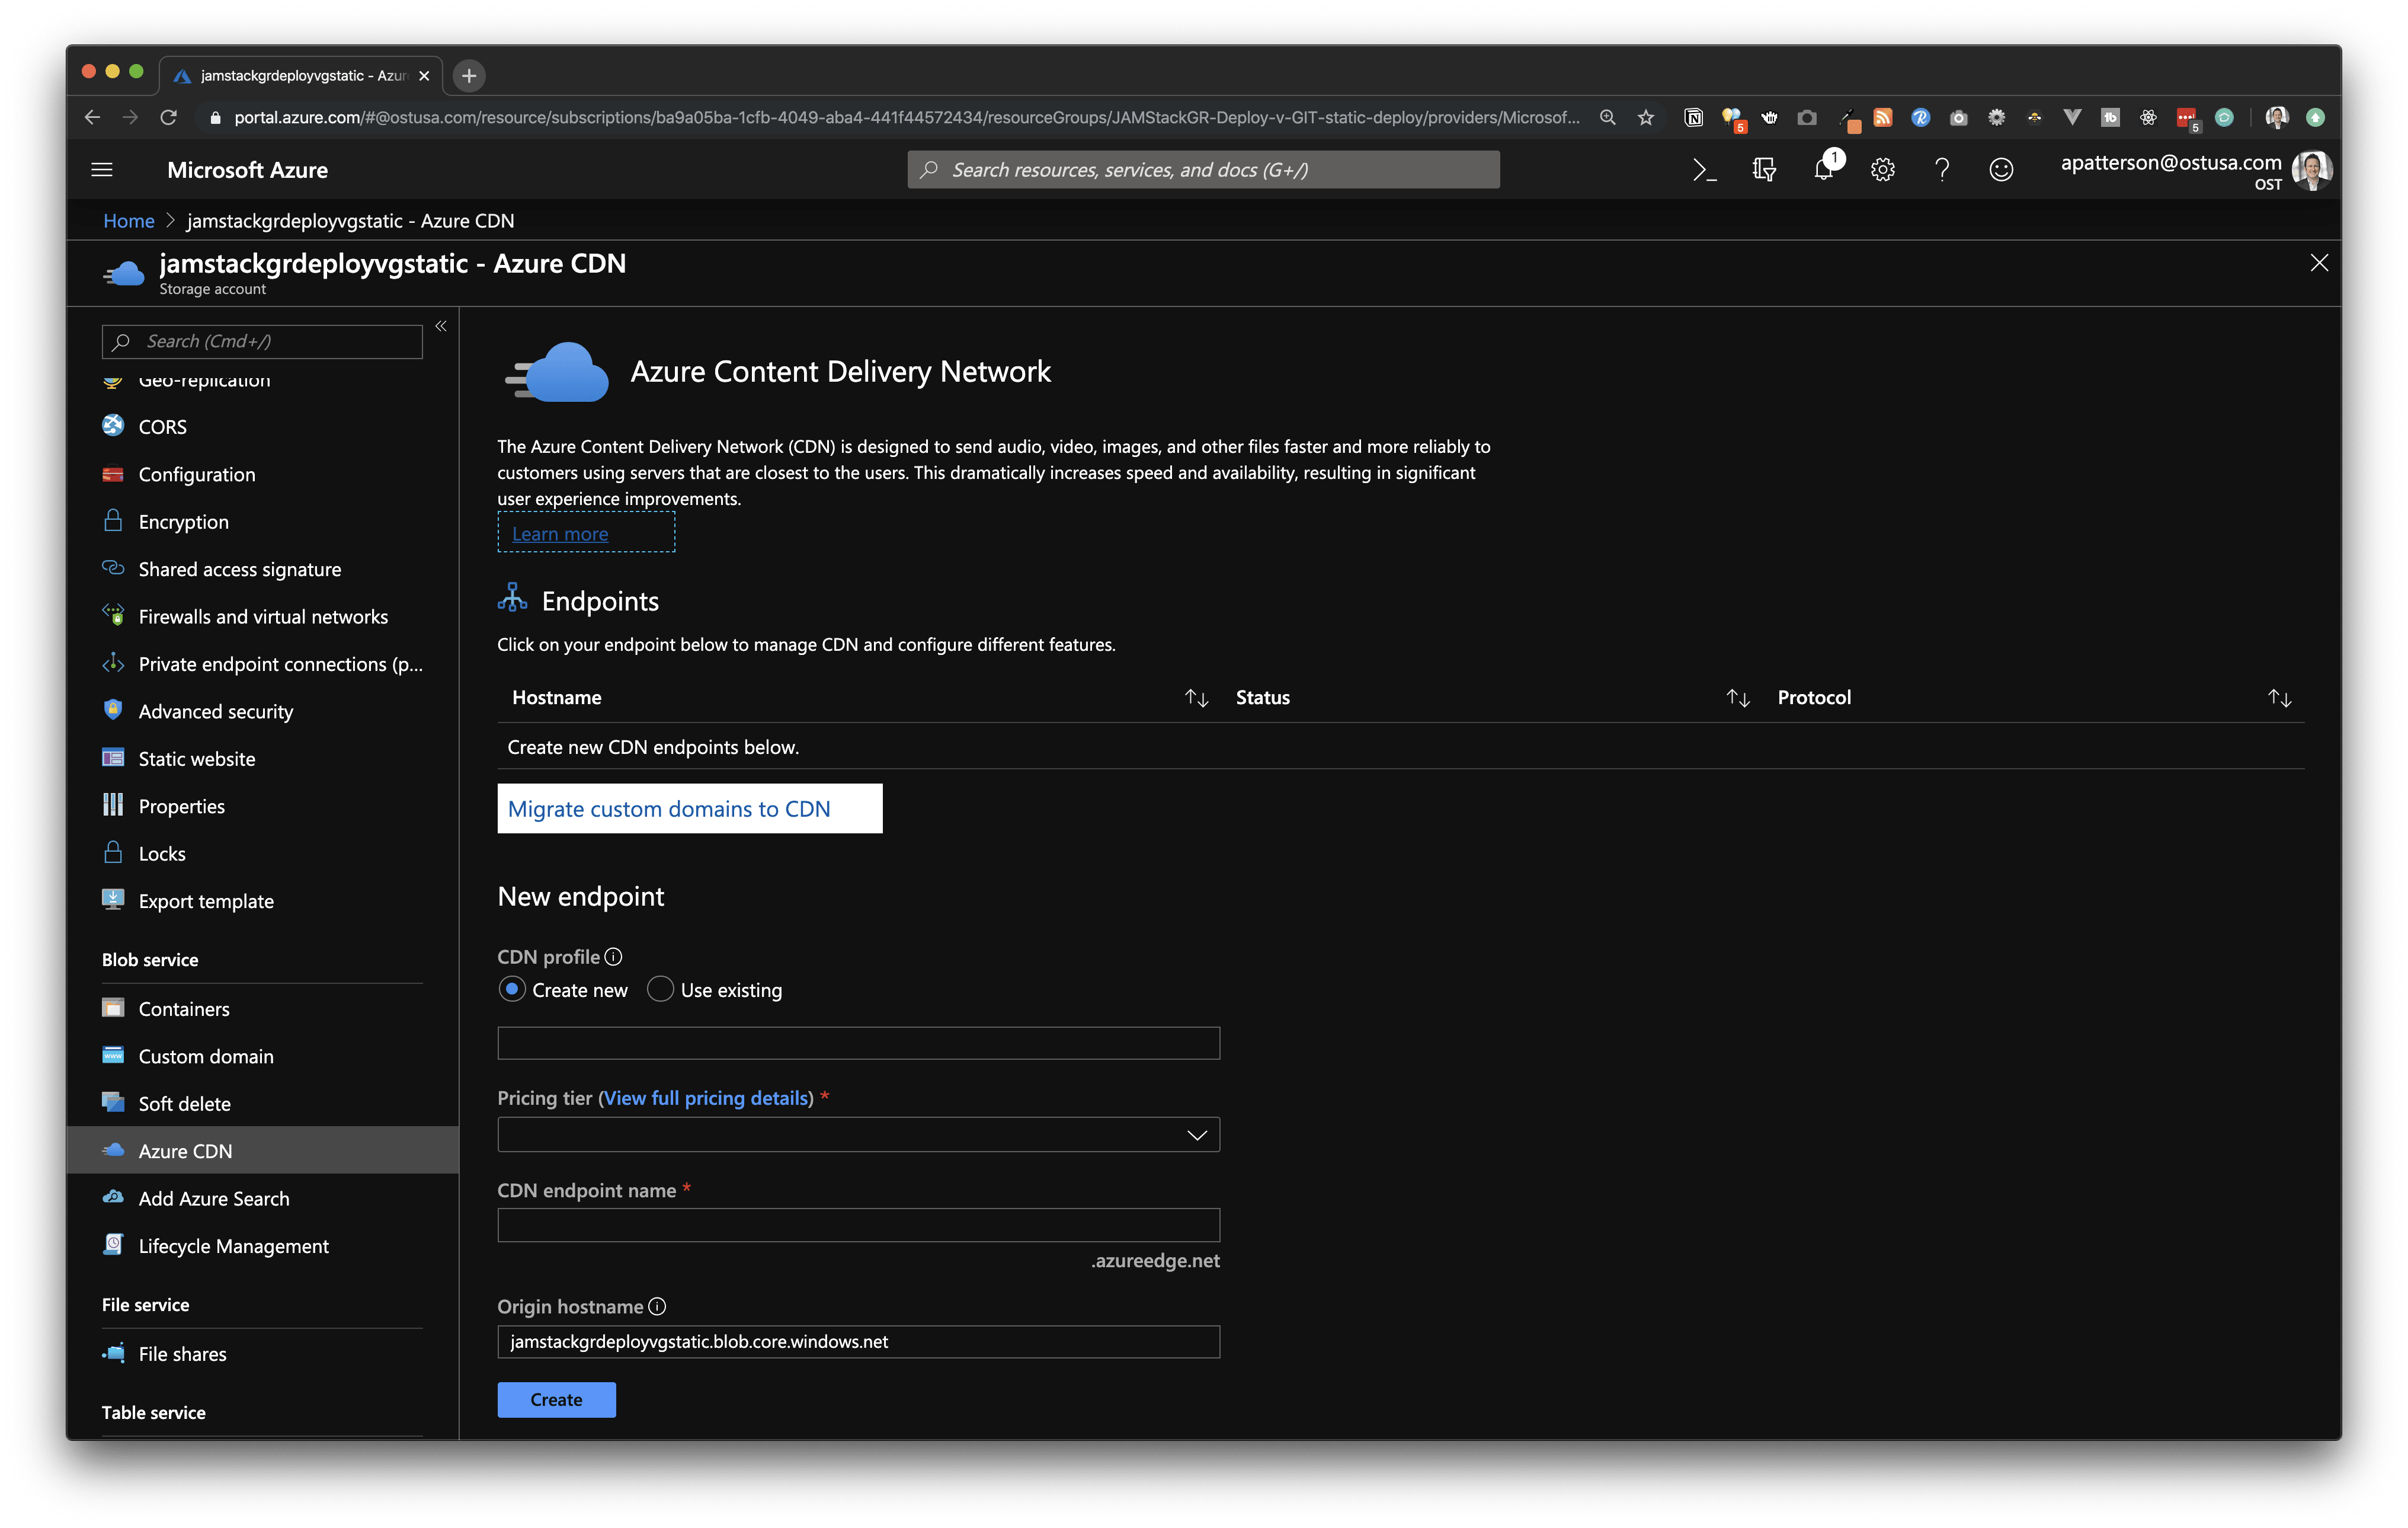
I haven’t confirmed this yet but it appears that you DO NOT get a full CDN from this deployment. You would have to configure this yourself under the Azure CDN option.
Demo site: https://jamstackgrdeployvgstatic.z22.web.core.windows.net/
Zeit Now Hosting
Zeit does not need an account created prior to deploying, you will need access to an email that you will provide to verify login.
Run the below commands
ng add @zeit/ng-deploy
This has added the correct npm packages for deploy "@zeit/ng-deploy": "^0.3.0",
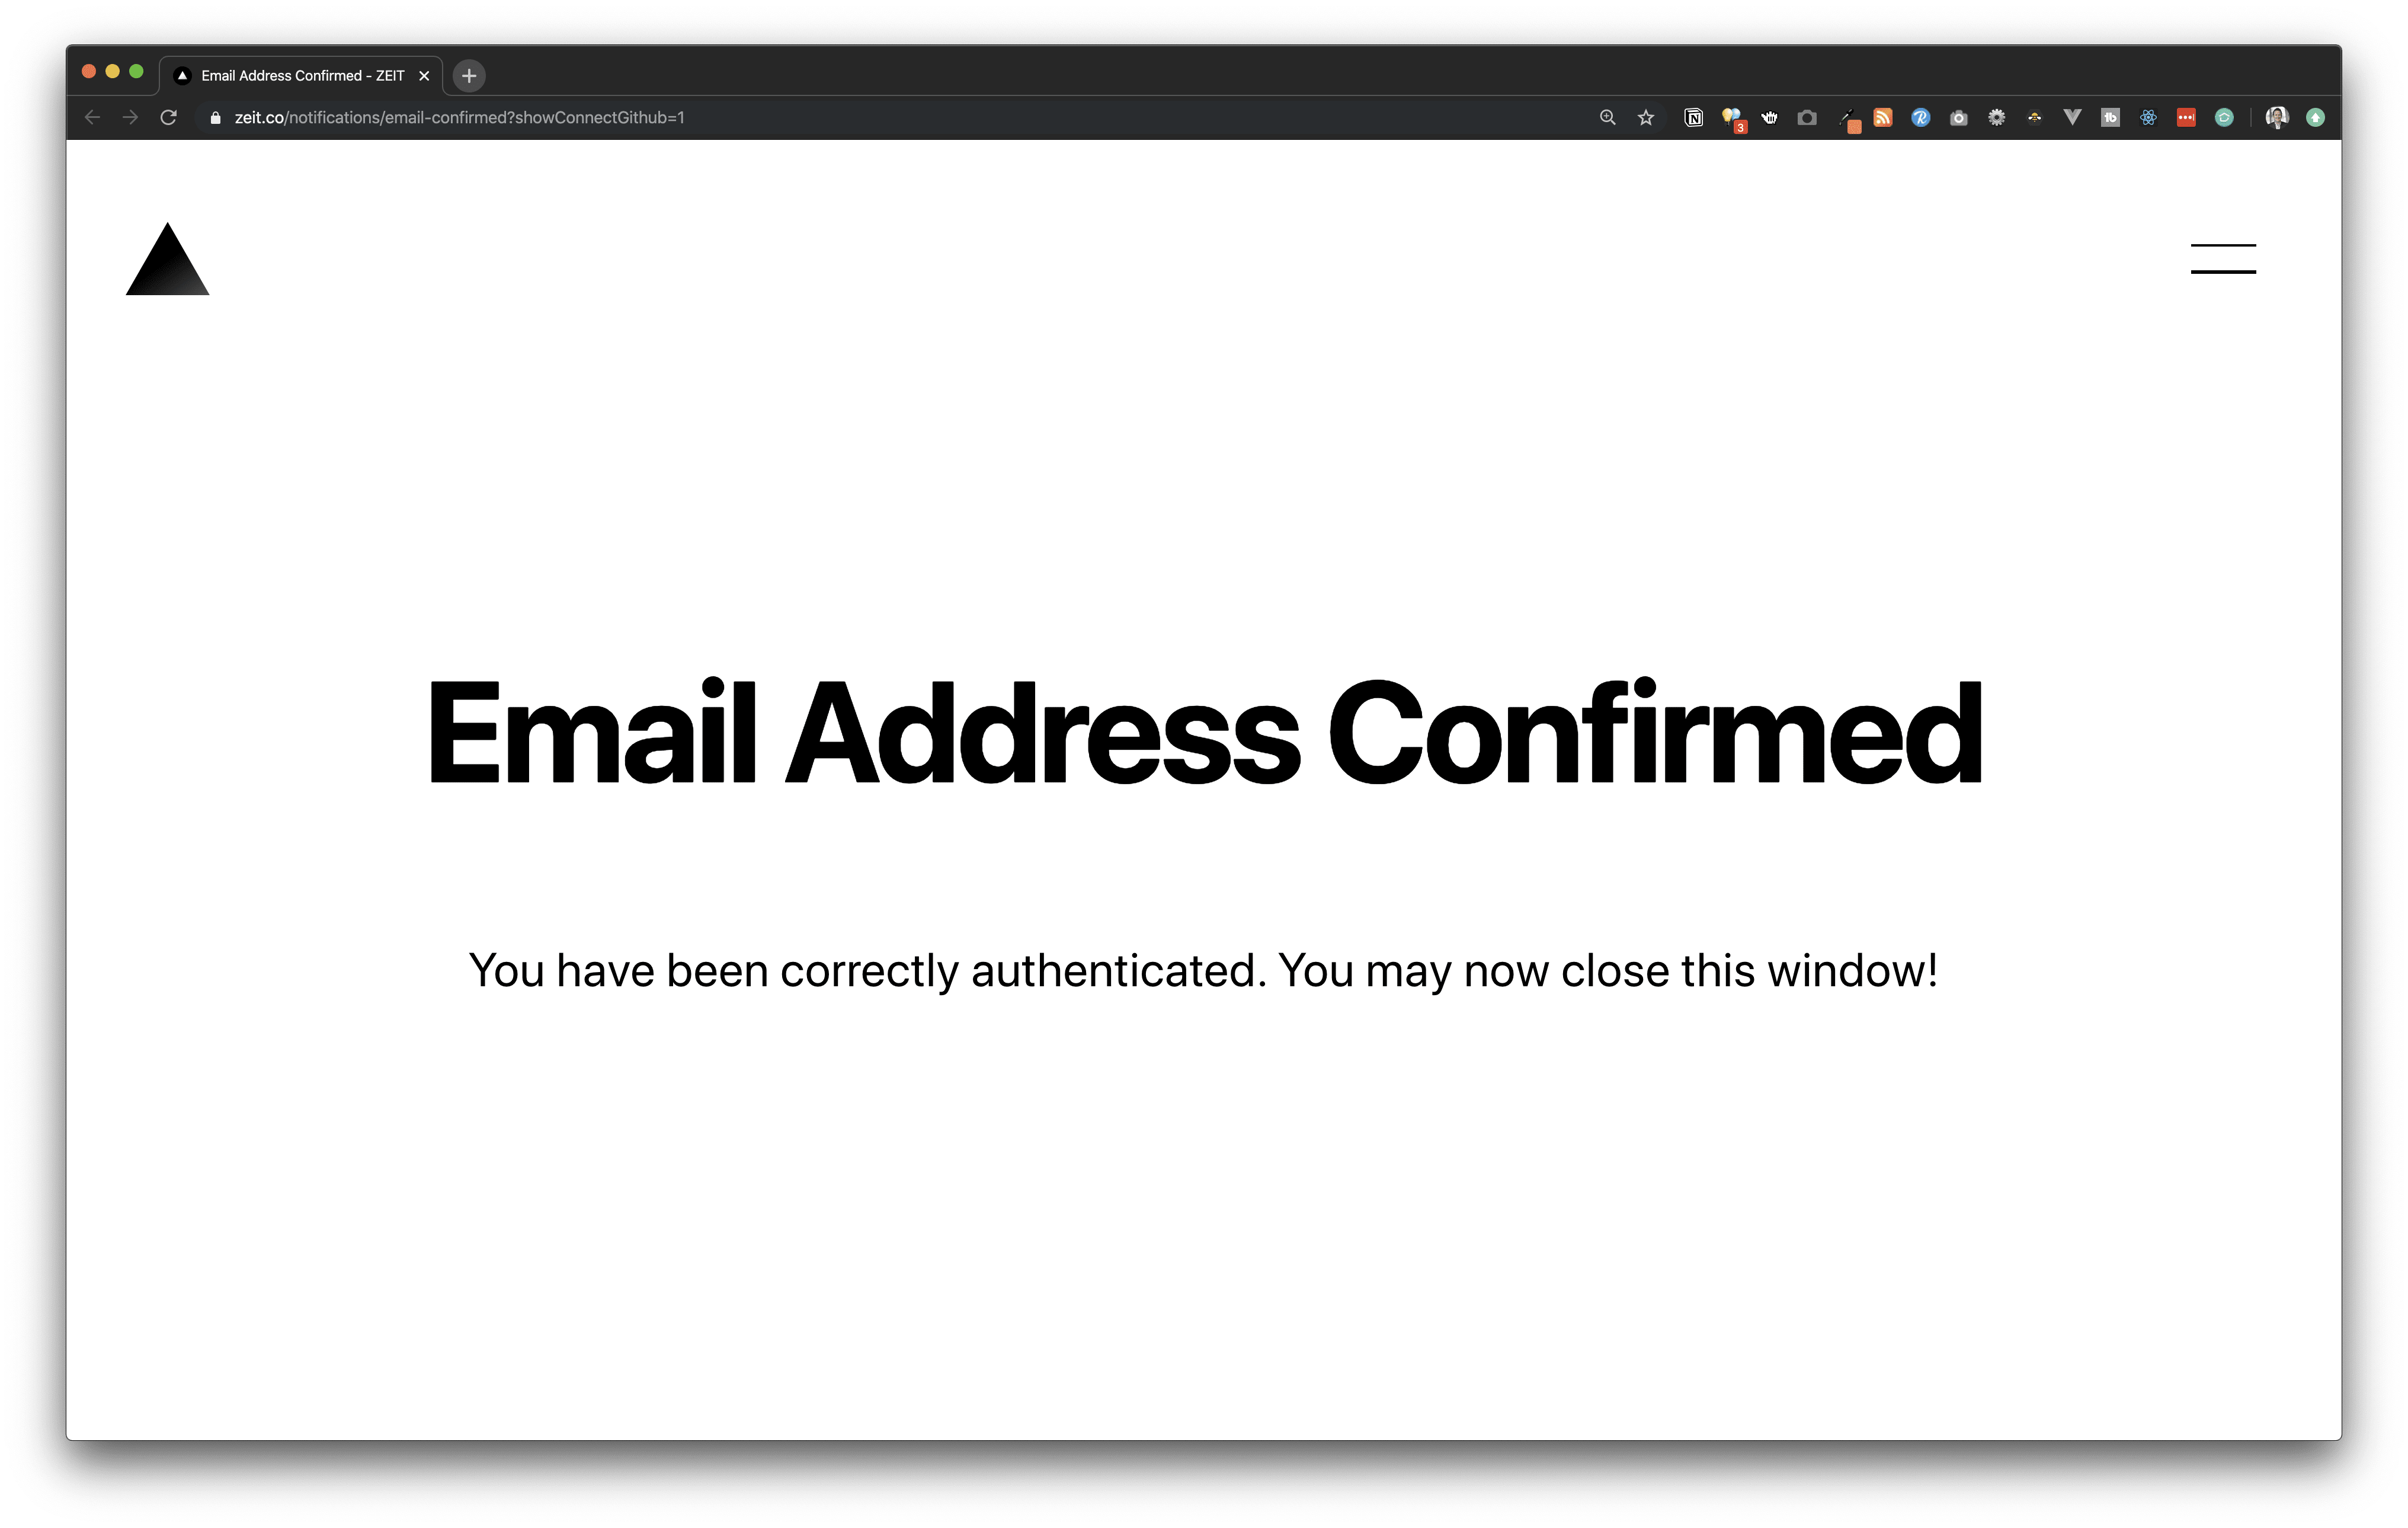
Instead of using a browser Zeit uses an email flow for login (well technically a browser as well). So you click a magic link like below to start the login flow.

Once you select the link this will verify your email address and finish the setup.
Deploy the site to Zeit Now hosting, using the command below.
ng deploy
If you see an error similar to below

You will need to install now-client manually, then try the deploy command again like below.
```plain text npm i now-client@5.2.1 && ng deploy
> I have raised an issue about this and it might be resolved later [https://github.com/zeit/ng-deploy-now/issues/7](https://github.com/zeit/ng-deploy-now/issues/7)

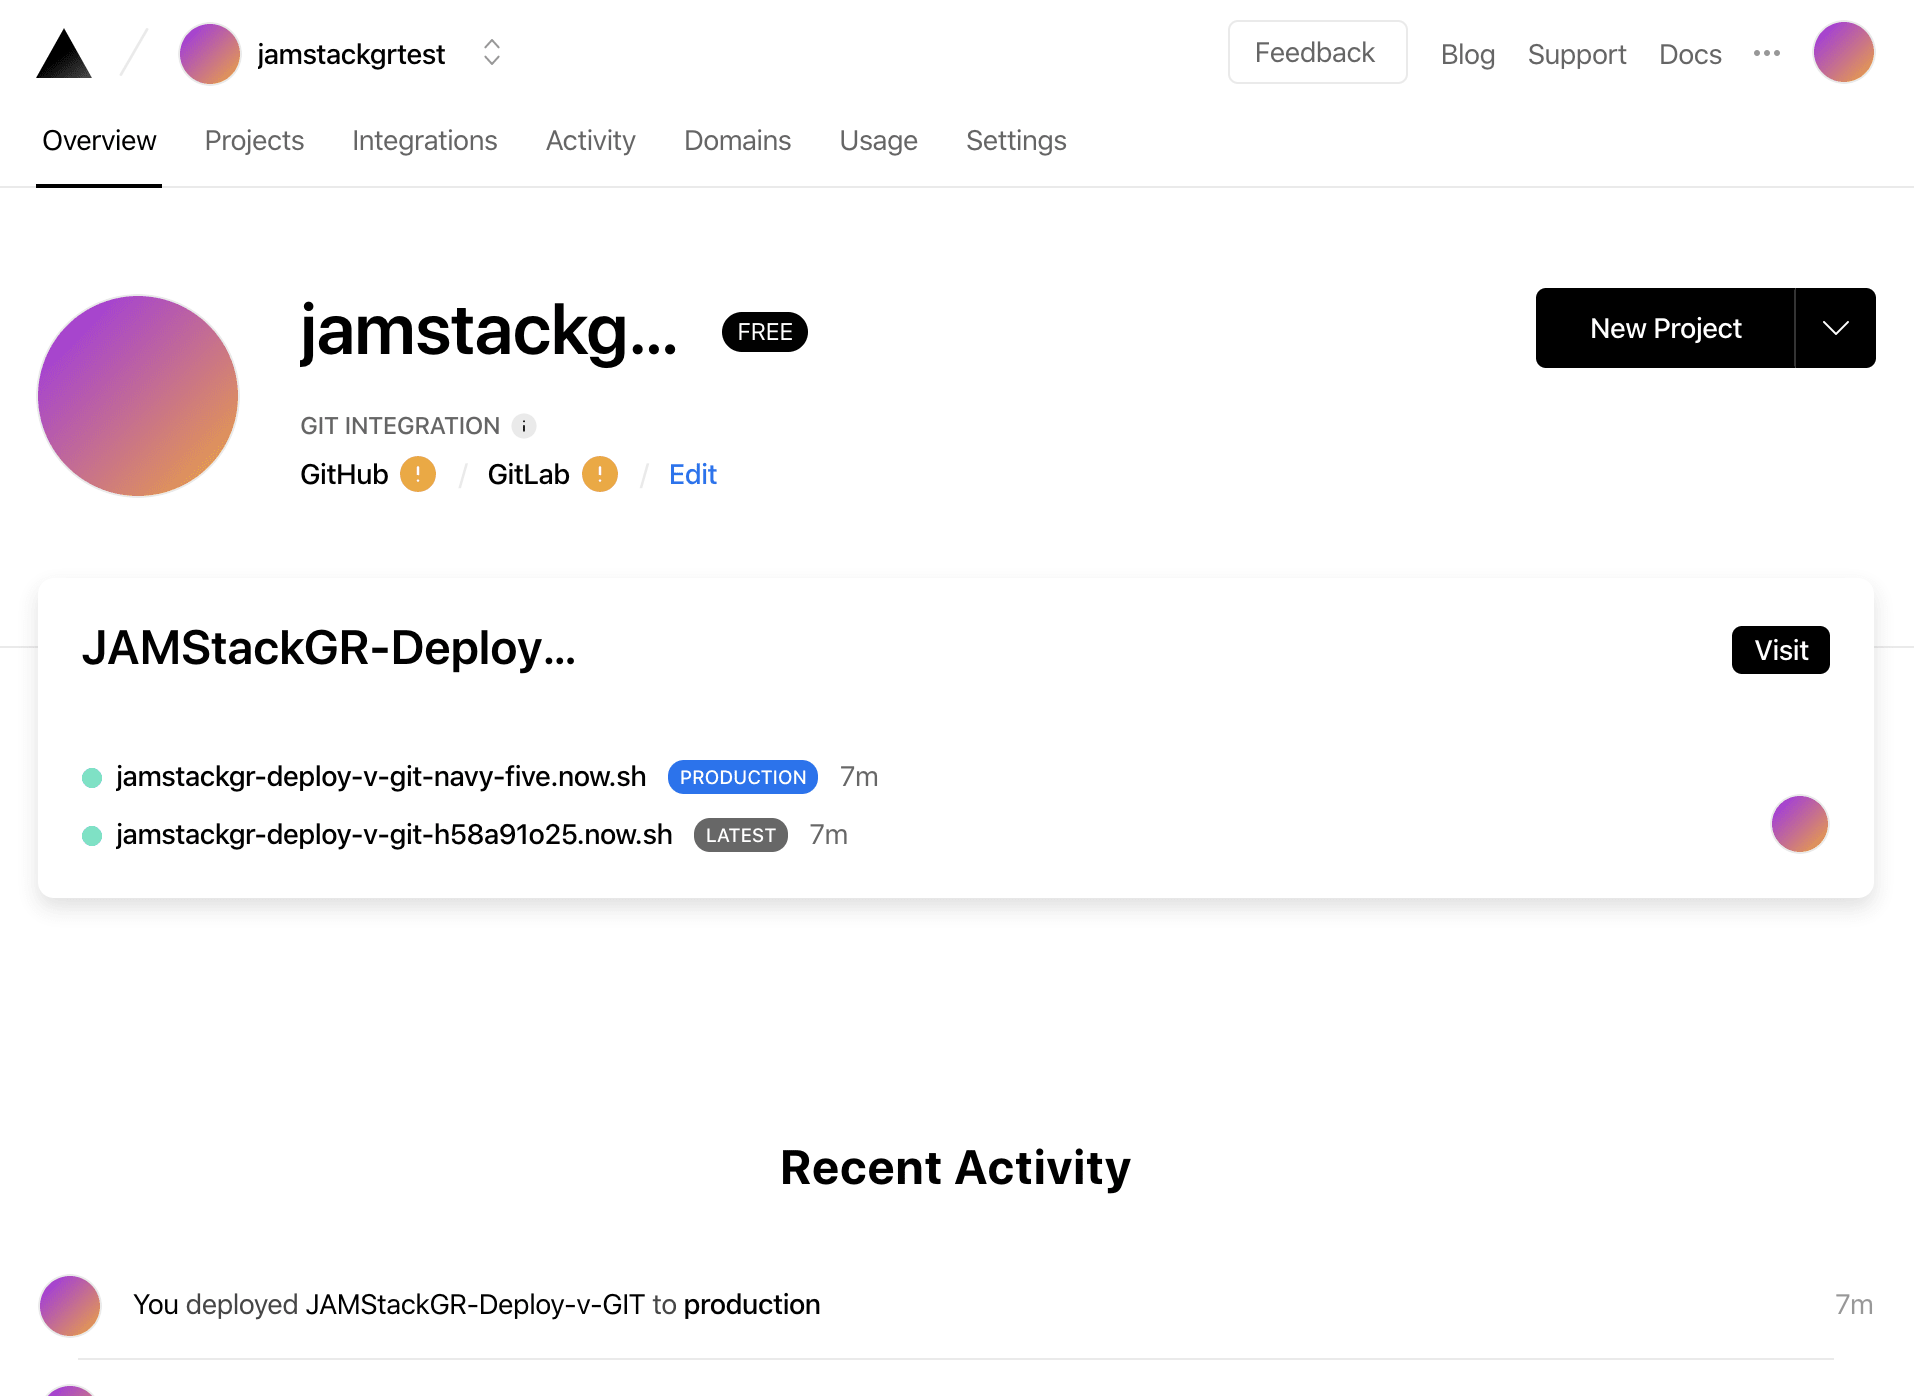
If you visit this base directory you will see your project listings just like in the dist folder, you can update your angular builders to update how you would like this handled (for instance just pushing your main project with index.html).
Below you will find the deploy activity to your account.
## Netlify
> For Netlify you will need to setup an account ahead of running this command. They accept GitHub, GitLab, Bitbucket or Email. You will also need to create a site so that you can get an API key.
Run the below command
**`ng add @netlify-builder/deploy`**
You will then be asked for the API Key of your site.

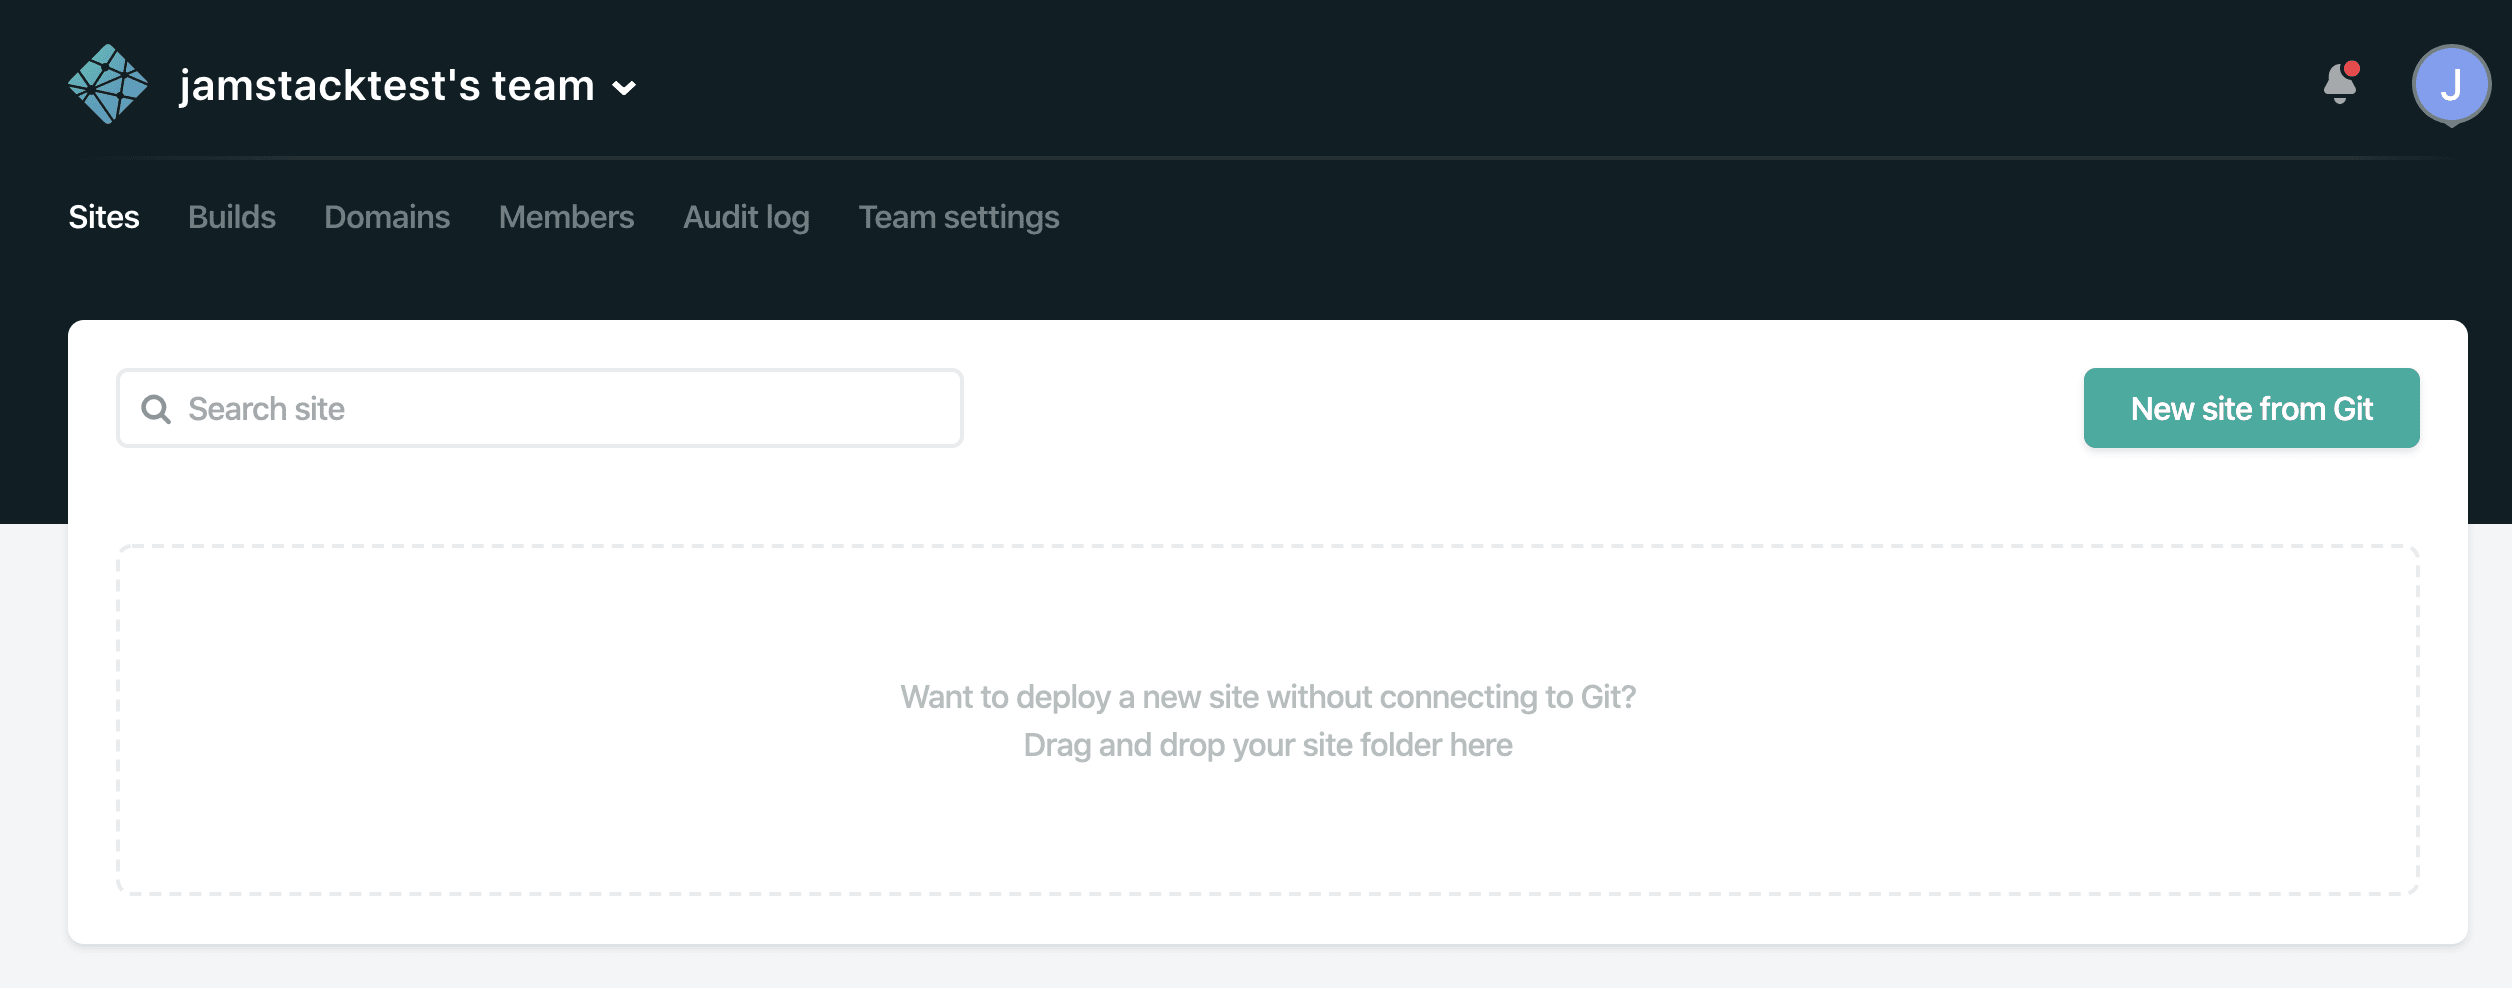
Login to Netlify with one of the above methods, if this is your first time you will see a page like below where you can create a new site. Netlify tries to keep you in the Git methodology but you can create a site without connecting a Git repo. For this drop our dist folder out here. Yes this seems odd as we are really trying to use the CLI to deploy (well I agree). However, because they require a folder with an index file this seems easiest for now. If you have not run that command yet (or deleted the folder) just run `ng build --prod`.
Once this happens you will have a new site created and already deployed, with a auto generated name associated to a new netlify URI.
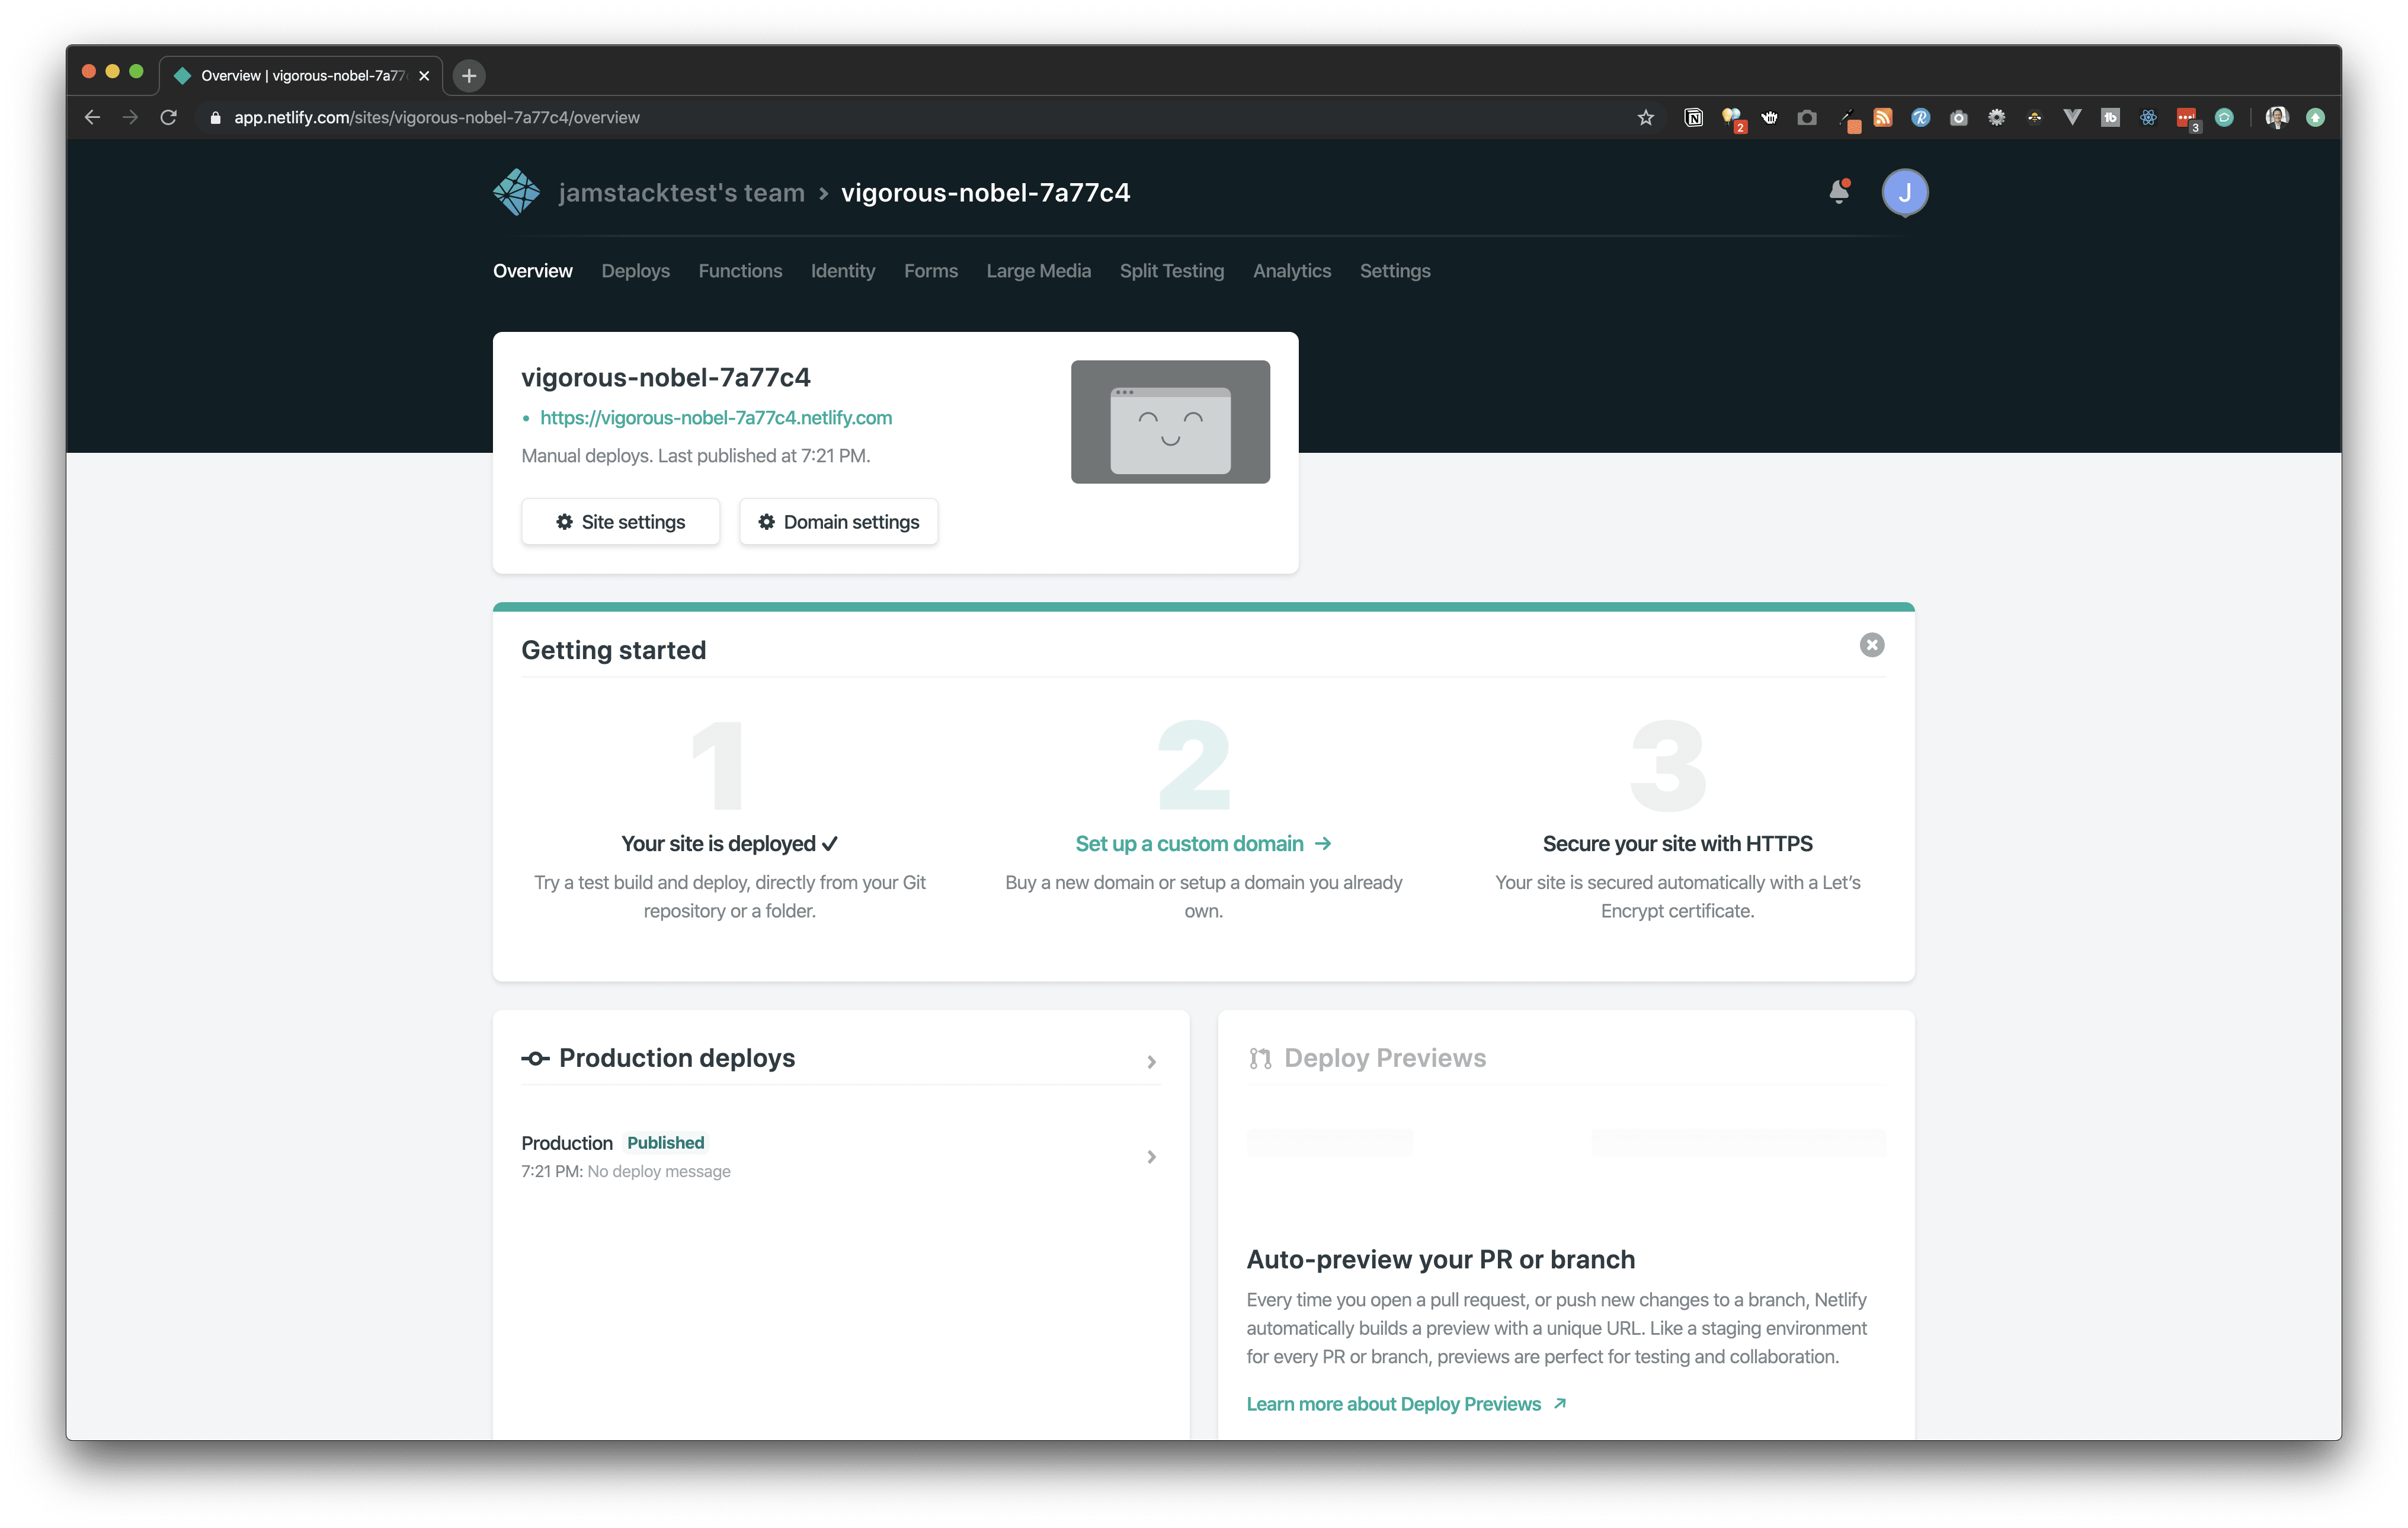
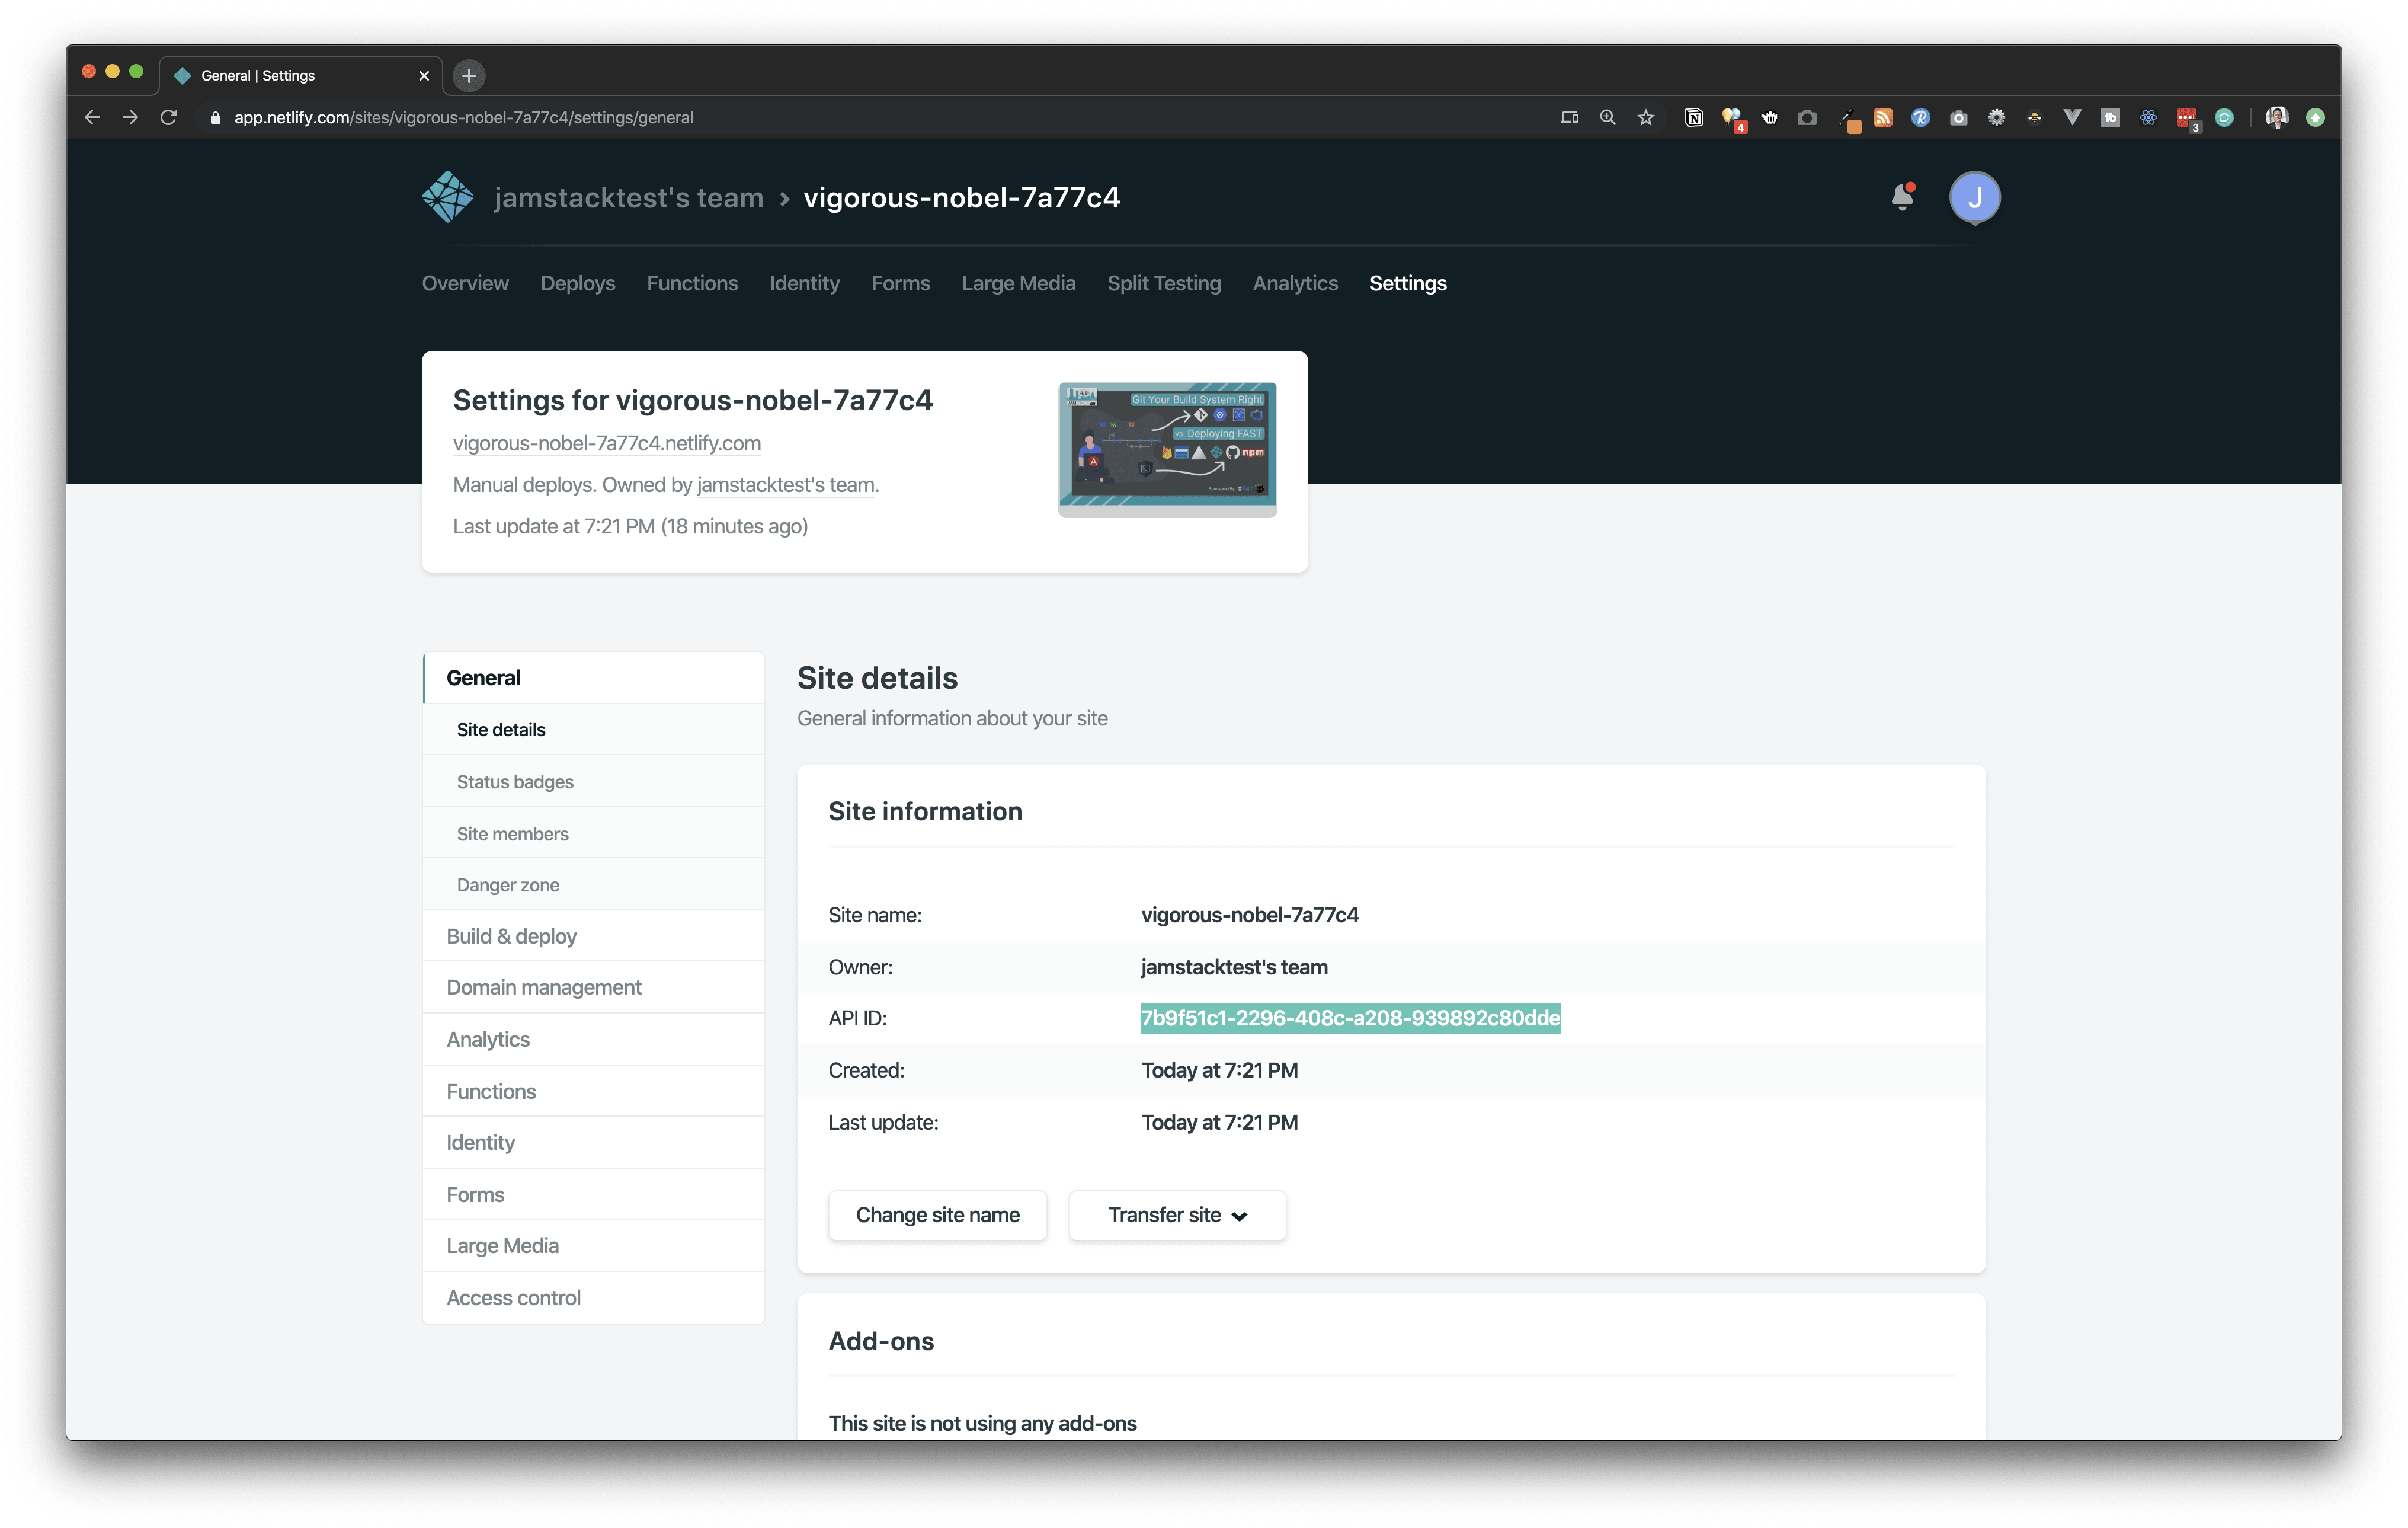
Now technically you could stop here and your site would be fully published, but the idea behind this is to setup a way to quickly deploy any changes. So now we can get back to the CLI questions. In this example we now provide the API ID into the CLI, don't confuse this with the Site Name. This can be found under settings->general, our example would be `7b9f51c1-2296-408c-a208-939892c80dde`
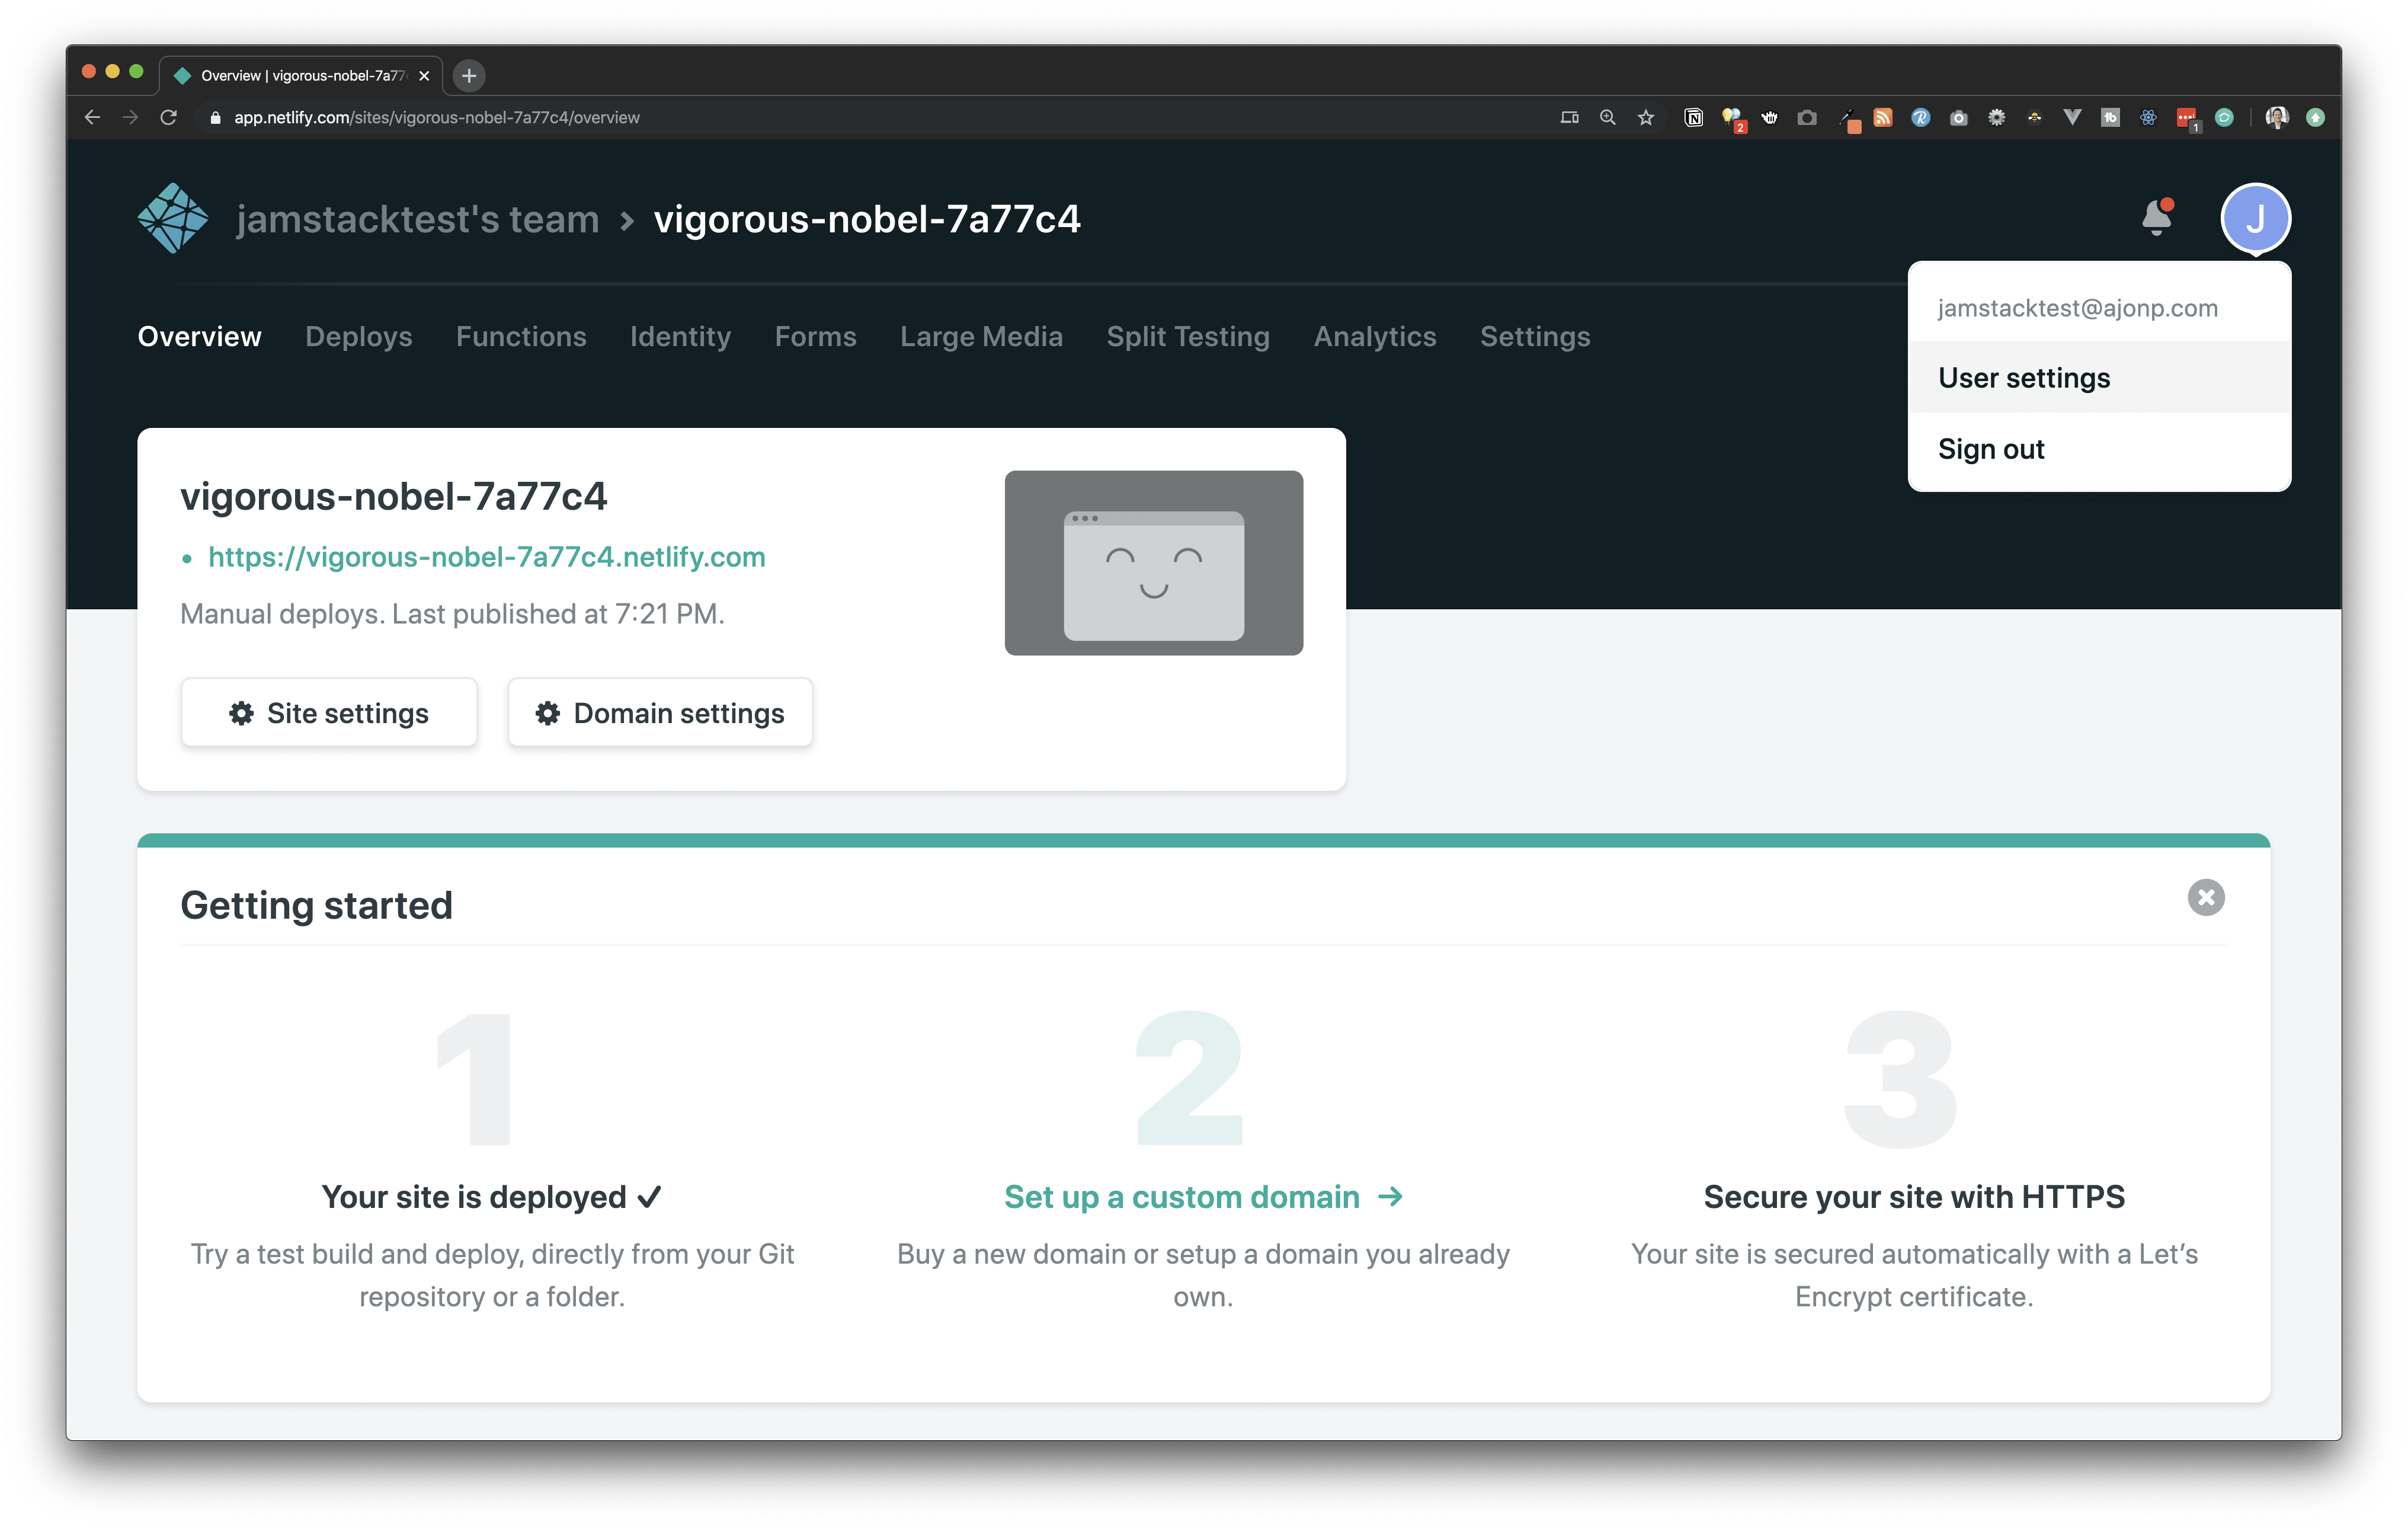
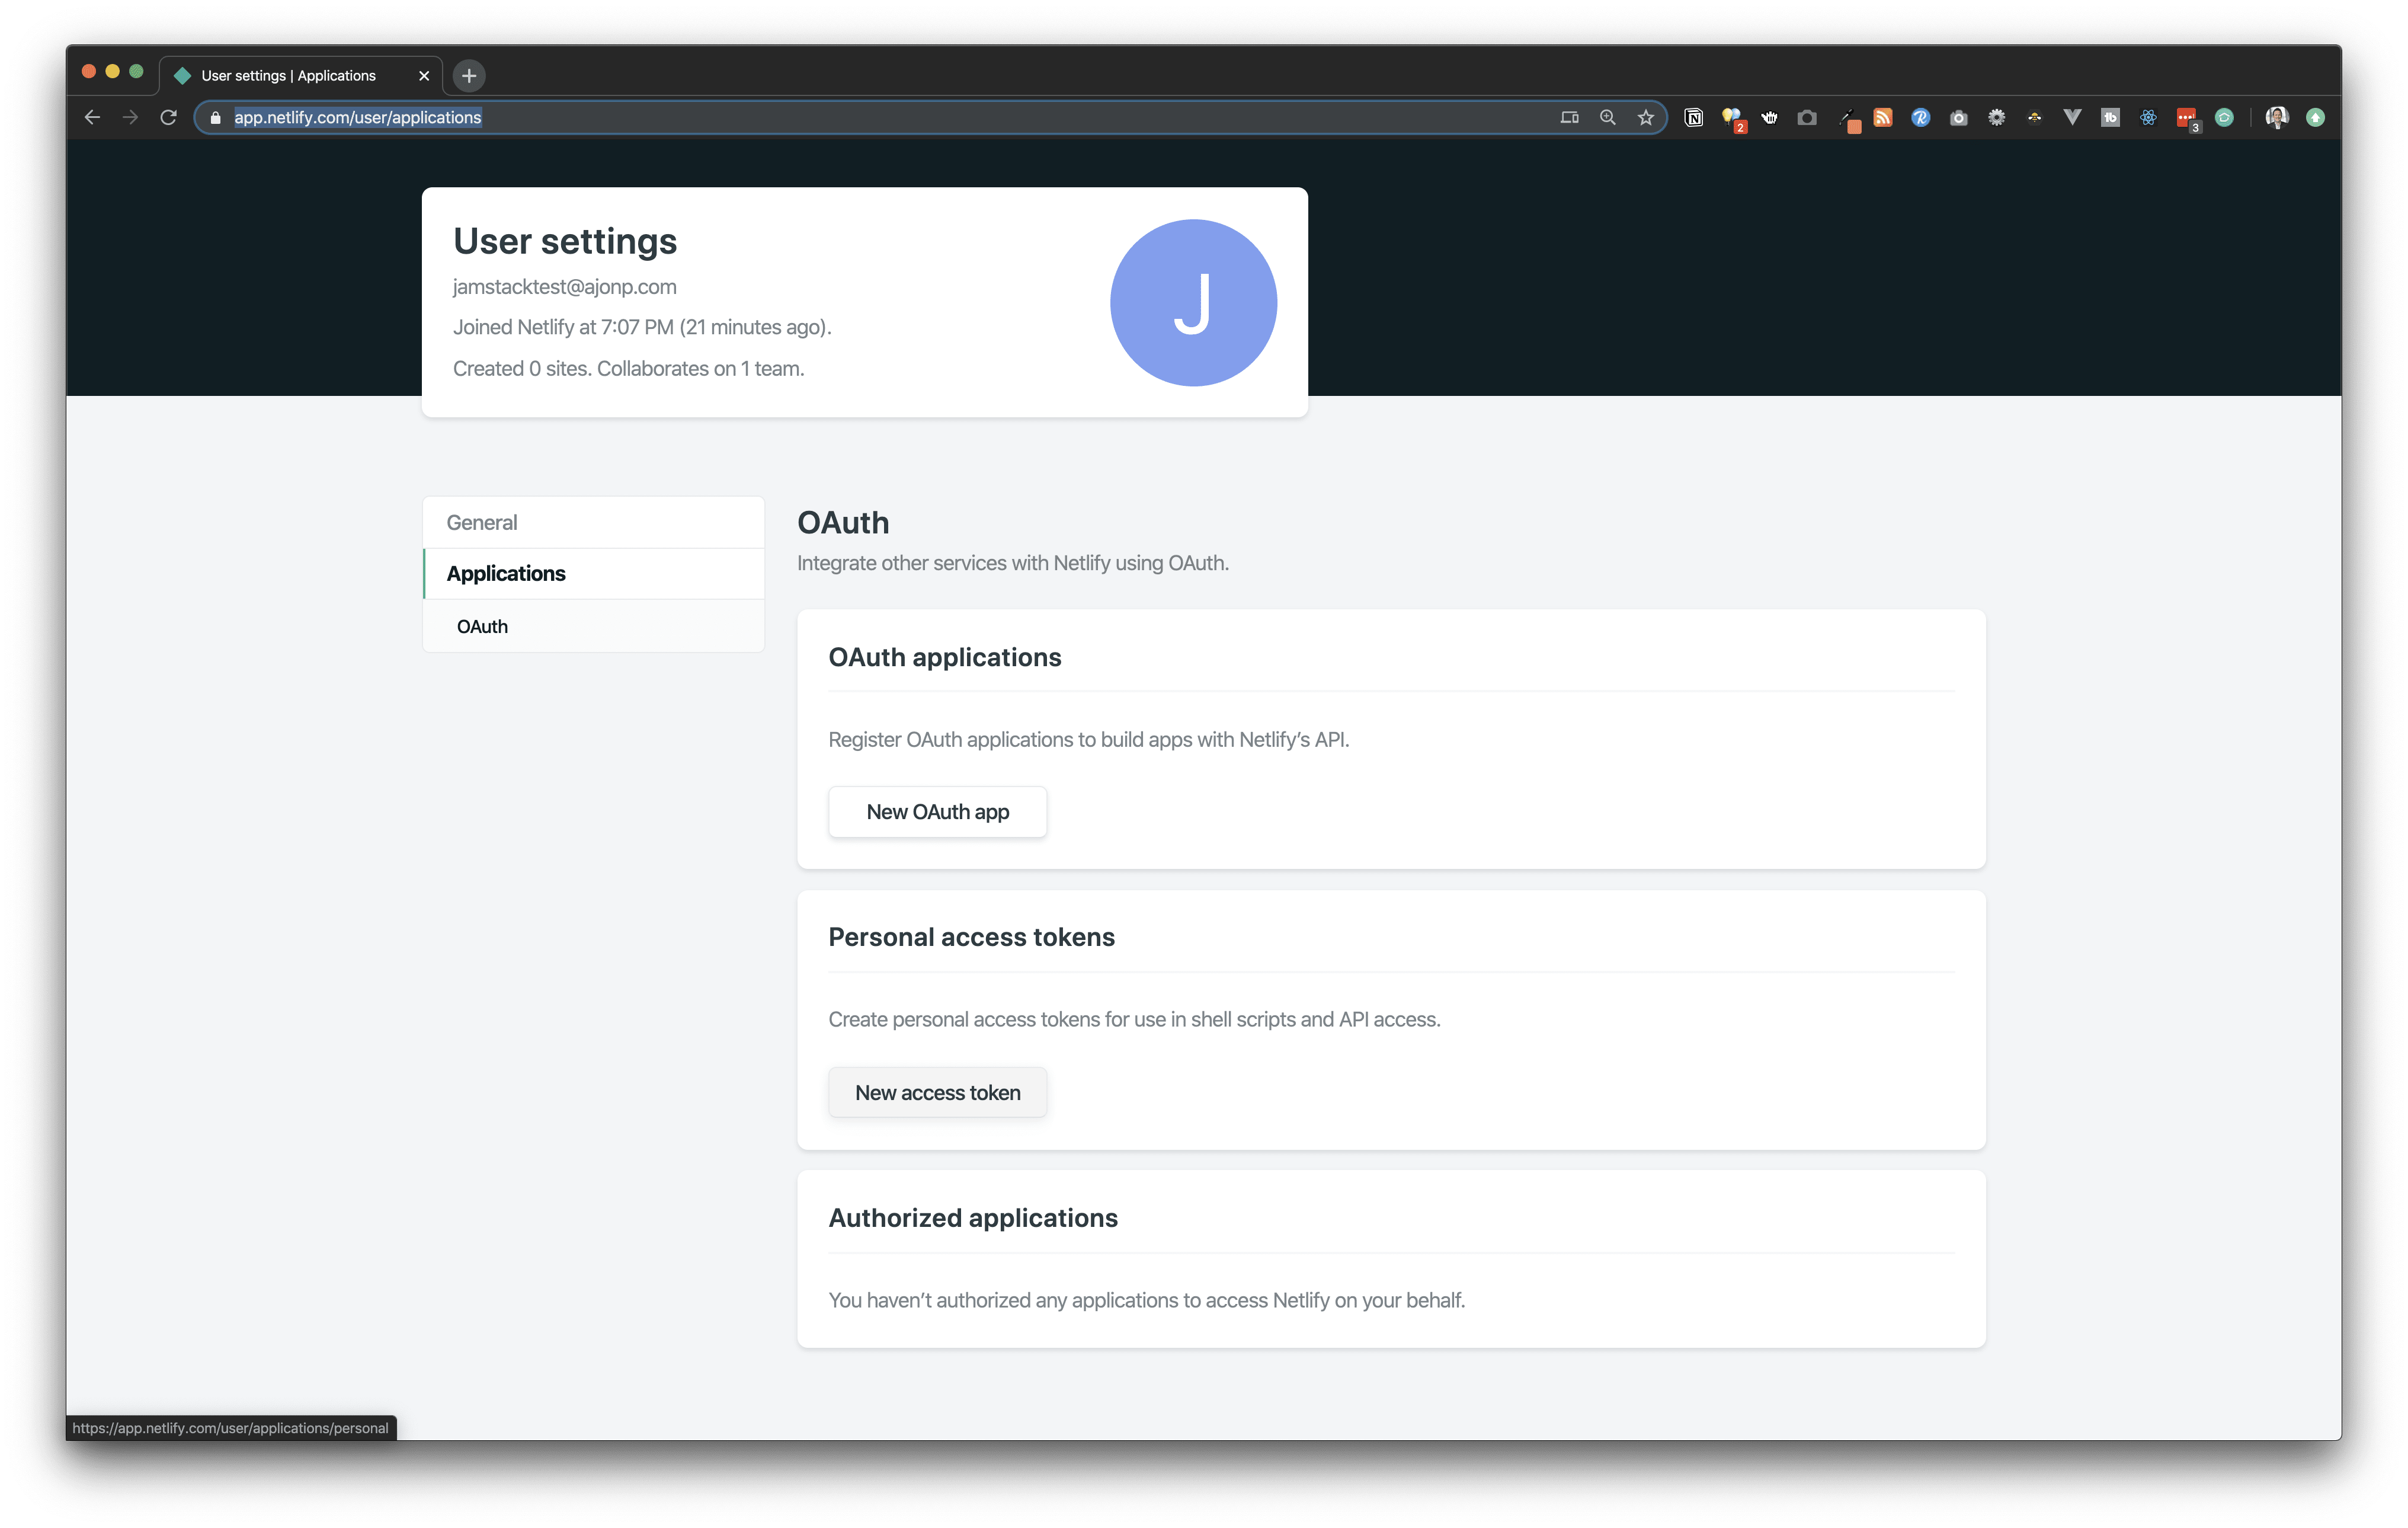
You will then need the Personal Access Tokens of Netlify Account, which can be found in User Settings, which is in the dopdown by your initial. Then select the tab for Applications. [https://app.netlify.com/user/applications](https://app.netlify.com/user/applications)
Once you are here locate the button New access Token, under Peronal access tokens.
Provide a meaningful name like Angular CLI.

Once this is complete you will need to copy the token that has been created and paste this into the CLI where it asks for your Personal Access Tokens of Netlify Account.

The result should look something like below.

`package.json`
```json
"@netlify-builder/deploy": "^2.0.3",
angular.json
"deploy": {
"builder": "@netlify-builder/deploy:deploy",
"options": {
"outputPath": "dist/JAMStackGR-Deploy-v-GIT",
"netlifyToken": "037ba2af8a480f0d73faec8c1db1761ccee24a4619f3776488a4e08053d99946",
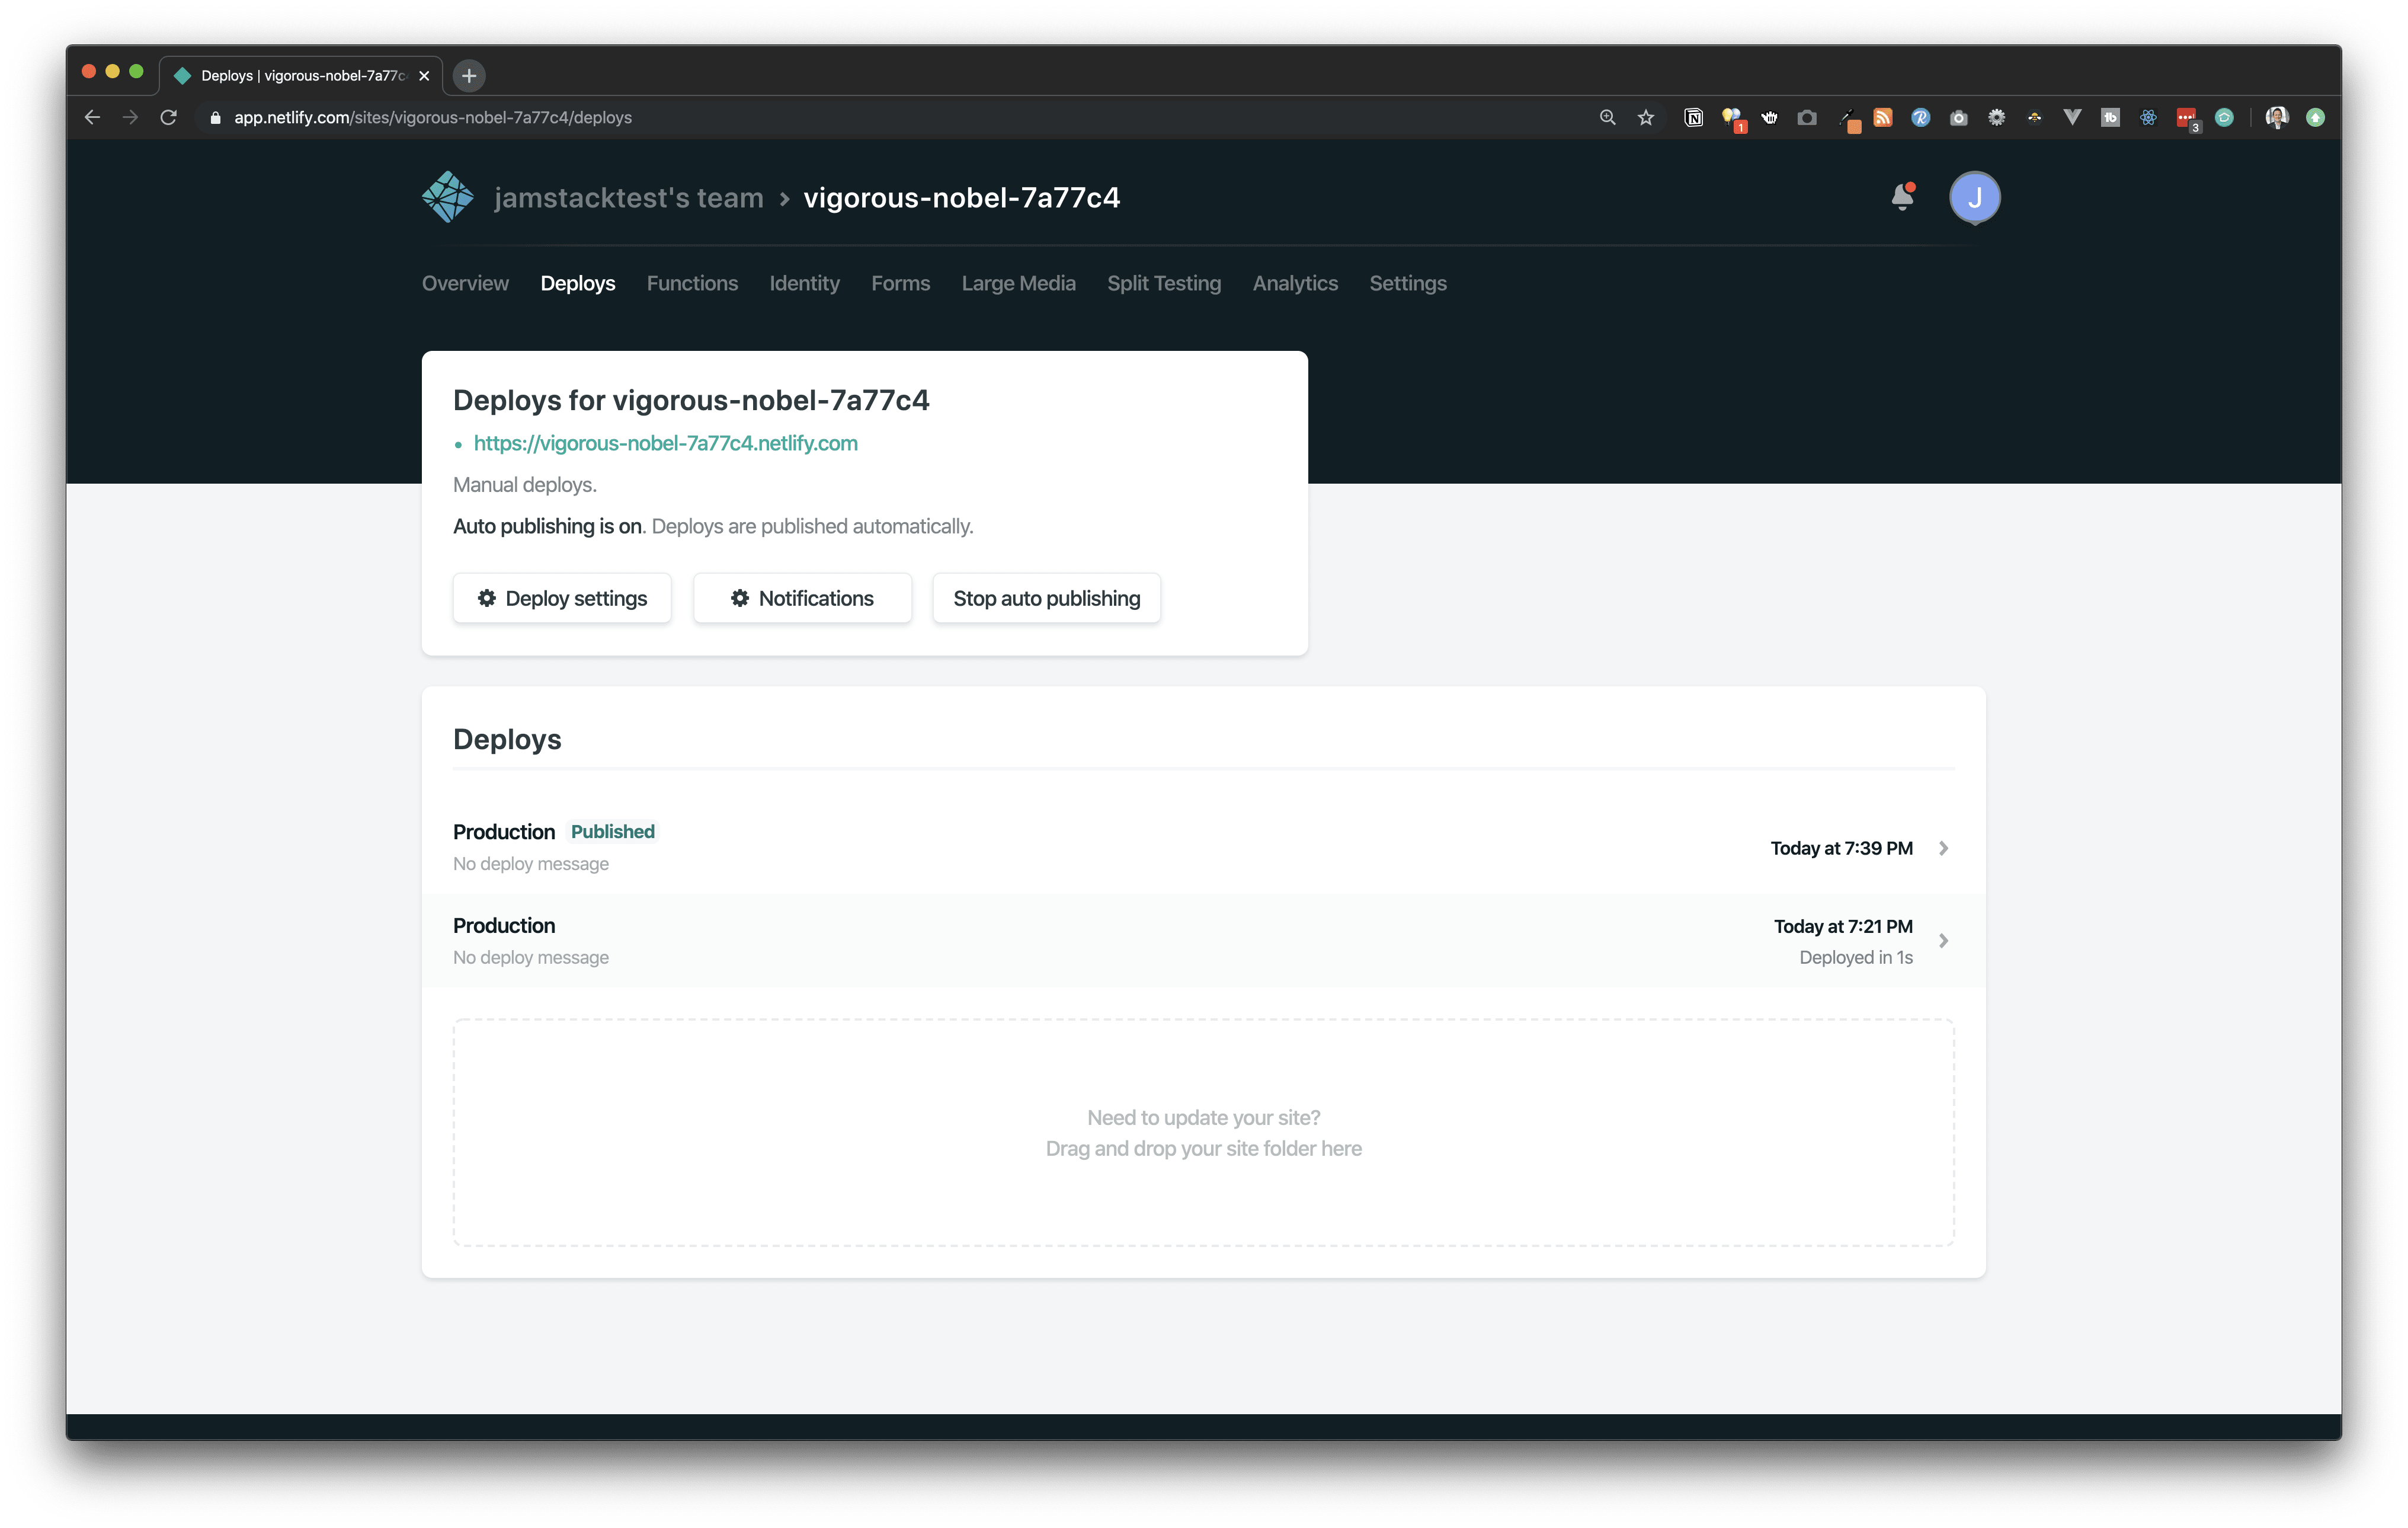
"siteId": "vigorous-nobel-7a77c4"
}
},
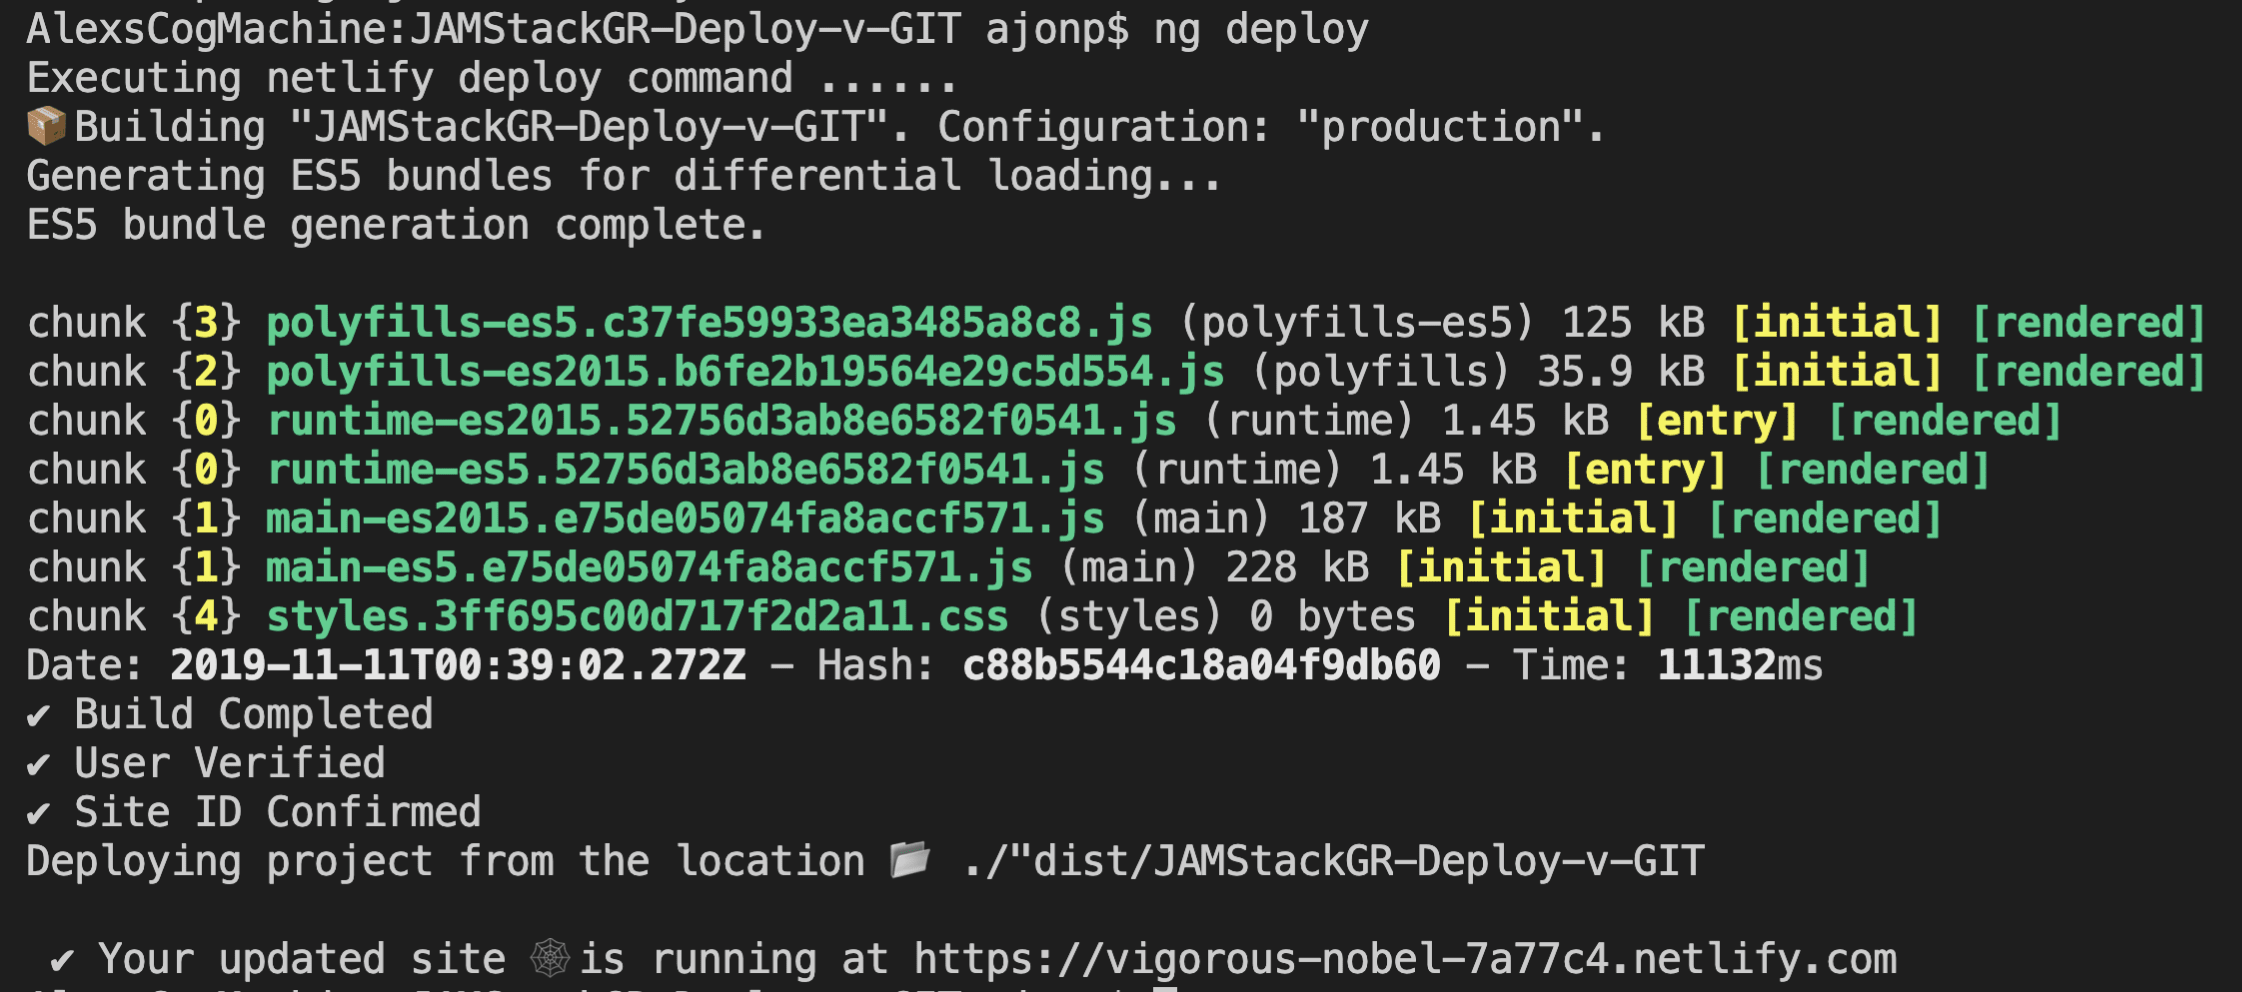
Now to deploy from the CLI you can run the below command:
ng deploy
Resulting in the build of the site and the upload of our dist folder.
If you need to ever look at your deploys they will all be listed under the Deploys tab within the site
GitHub Pages Hosting
In order to use GitHub pages you must have a GitHub account and setup the project with an origin.
Run the below command
ng add angular-cli-ghpages
This will install the correct npm package in package.json
"angular-cli-ghpages": "^0.6.0"
This will also adjust the angular.json file to include the below
"deploy": {
  "builder": "angular-cli-ghpages:deploy",
  "options": {}
},
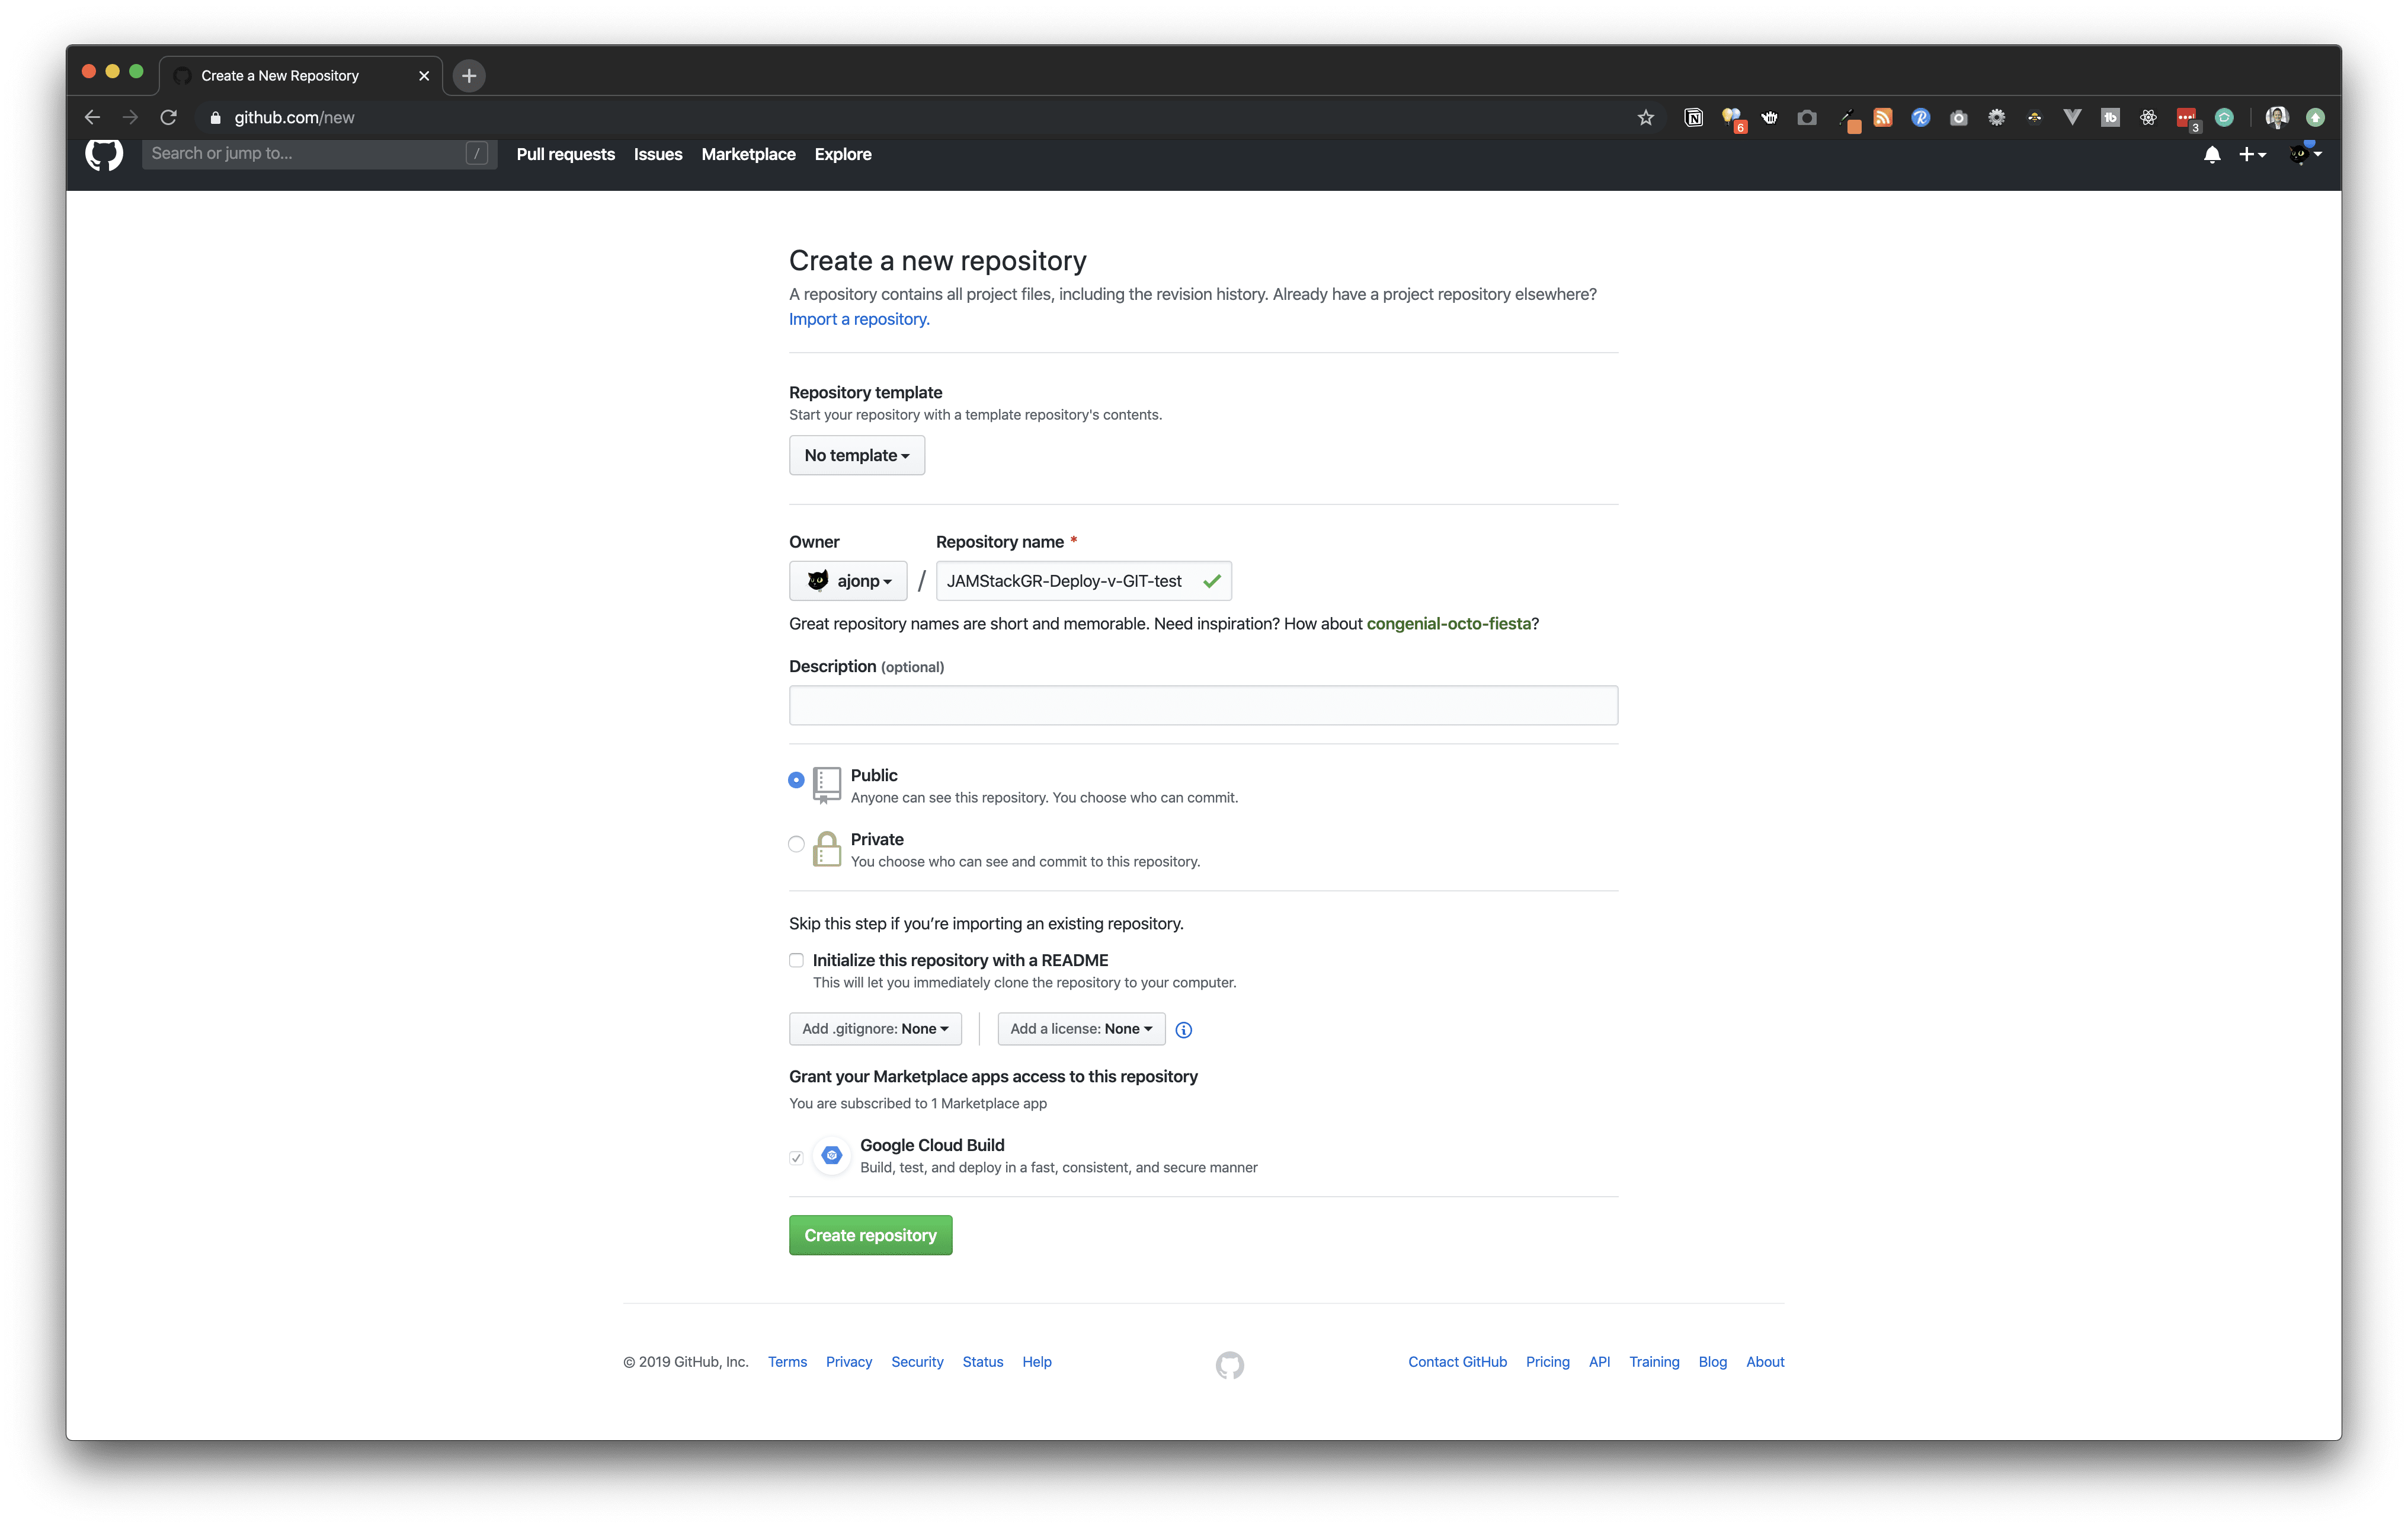
Before we move on to deploying we must establish a GitHub Project on https://github.com/new. Enter a unique name for your repository. You don't need to update anything else.
You should see a command similar to the one below listed under "…or push an existing repository from the command line". Copy this and execute within your projects directory.
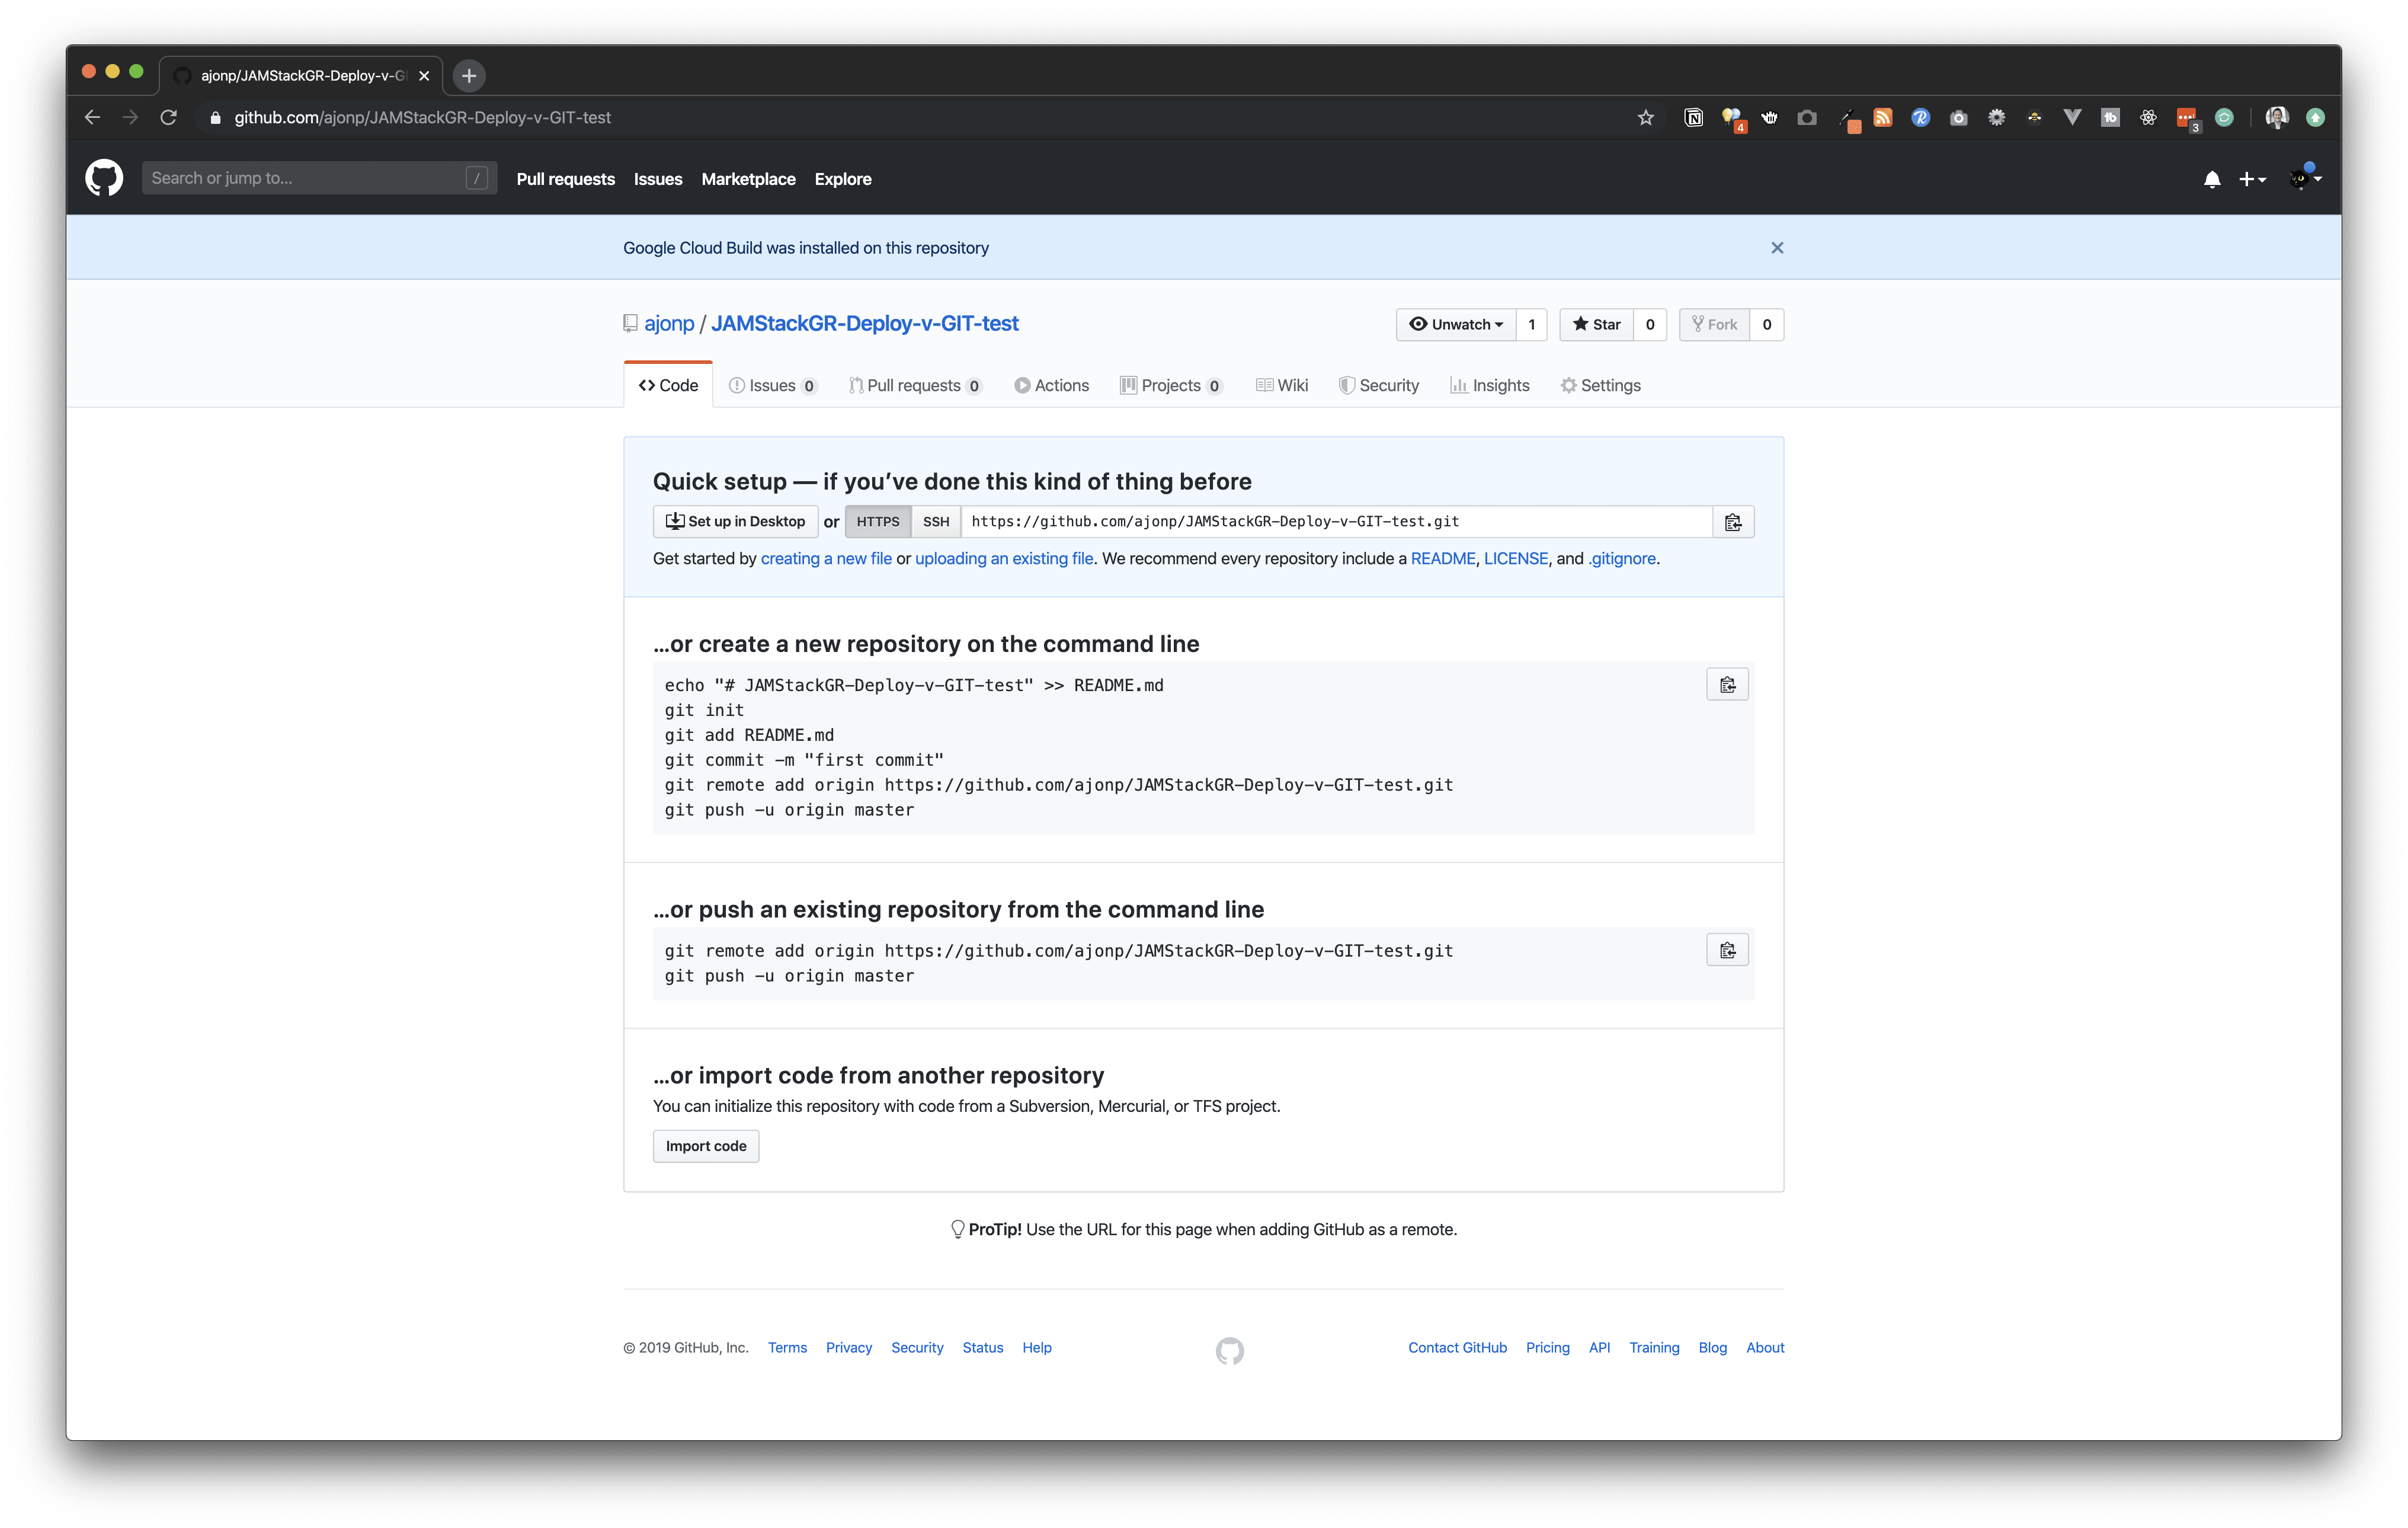
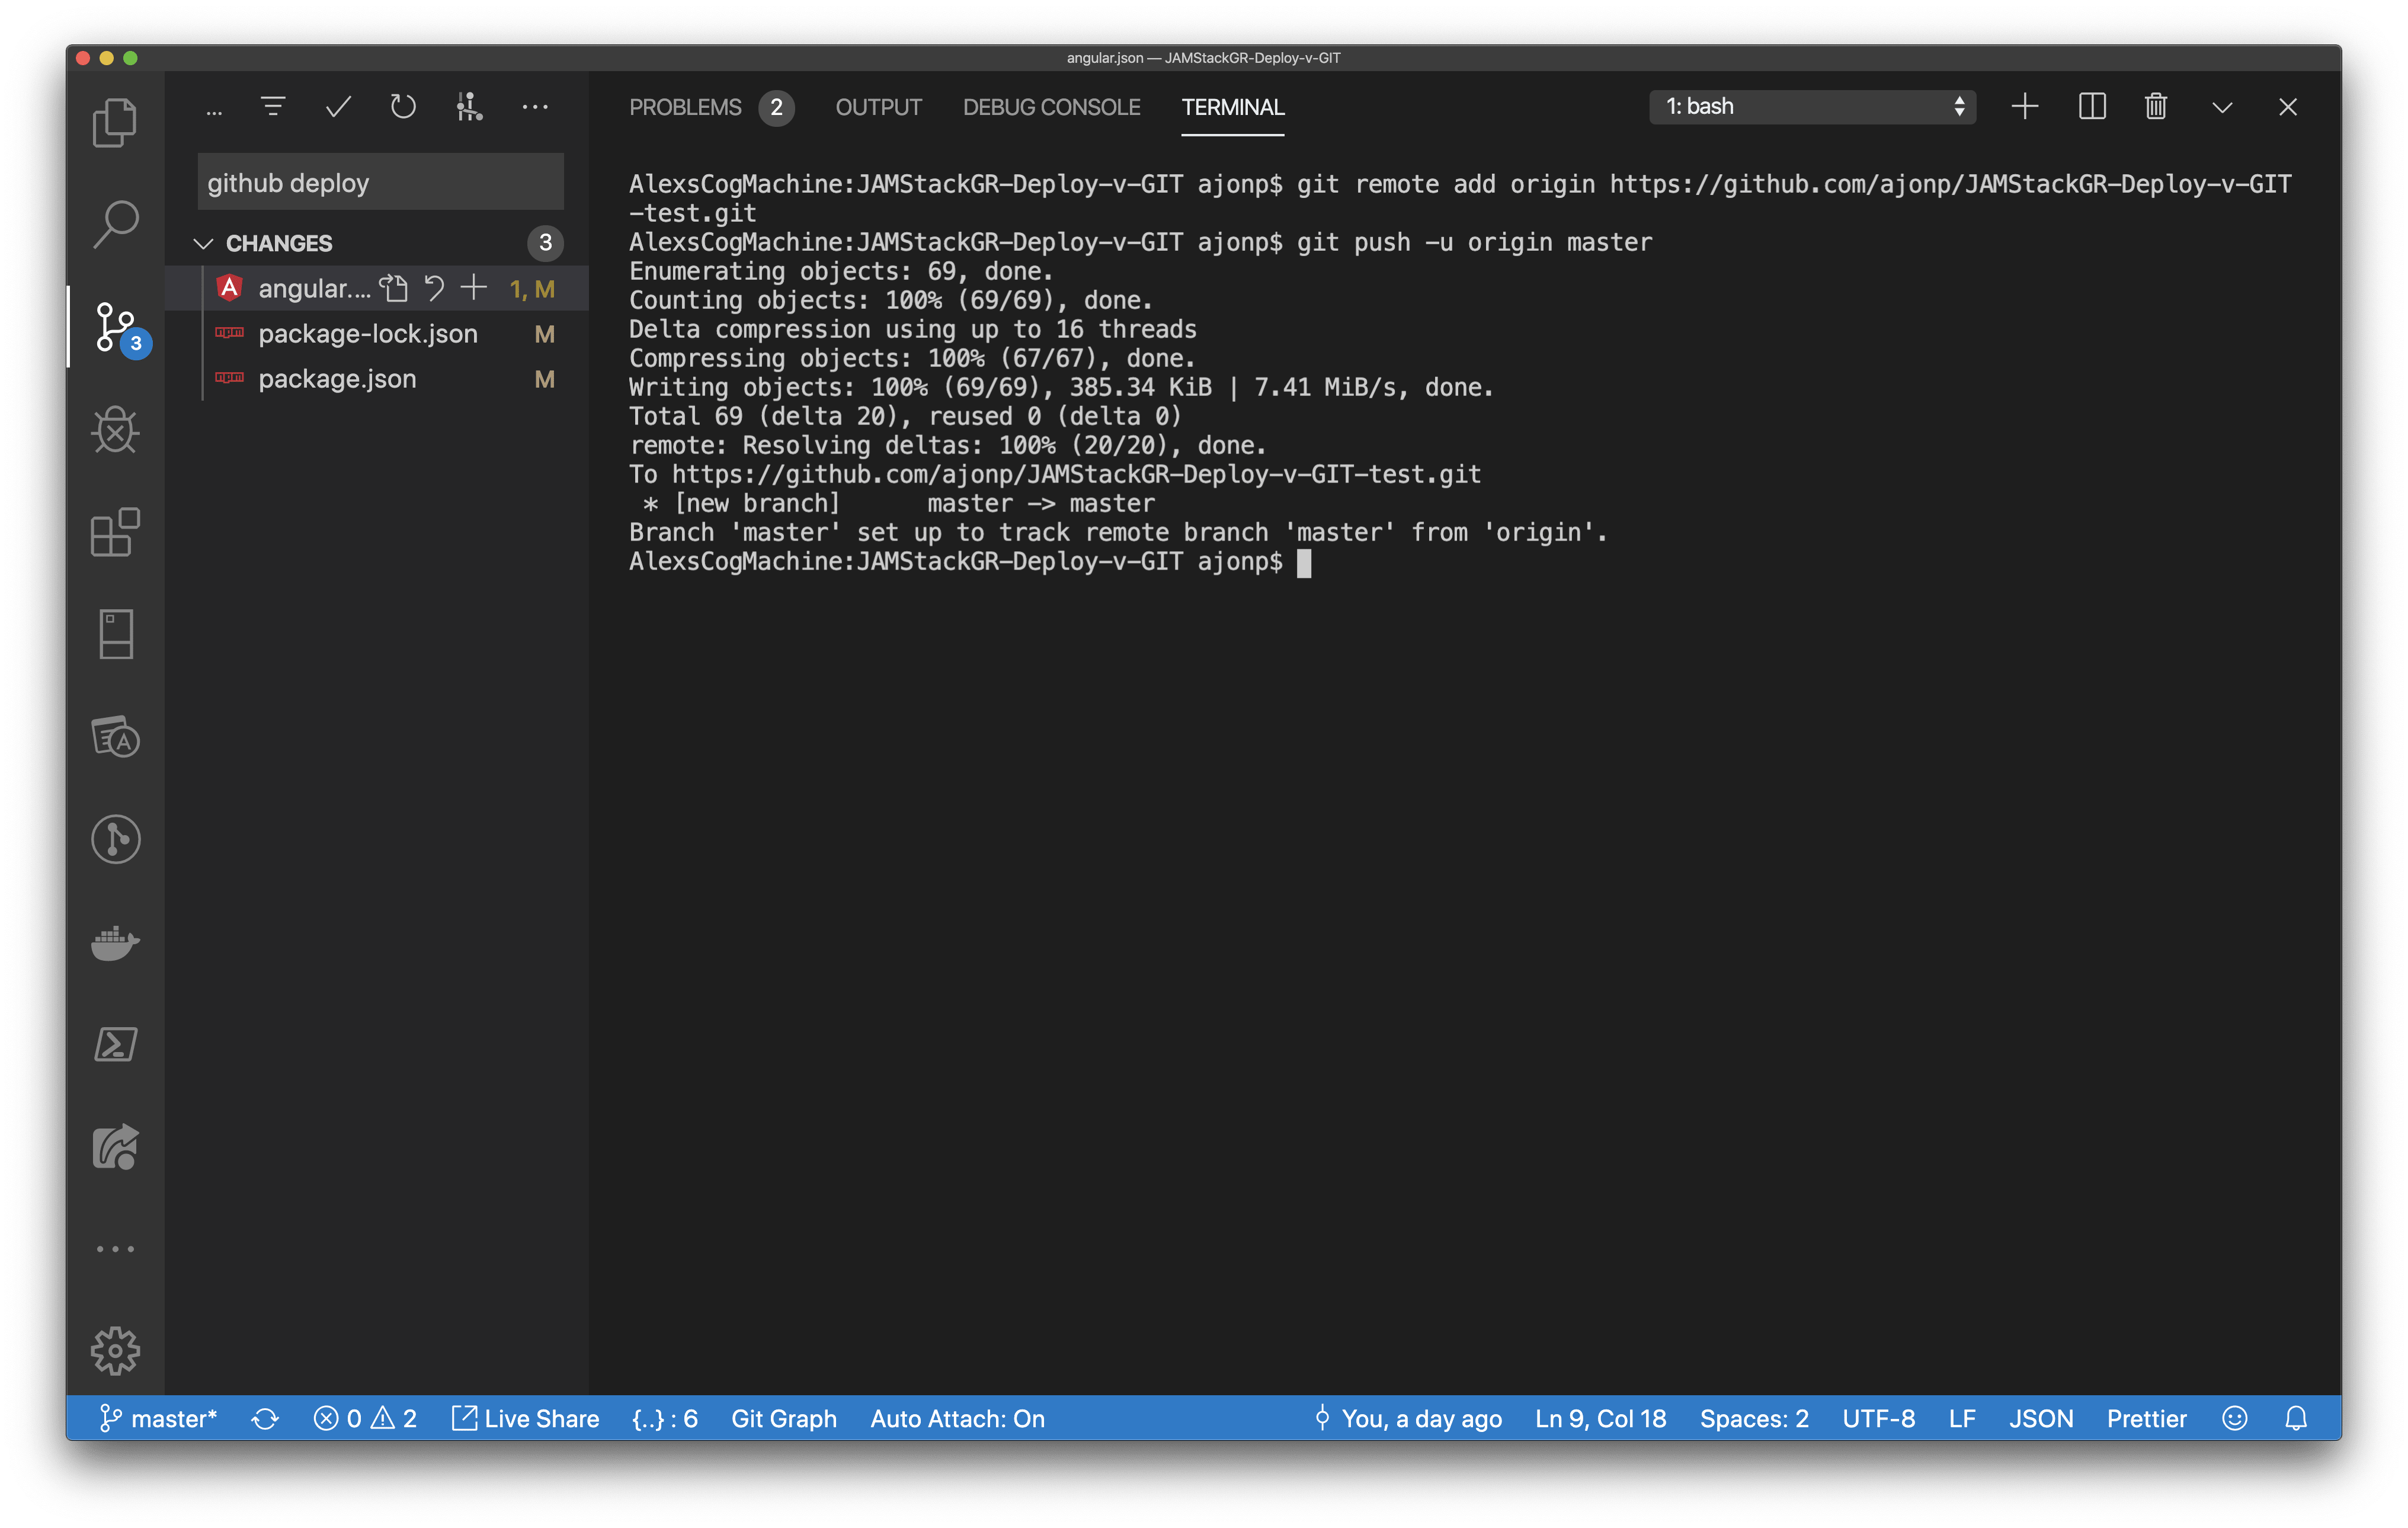
git remote add origin https://github.com/ajonp/JAMStackGR-Deploy-v-GIT-test.git
git push -u origin master
The result should show that you now have an associated remote branch and pushed all of the objects up to your GitHub site.
If you now refresh the page above you will not see commands on how to start setting up your repo, you will see the actual source code.

Now that we have made a connection to GitHub we can run our deploy command below.
Please make sure to read https://www.npmjs.com/package/angular-cli-ghpages#--base-href without this loaded files will not be found and show a 404.
ng deploy --base-href=/JAMStackGR-Deploy-v-GIT-test/
This command created a new branch in our repo called gh-pages .
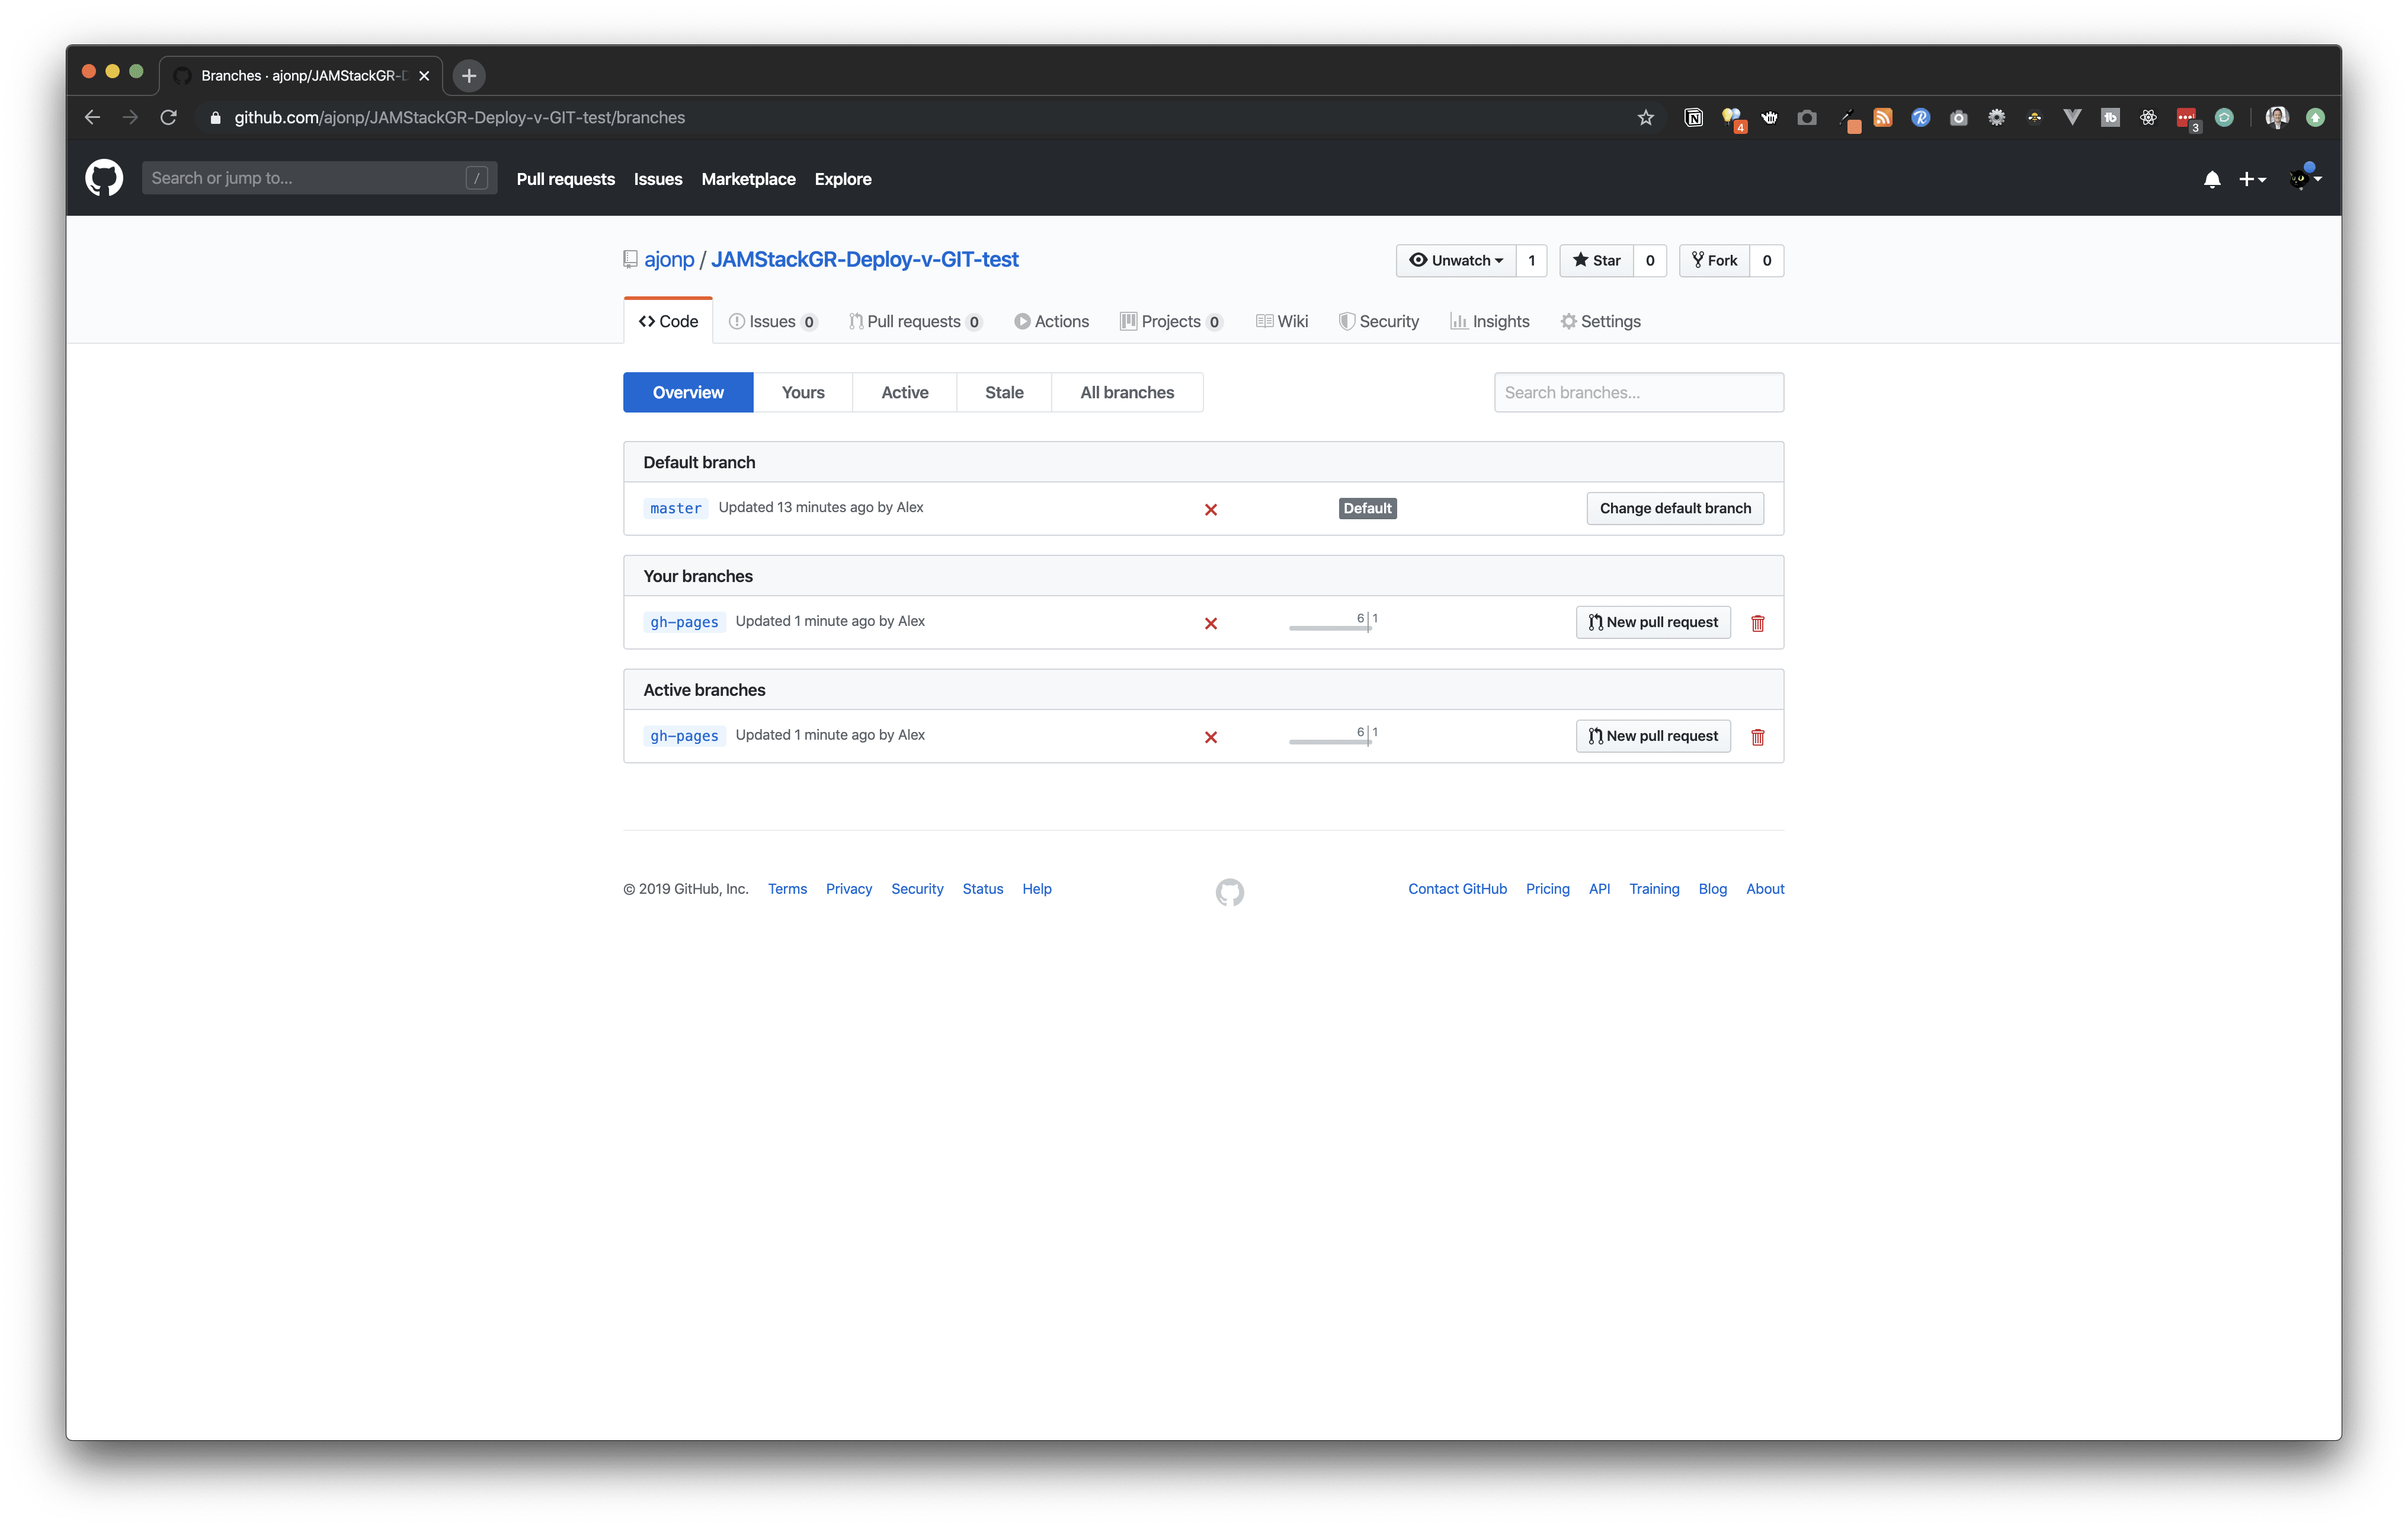
It then built our dist folder and uploaded it to this branch.
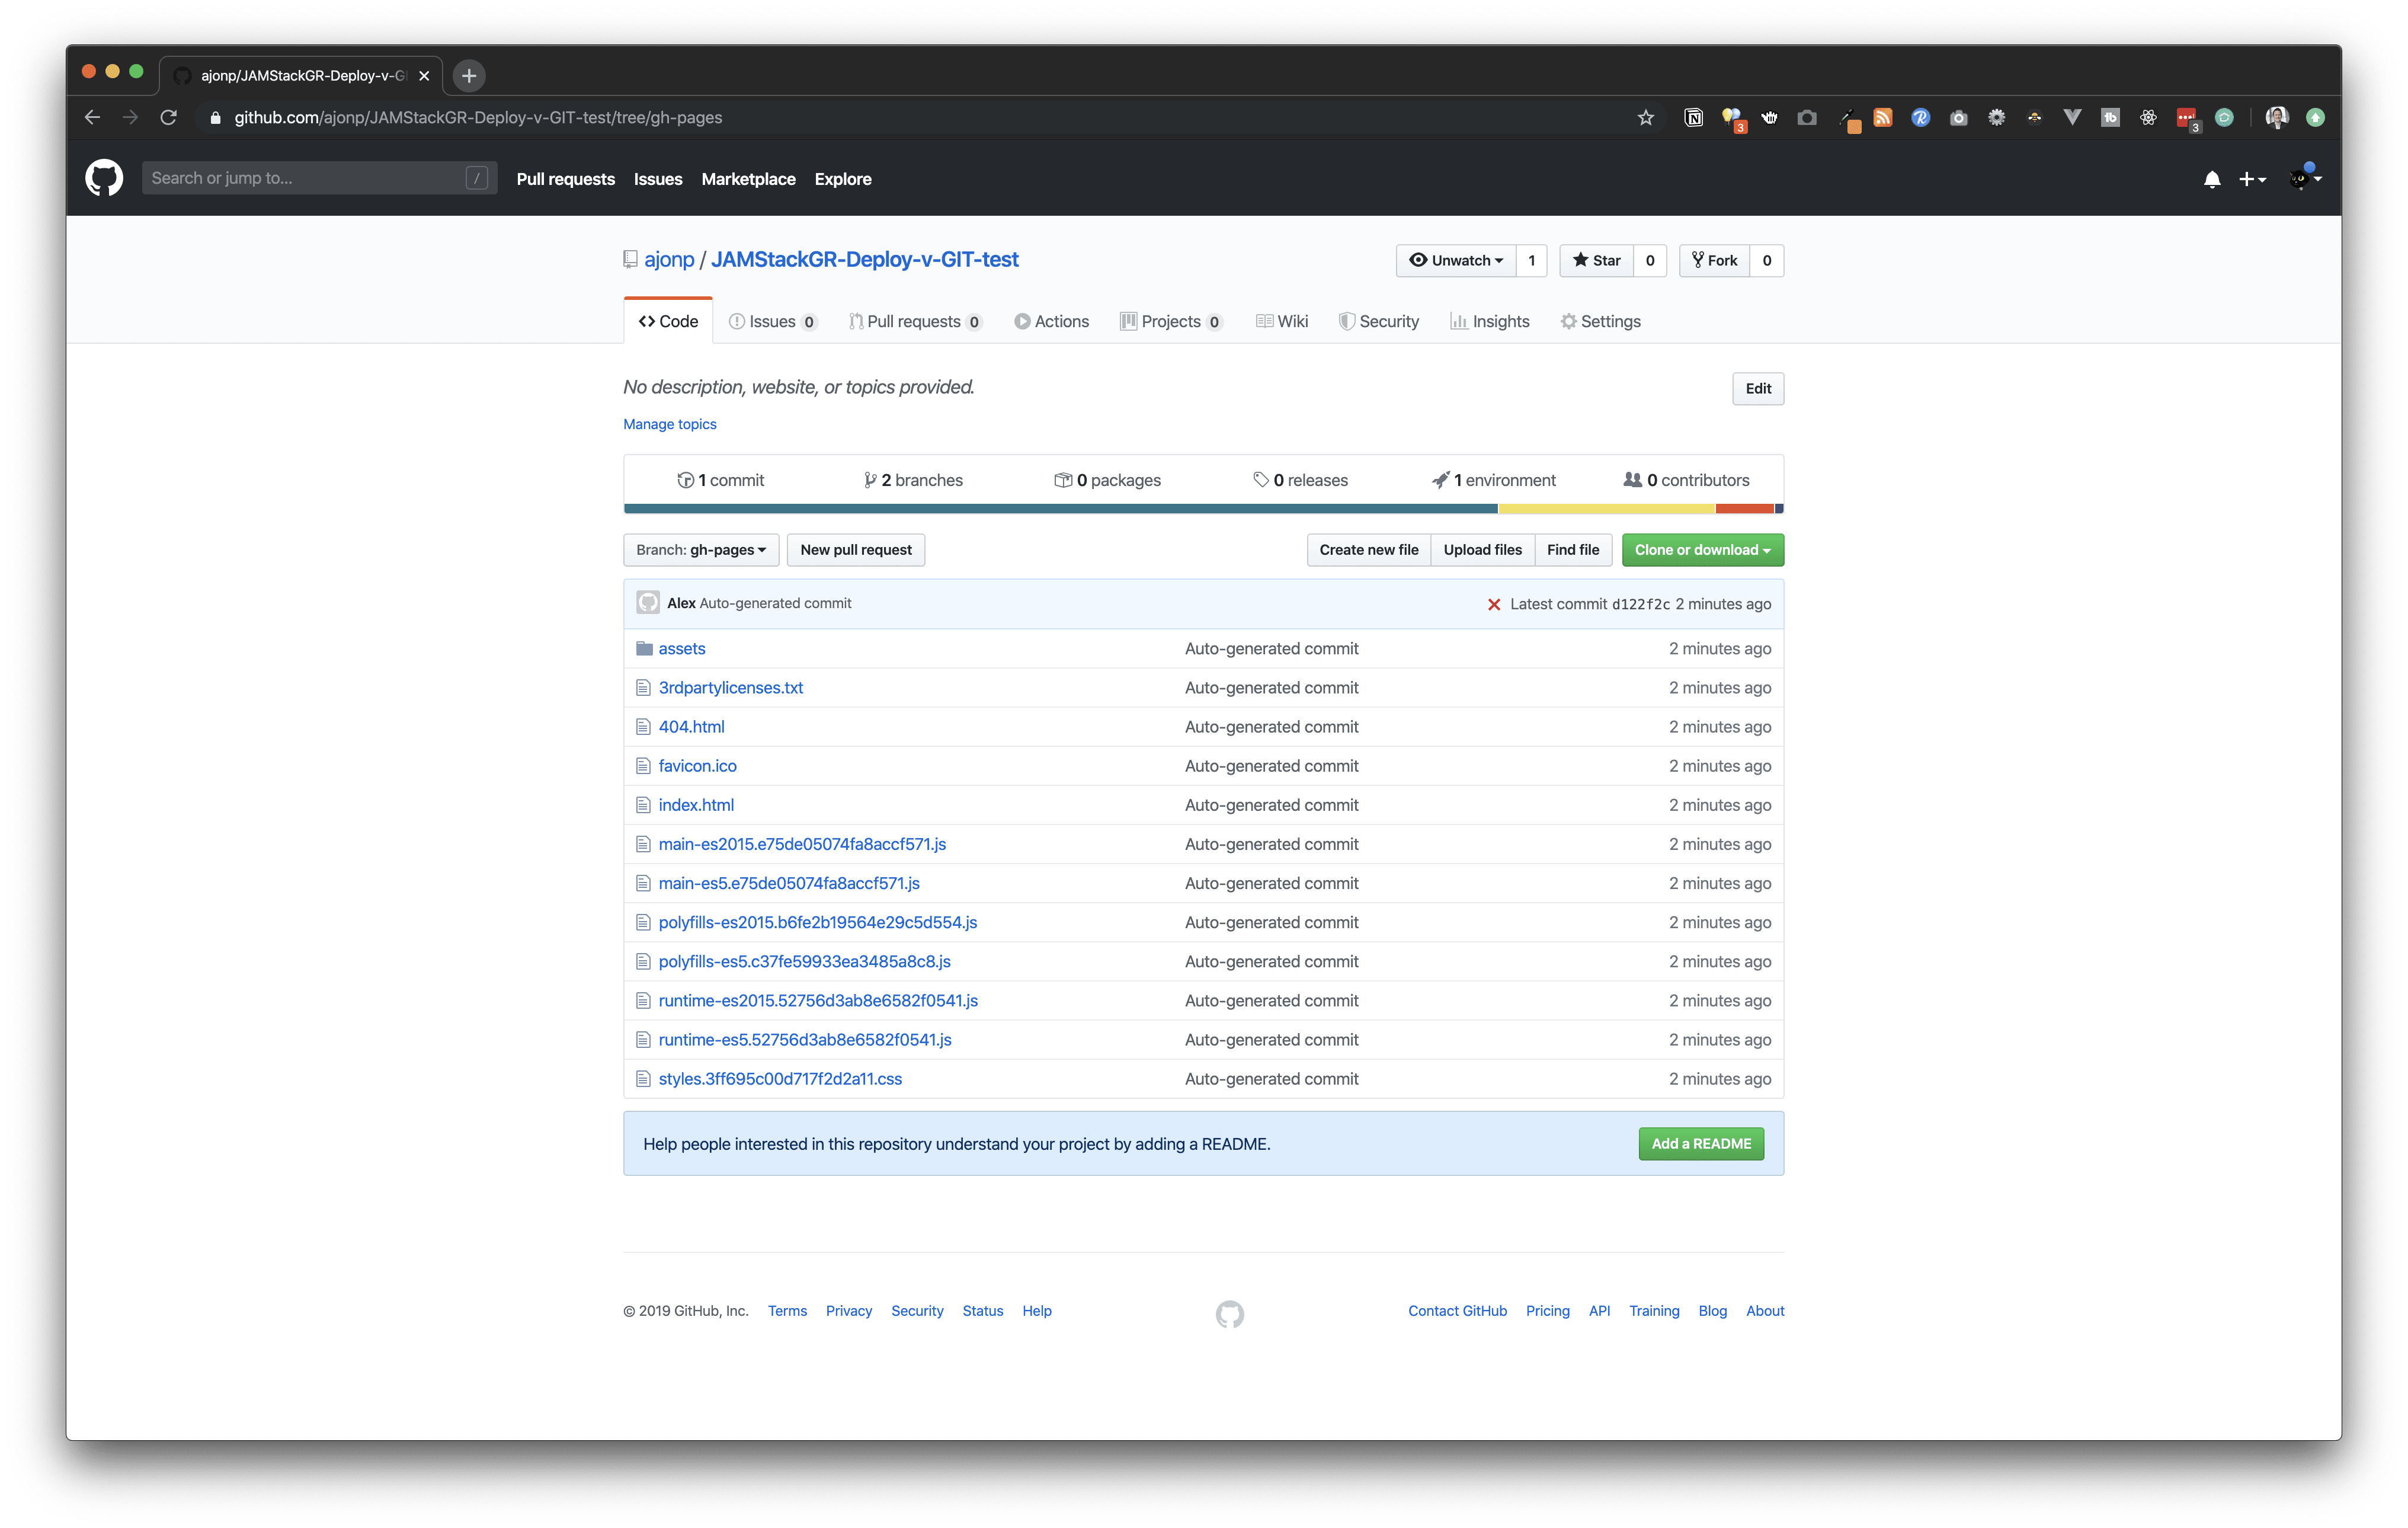
You can select the environment tab to see your deployments.
Select view deployment to access your new site
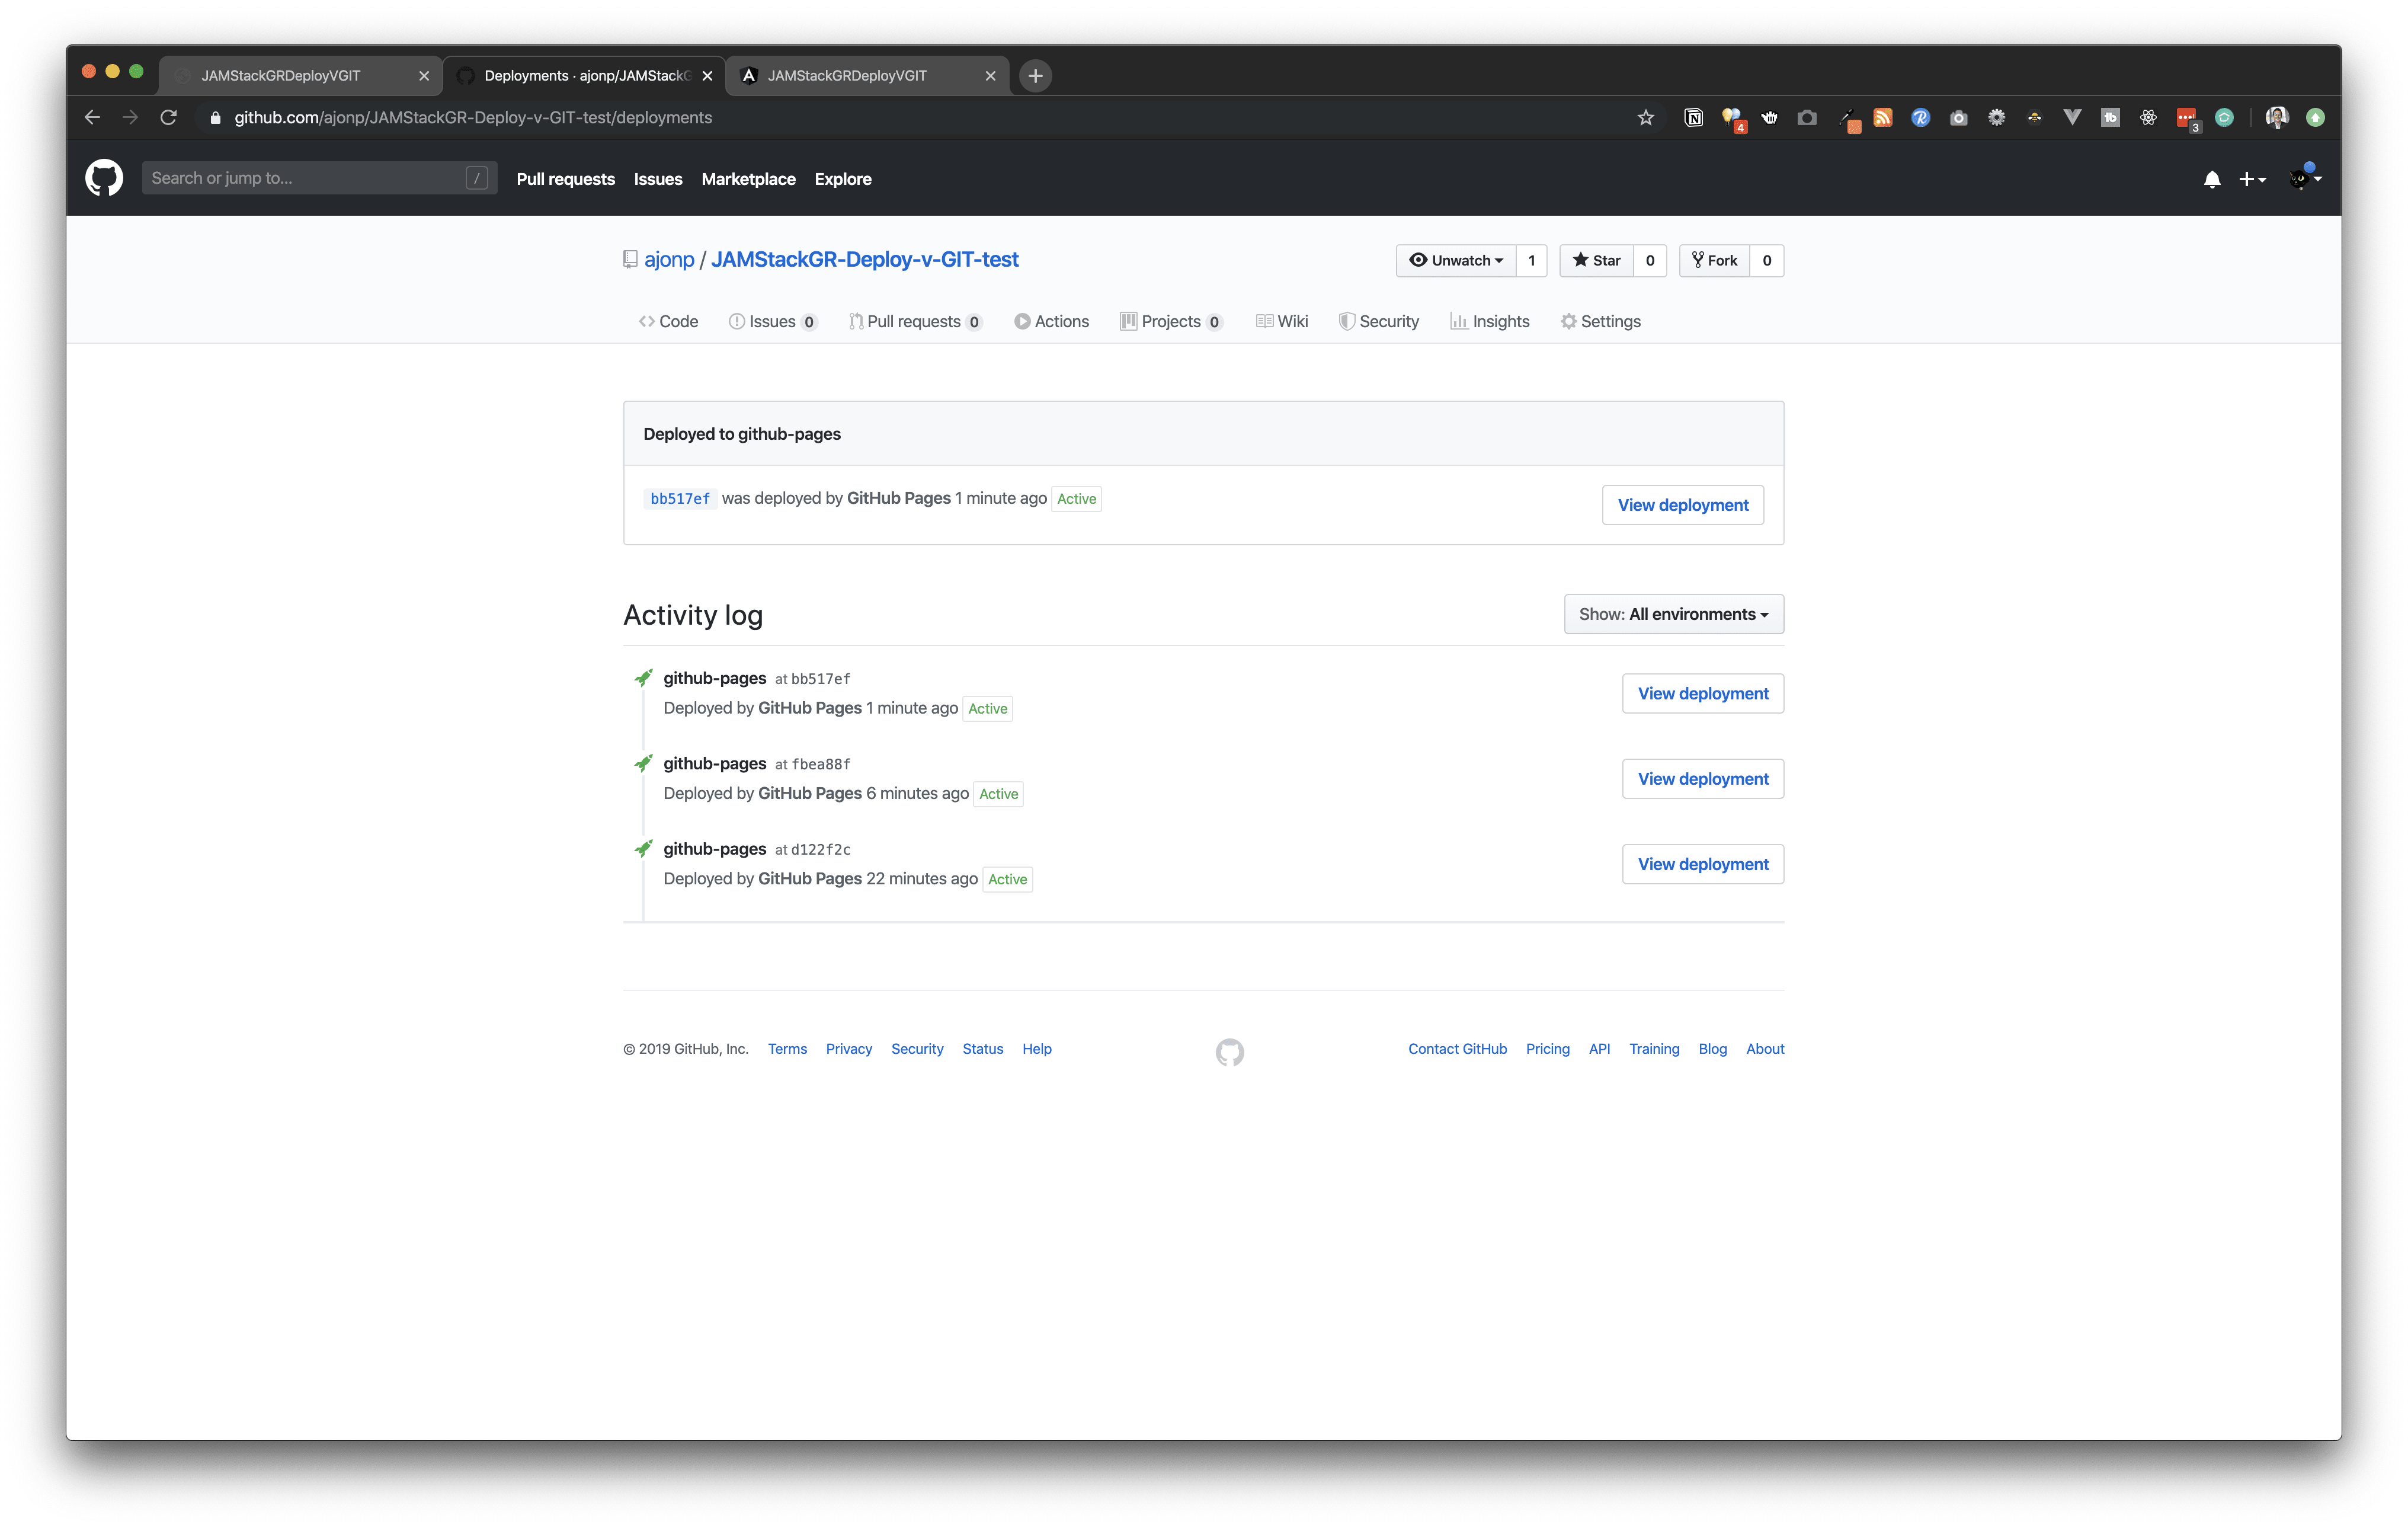
Demo Site: https://ajonp.github.io/JAMStackGR-Deploy-v-GIT-test/
NPM Package Publish
This is not really deploying a web app, but I wanted to cover all the current ng deploys for an example This example is on a seperate branch in the repo https://github.com/ajonp/JAMStackGR-Deploy-v-GIT-test/tree/npm-deploy
ng generate library
Give your library a name like jamstackgr2-library
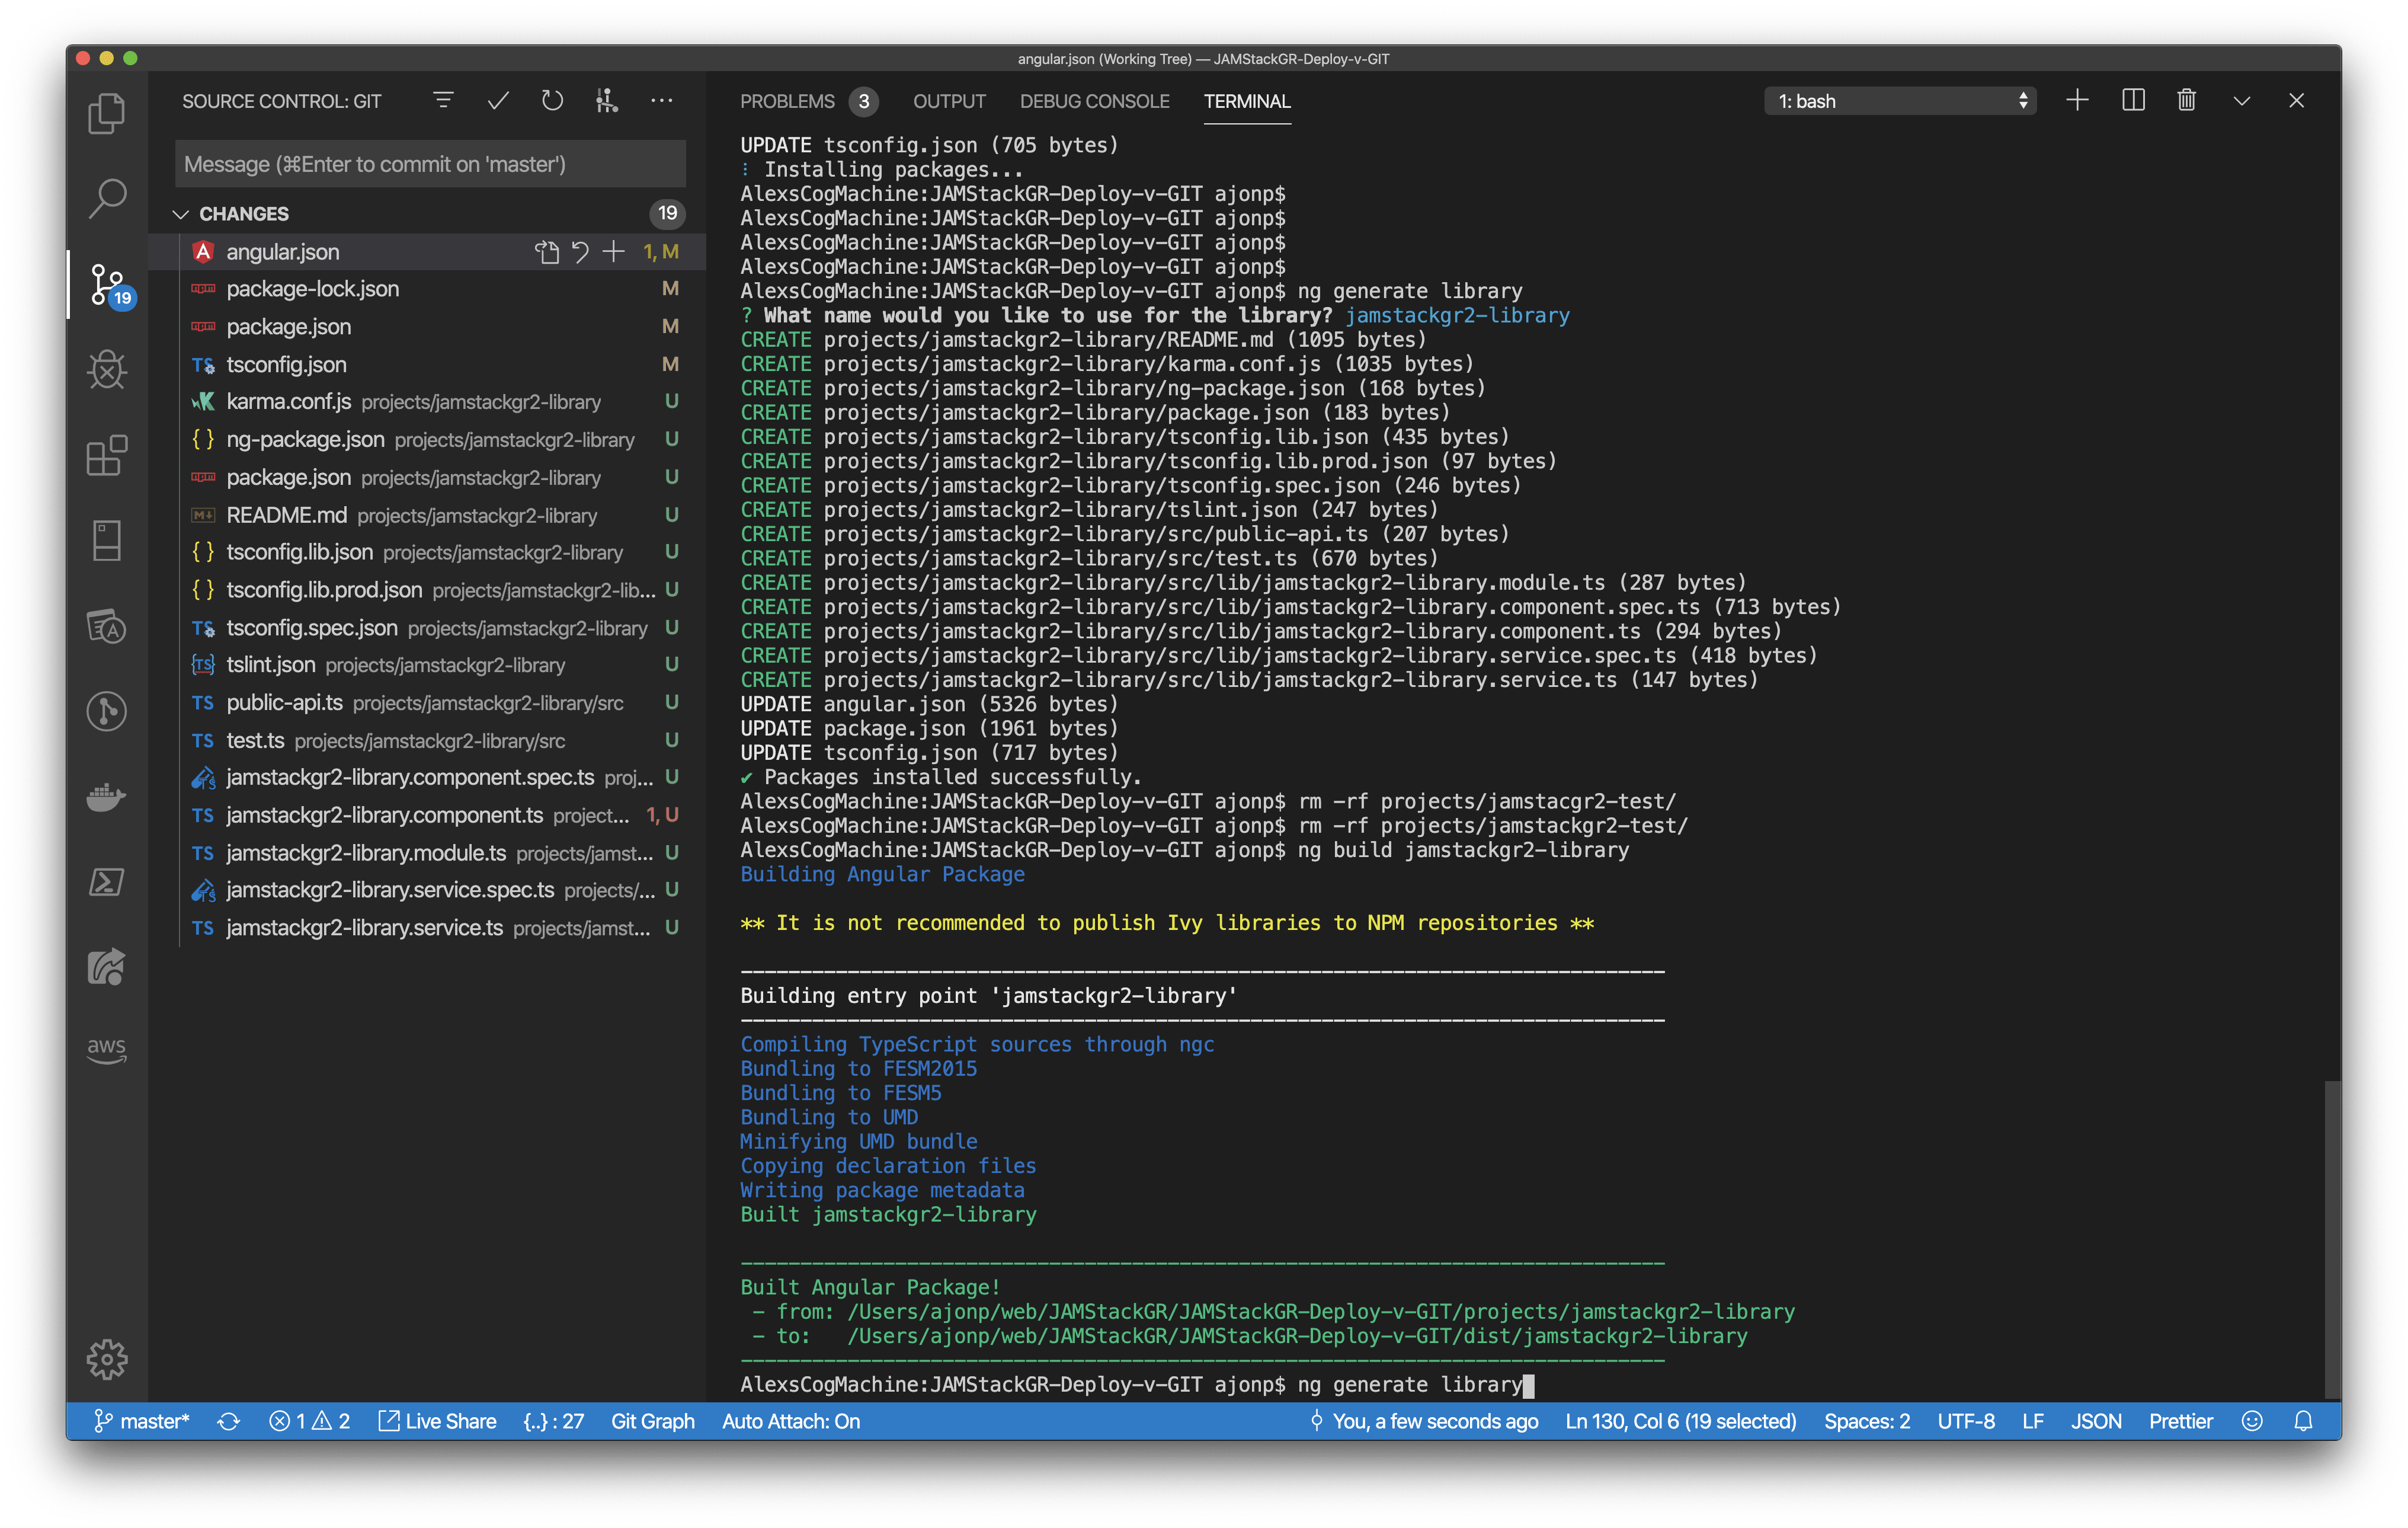
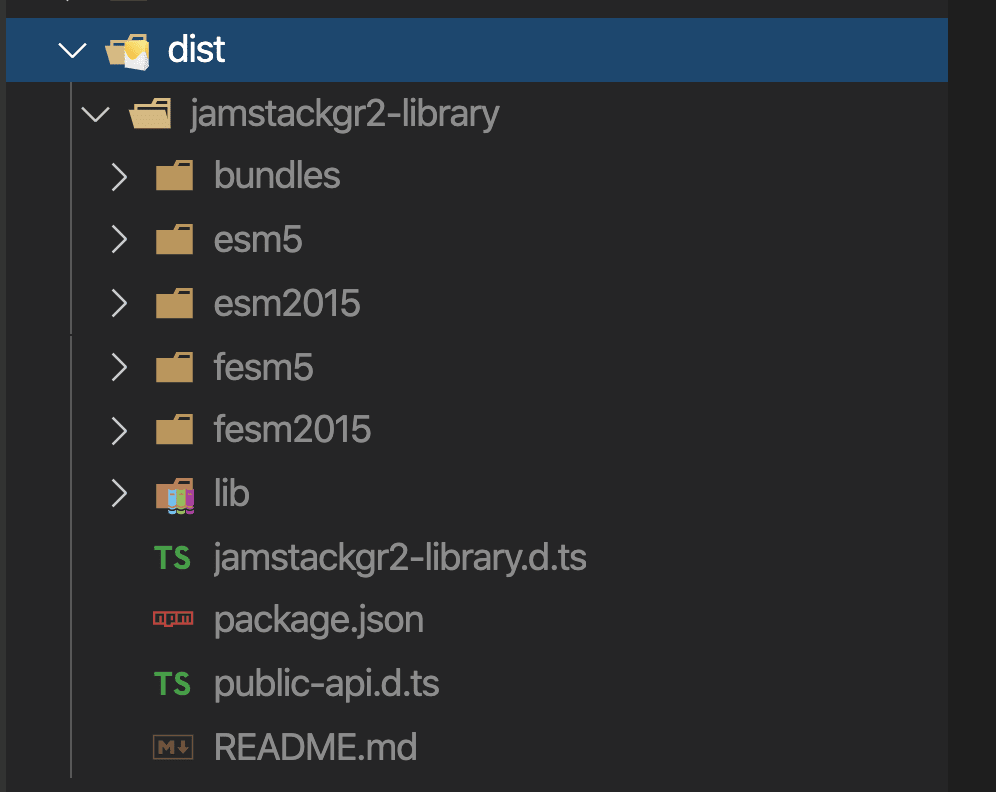
You will then need to build this library, you will find this in the dist folder.
ng build jamstackgr2-library
You will need to login to NPM for this next part

Now we are prepped for running the angular command for deployment!
Full angular.json
{
  "$schema": "./node_modules/@angular/cli/lib/config/schema.json",
  "version": 1,
  "newProjectRoot": "projects",
  "projects": {
    "JAMStackGR-Deploy-v-GIT": {
      "projectType": "application",
      "schematics": {},
      "root": "",
      "sourceRoot": "src",
      "prefix": "app",
      "architect": {
        "build": {
          "builder": "@angular-devkit/build-angular:browser",
          "options": {
            "outputPath": "dist/JAMStackGR-Deploy-v-GIT",
            "index": "src/index.html",
            "main": "src/main.ts",
            "polyfills": "src/polyfills.ts",
            "tsConfig": "tsconfig.app.json",
            "aot": true,
            "assets": [
              "src/favicon.ico",
              "src/assets"
            ],
            "styles": [
              "src/styles.css"
            ],
            "scripts": []
          },
          "configurations": {
            "production": {
              "fileReplacements": [
                {
                  "replace": "src/environments/environment.ts",
                  "with": "src/environments/environment.prod.ts"
                }
              ],
              "optimization": true,
              "outputHashing": "all",
              "sourceMap": false,
              "extractCss": true,
              "namedChunks": false,
              "extractLicenses": true,
              "vendorChunk": false,
              "buildOptimizer": true,
              "budgets": [
                {
                  "type": "initial",
                  "maximumWarning": "2mb",
                  "maximumError": "5mb"
                },
                {
                  "type": "anyComponentStyle",
                  "maximumWarning": "6kb",
                  "maximumError": "10kb"
                }
              ]
            }
          }
        },
        "serve": {
          "builder": "@angular-devkit/build-angular:dev-server",
          "options": {
            "browserTarget": "JAMStackGR-Deploy-v-GIT:build"
          },
          "configurations": {
            "production": {
              "browserTarget": "JAMStackGR-Deploy-v-GIT:build:production"
            }
          }
        },
        "extract-i18n": {
          "builder": "@angular-devkit/build-angular:extract-i18n",
          "options": {
            "browserTarget": "JAMStackGR-Deploy-v-GIT:build"
          }
        },
        "test": {
          "builder": "@angular-devkit/build-angular:karma",
          "options": {
            "main": "src/test.ts",
            "polyfills": "src/polyfills.ts",
            "tsConfig": "tsconfig.spec.json",
            "karmaConfig": "karma.conf.js",
            "assets": [
              "src/favicon.ico",
              "src/assets"
            ],
            "styles": [
              "src/styles.css"
            ],
            "scripts": []
          }
        },
        "lint": {
          "builder": "@angular-devkit/build-angular:tslint",
          "options": {
            "tsConfig": [
              "tsconfig.app.json",
              "tsconfig.spec.json",
              "e2e/tsconfig.json"
            ],
            "exclude": [
              "**/node_modules/**"
            ]
          }
        },
        "e2e": {
          "builder": "@angular-devkit/build-angular:protractor",
          "options": {
            "protractorConfig": "e2e/protractor.conf.js",
            "devServerTarget": "JAMStackGR-Deploy-v-GIT:serve"
          },
          "configurations": {
            "production": {
              "devServerTarget": "JAMStackGR-Deploy-v-GIT:serve:production"
            }
          }
        },
        "deploy": {
          "builder": "angular-cli-ghpages:deploy",
          "options": {}
        },
        "azureLogout": {
          "builder": "@azure/ng-deploy:logout"
        }
      }
    },
    "jamstackgr2-library": {
      "projectType": "library",
      "root": "projects/jamstackgr2-library",
      "sourceRoot": "projects/jamstackgr2-library/src",
      "prefix": "lib",
      "architect": {
        "build": {
          "builder": "@angular-devkit/build-ng-packagr:build",
          "options": {
            "tsConfig": "projects/jamstackgr2-library/tsconfig.lib.json",
            "project": "projects/jamstackgr2-library/ng-package.json"
          },
          "configurations": {
            "production": {
              "tsConfig": "projects/jamstackgr2-library/tsconfig.lib.prod.json"
            }
          }
        },
        "test": {
          "builder": "@angular-devkit/build-angular:karma",
          "options": {
            "main": "projects/jamstackgr2-library/src/test.ts",
            "tsConfig": "projects/jamstackgr2-library/tsconfig.spec.json",
            "karmaConfig": "projects/jamstackgr2-library/karma.conf.js"
          }
        },
        "lint": {
          "builder": "@angular-devkit/build-angular:tslint",
          "options": {
            "tsConfig": [
              "projects/jamstackgr2-library/tsconfig.lib.json",
              "projects/jamstackgr2-library/tsconfig.spec.json"
            ],
            "exclude": [
              "**/node_modules/**"
            ]
          }
        },
        "deploy": {
          "builder": "ngx-deploy-npm:deploy",
          "options": {
            "access": "public"
          }
        }
      }
    }
  },
  "defaultProject": "JAMStackGR-Deploy-v-GIT",
  "cli": {
    "analytics": "f6a38b3e-94be-42aa-8d50-a76c8ea31bc5"
  }
}
Deploy portion of angular.json for NPM
        "deploy": {
          "builder": "ngx-deploy-npm:deploy",
          "options": {
            "access": "public"
          }
        }
I tried this next command while ignoring that I was building with Angular Ivy and received this...

So at this time I would recommend just using Angular 8. I downgraded to 8.3.18 and did npm i.
ng deploy jamstackgr2-library
You should see a message like below
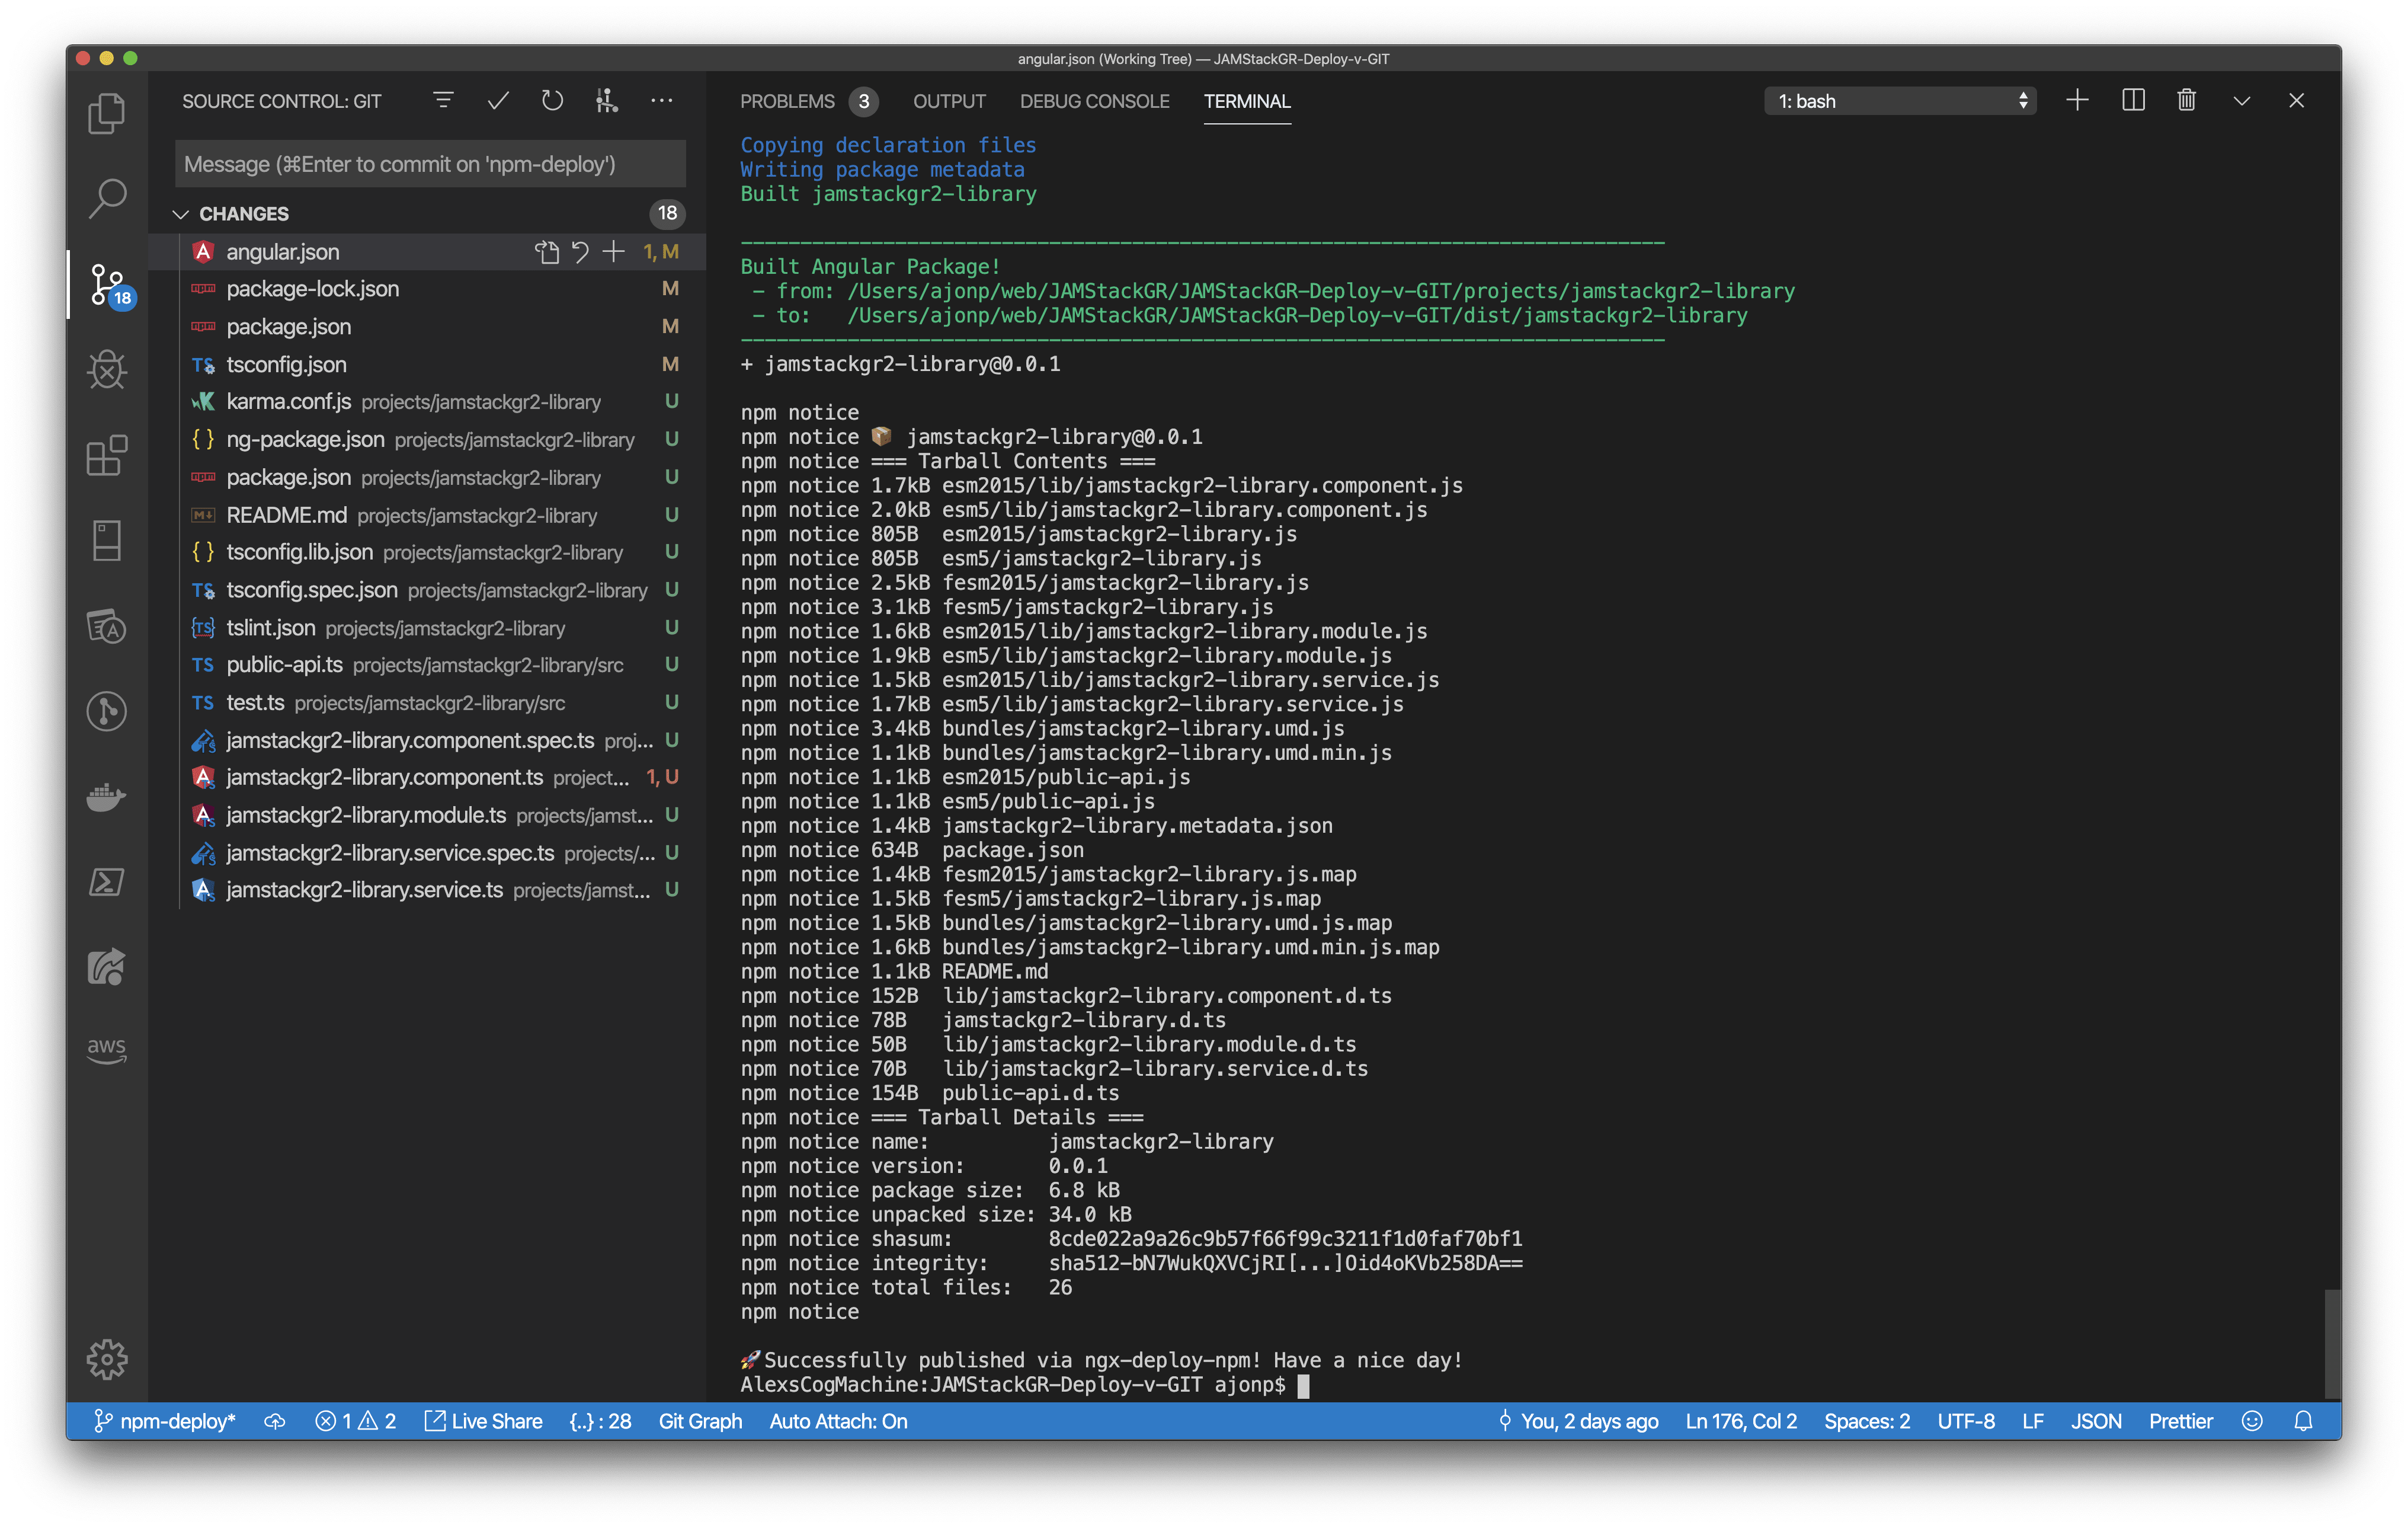
This package will now be available on NPM. Remember anytime you want to update this package you need to bump the NPM version.
Example: https://www.npmjs.com/package/jamstackgr2-library/v/0.0.3
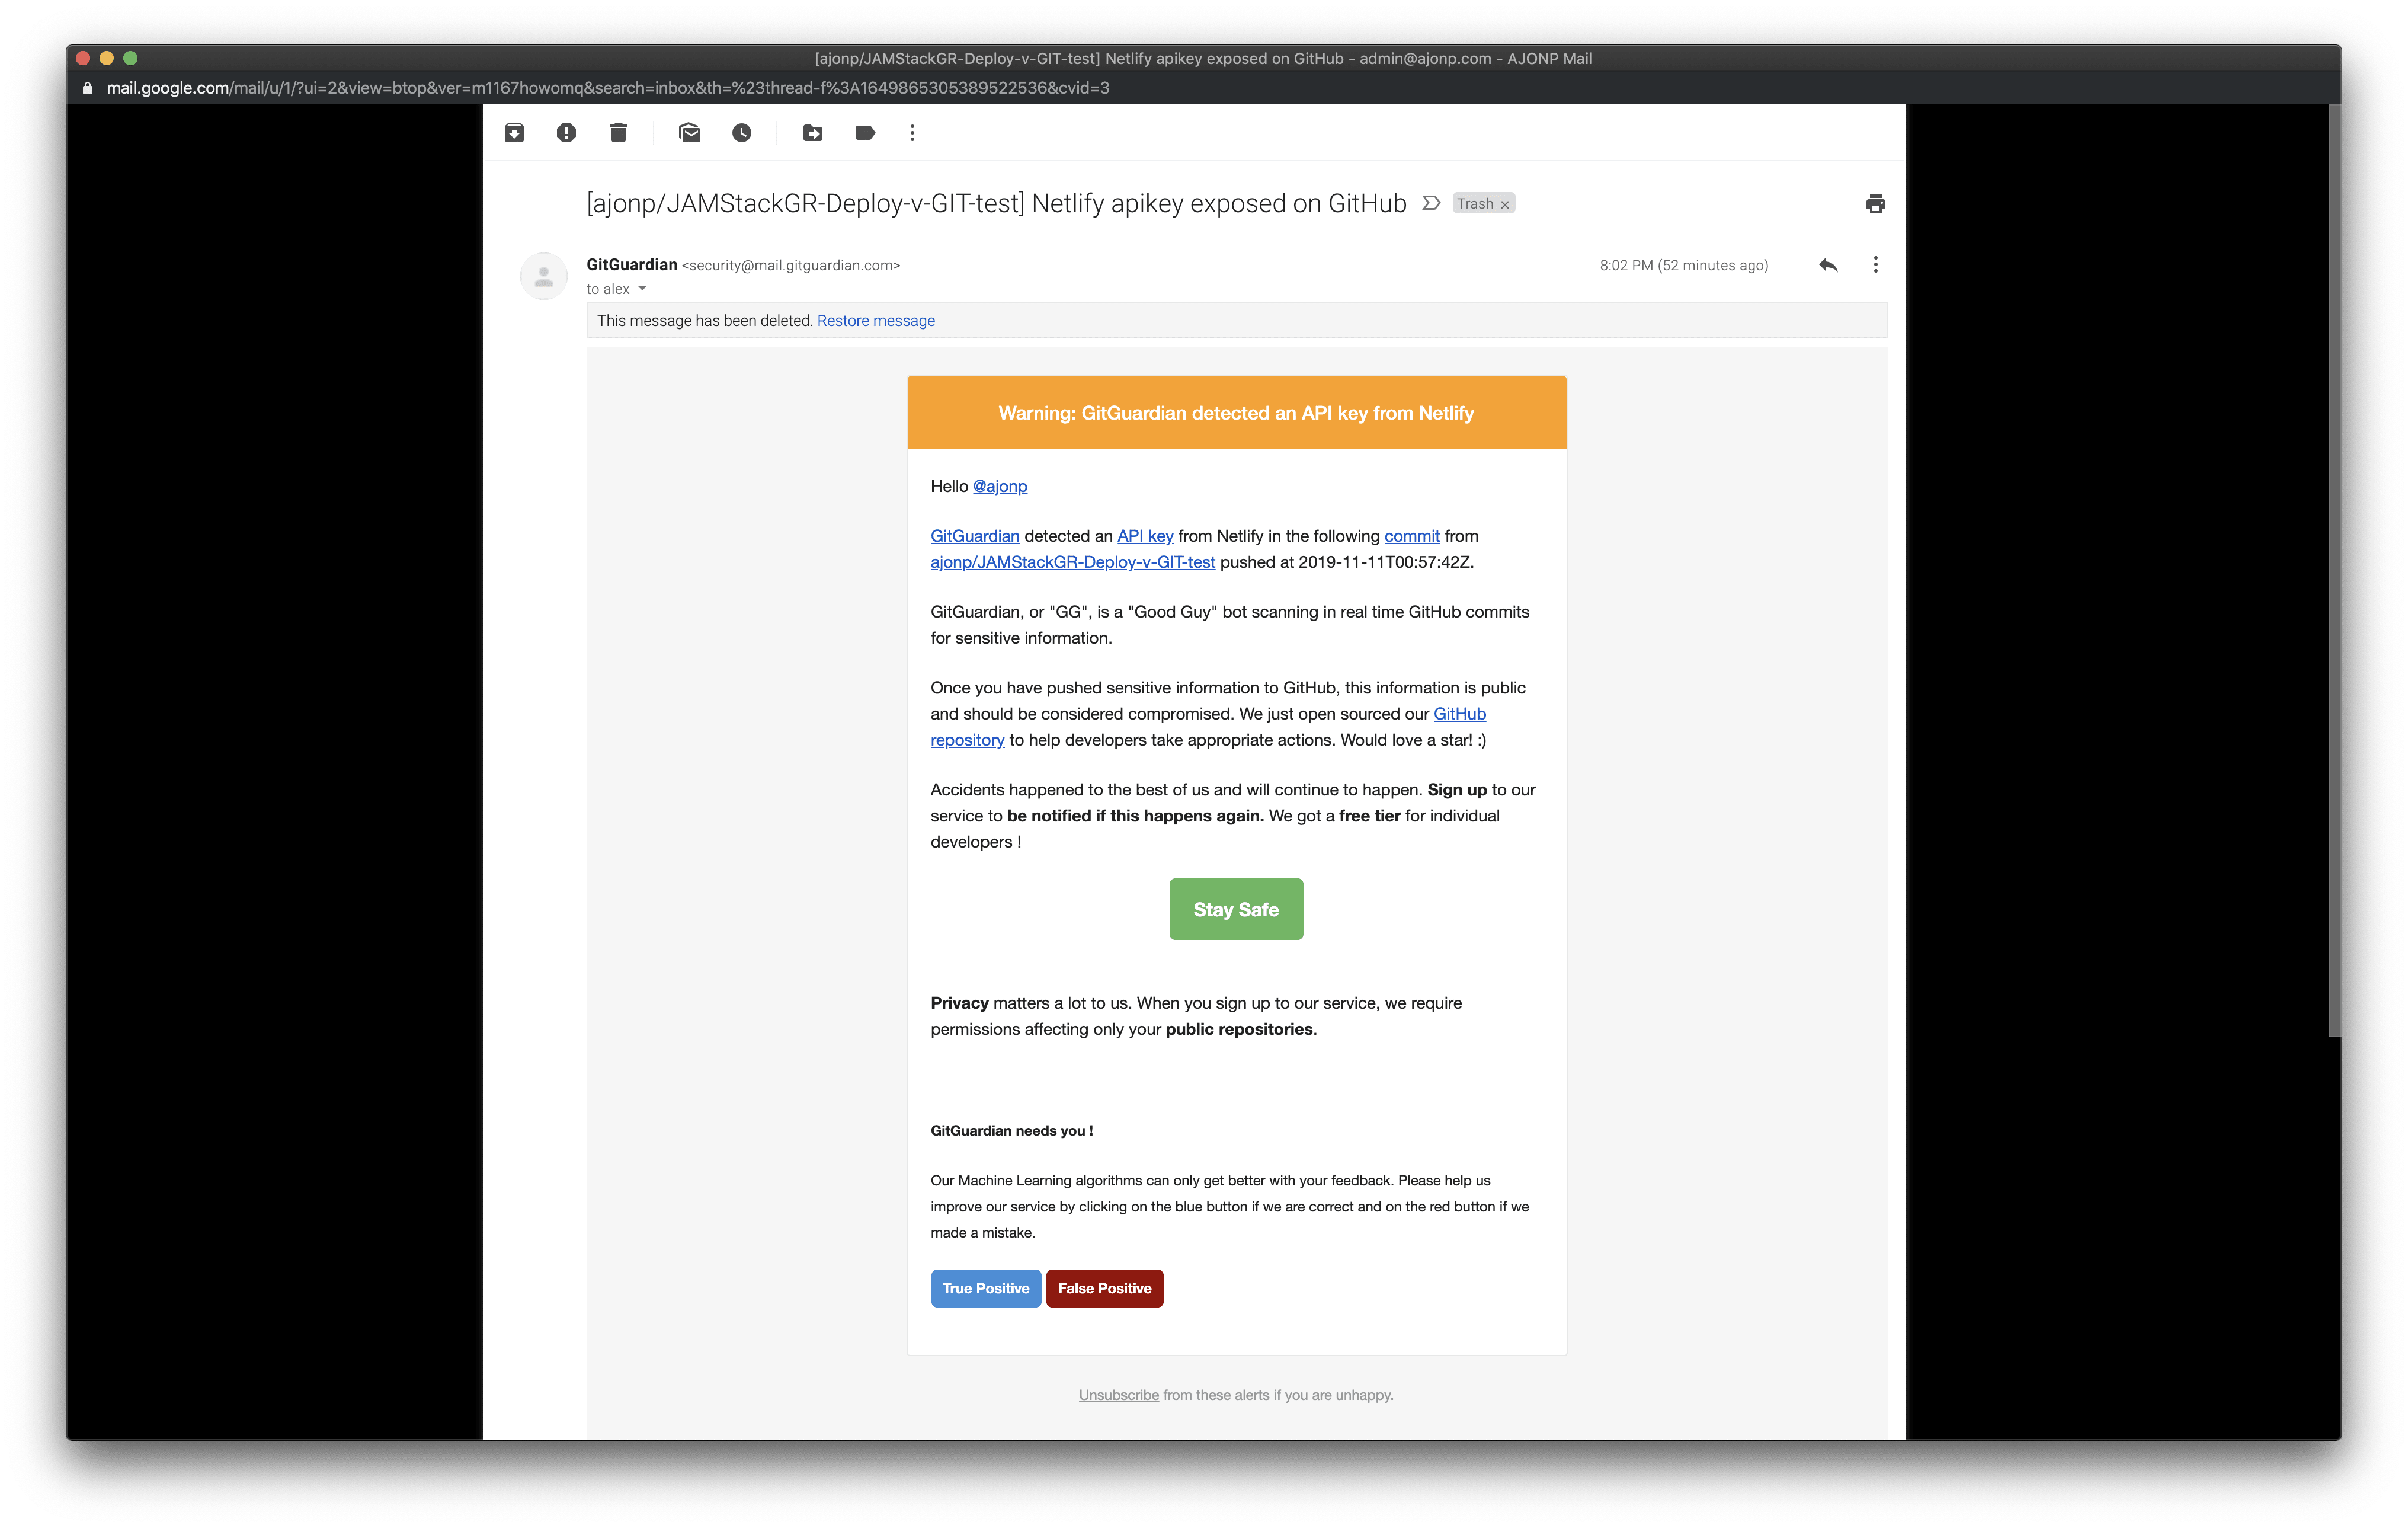
Issue with leaving keys